James Priest
100 Days Of Code
| Log 1 | Log 2 | Log 3 | Log 4 | Log 5 |
|---|---|---|---|---|
| this log | 100 Days Round 2 | 100 Days Round 3 | 100 Days Round 4 | 100 Days Round 5 |
Challenge & Commitment
This is part of Alexander Kallaway’s 100DaysOfCode challenge. More details about the challenge can be found here: 100daysofcode.com.
Commitment: I will code daily for the next 100 days.
| Start Date | End Date |
|---|---|
| June 12, 2017 | January 25, 2018 |
Goals
- Code daily
- Expand portfolio
- Hone my Git CLI skills
- Complete as many courses, classes, challenges, & certifications as possible
- Get established in Twitter dev community
- This has been awesome!
- Great support and encouragement from my Twitter family!
- Use #100DaysOfCode hashtag.
Secondary Goals & Resources
- Complete as many Code School courses as possible. These are highly focused, subject matter classes that can be completed in a week’s time. Completed 18 courses!
-
Got accepted into the #GrowWithGoogle Challenge Scholarship and will be doing the #GoogleUdacityScholars program as part of #100DaysOfCode Round Two!
Code Log
Final Thoughts for Round 1
January 26, 2018
A.K.A: A Love Letter to my Twitter Fam.
Dear Fam,
This was a completely successful and highly effective challenge. It gave me a format to help me keep myself accountable. It brought out my best and helped me struggle through my worst - the self-doubt, frustration, and uncertainty that comes along with learning the skills to be a cutting edge developer today.
The Twitter community was the key. This challenge helped me connect with like-minded folks who are taking the same classes, learning the same information, and sharing support and direction at every turn.
Will Ferrell said it best when he said,
“Facebook makes you hate people you already know & Twitter makes you love people you’ve never met.”
That completely sums up my experience with this challenge. It was an exercise in commitment and consistency which ironically enough is the recipe for success in this field:
Consistency over time.
If you can master that while leaning on the support of the community then you’ve got it made.
Thank you once again to Alexander Kallaway for providing access to this community and thank you to all the friends I’ve made during the seven months of coding it took me to get 100 Days of Log entries knocked out. :P :)
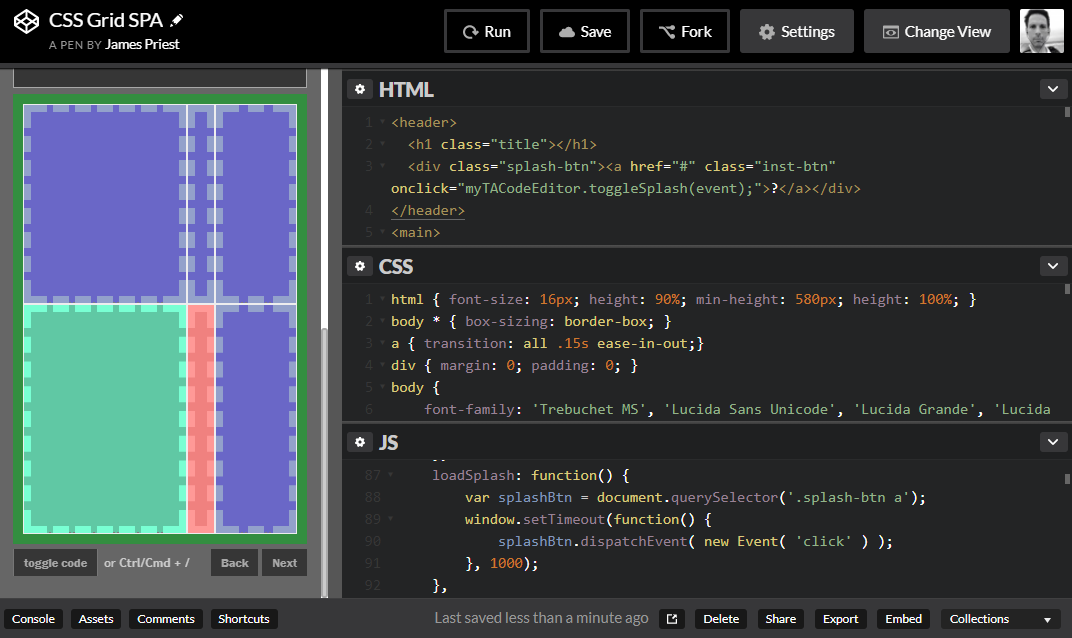
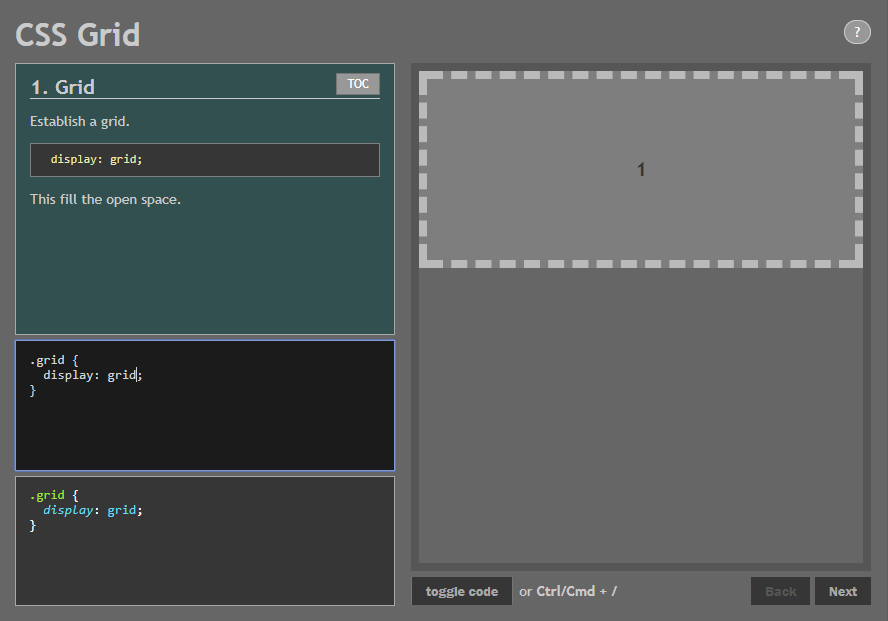
100. CSS Grid Practice App on CodePen
Day 100: January,25 2018 - Saturday
Project: CSS Grid SPA
Progress: Completed project!
Thoughts: I had gotten a couple requests from folks about chekcing out the code - which anyone is free to do by forking the repo. So, since it’s all straight HTML, CSS, & JS, I created a Pen on CodePen that you can check out as well.
Link to Work:
- CSS Grid SPA on CodePen
- Grid Practice App repo on GitHub
- My Code Editor repo on GitHub
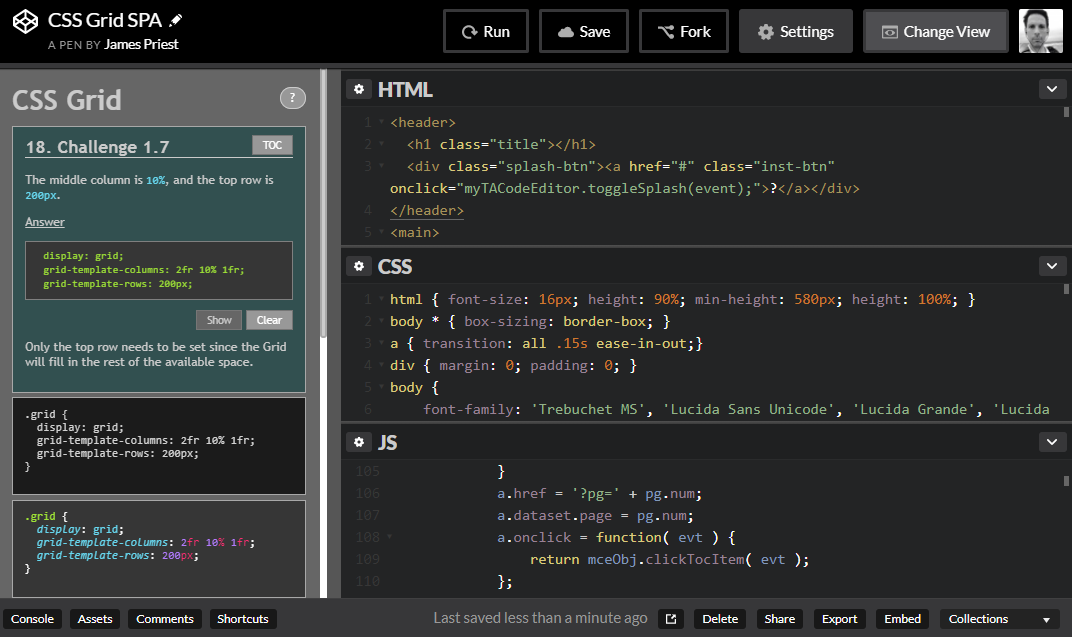
99. Navigation, Splash Page, Code Hints - CSS Grid SPA
Day 99: January,15 2018 - Saturday
Project: CSS Grid SPA
Progress: Completed the addition of navigation, splash page, & code hints.

Thoughts: I needed a simple way to provide site navigation to any page without requiring too many clicks from the user. I added a slide-out left nav following the same structure as Dave Geddes’ Grid Critters learning app.
The next thing I tackled was creating a splash page in order to give some background on this project and to properly acknowledge Dave’s work with creating Grid Critters and Flexbox Zombies. This is also where I discuss what technologies where used in building this app.
Both the slide-out nav and the splash page were created with absolute positioned divs set to display: none and opacity: 0. I then created a class with the ‘show’ state and set that class on the div element with an ‘onclick’ event. The animation was done by setting a transition on both of the div elements.
Lastly, I created a ‘code hints’ section which allow you to ‘show’ the answer to the proposed question and also paste this answer in place.
Link to Work:
- My Practice Environment on GitHub Pages
- GitHub Repo for this project
- Grid Critters - CSS Grid learning app
- Flexbox Zombies - Flexbox learning app
98. JSON, Media Queries, & Transitions - CSS Grid SPA
Day 98: January,10 2018 - Monday
Project: CSS Grid SPA
Progress: Created a JSON file to contain the data for each page of the SPA.
Thoughts: I had originally built this site with static pages but it was a pain to maintain. It was definitely NOT DRY (Don’t Repeat Yourself). So I isolated the pieces of information that changed from page to page and put those in a JSON file. I then gutted the HTML so that only the semantic structure remained.
Once I hooked up the Back and Next buttons to load the appropriate page data, I then needed the app to animate nicely when moving from one page to another. This was done with CSS transitions.
Lastly, I added some fine-tuning to the layout and font-size through media queries to make the site responsive.
Link to Work:
- My Practice Environment on GitHub Pages
- GitHub Repo for this project
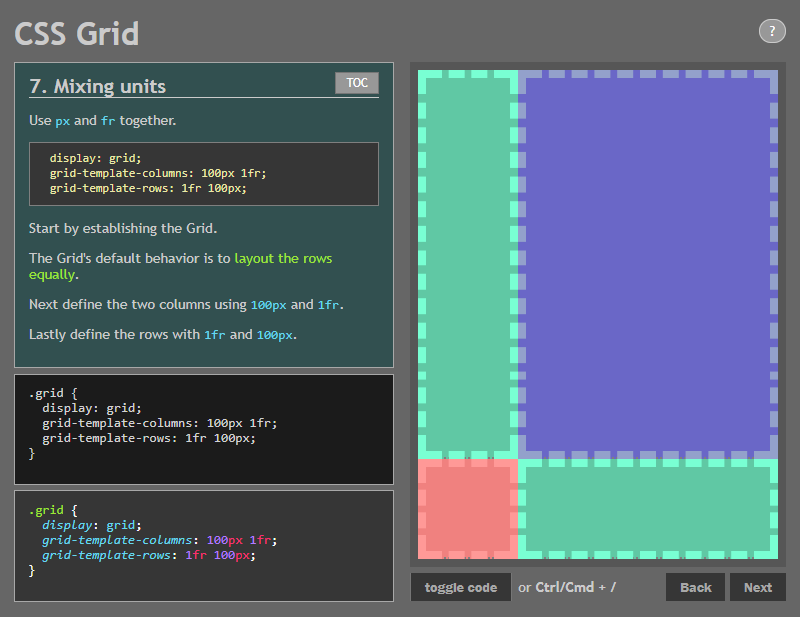
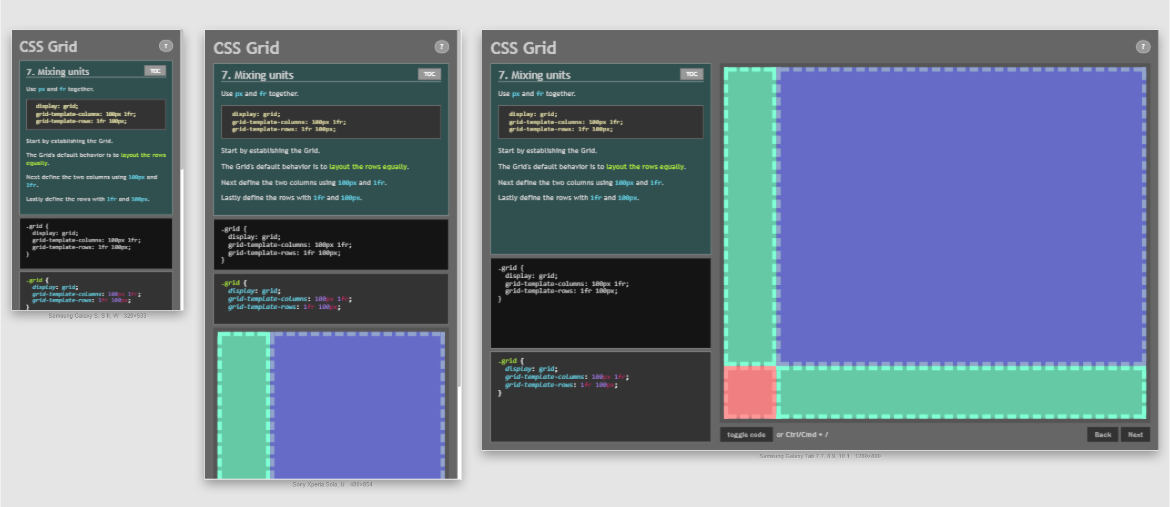
97. My CSS Grid Practice Environment
Day 97: January,5 2018 - Monday
Project: CSS Grid Practice Environment
Progress: Created a stripped down version of the learning environment from Grid Critters.
Thoughts: In going through Dave Geddes’ Grid Critters learning app, I was inspired to try my hand at replicating the functionality. I didn’t just want to code along with the exercises but I wanted to see if I could build an environment that replicated the lessons of the game.
I figured in doing this I’d have the opportunity to not only “flex” my coding skills (Ouch, bad pun :P) but also have a #100DaysOfCode project to work on. It would also stretch my coding skills to build something from scratch. Heck, this would not only ingrain the material, but it might even serve as sample of work when finished.
And how long would it take? I figured maybe a week or two. That was my first naive step down this road armed only with the notion of, “Well… how hard could it be?”😉😁
I found out exactly how hard was after spending six weeks coding not just the stuff that worked but all the stuff that didn’t!
It was a GREAT exercise and I learned alot in the process.
Link to Work:
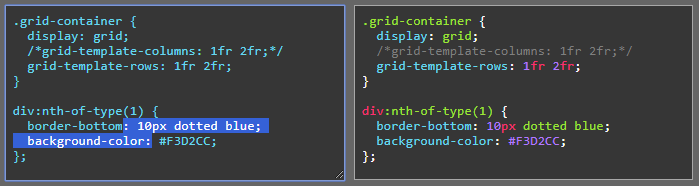
- My Practice Environment on GitHub Pages
- GitHub Repo for this project
96. MCE (My Code Editor) - Undo & Redo History
Day 96: December 31, 2017 - Sunday
Project: MCE (My Code Editor) project
Progress: Modified code to work with browser’s Undo History
Thoughts: I found out that whenever we programmatically manipulate the contents of an editable region on a web page, we circumvent the browser’s built-in “undo” history. This is because we are typically trapping a keypress or similar event and issuing a preventDefault() or return false after we’ve carried out our specific logic.
Then when we undo with Ctrl/Cmd + Z our content get’s scrambled because the browser is applying undo commands to content it did not alter or track. Redo, Ctrl/Cmd + Y does not work to get the original content back either. The solution is to use document.execCommand().
So, instead of this:
if (event.key === "Enter" ) {
  event.preventDefault()
  const cursor = textarea.selectionStart
  textarea.value = textarea.value.slice(0, cursor) +
      '\n' + textarea.value.slice(textarea.selectionEnd)
  textarea.selectionStart = textarea.selectionEnd = cursor + 1
}
We replace with this:
if (event.key === "Enter" ) {
  event.preventDefault();
  document.execCommand("insertText", false, '\n');
}
So, document.execCommand() not only invokes the browser’s built-in facility to update content but the code is simpler and easier to maintain.
Link to Work:
- Document.execCommand() on MDN
- StackOverflow - How to make undo work in an HTML textarea after setting the value
95. MCE (My Code Editor) - Preserve Selection
Day 95: December 30, 2017 - Saturday
Project: MCE (My Code Editor) project
Progress: Added ability to preserve cursor position and/or content selection after toggling comment blocks on or off.
Thoughts: One of the challenges about programmatically updating the contents of an input, textarea,or contenteditable div is that the browser no longer tracks things like cursor position or selection range.
These are things that must now be tracked through code and manually updated based on the changes you’ve made. Therefore, if you insert a character, you must move the cursor position by a character if the insertion point was before the cursor position. If you remove multiple characters you need to keep track of how many and reduce the cursor position by that many.
This is compounded if you actually made a selection. You then need to track the selection start and selection end positions and manually update both in order to preserver the same selection points.
Lastly, you also need to account for the selection direction. If the selection is made from left to right then using the arrow key to advance the cursor must occur at the end of the string. If the selection is from right to left then it must occur at the beginning.
All these things add up to an interesting set of coding challenges which exercise the brain and test your patience.
Link to Work:
- MCE v4 - Version 4 of the code editor (work in progress)
94. MCE (My Code Editor) - Toggle Comments
Day 94: December 29, 2017 - Friday
Project: MCE (My Code Editor) project
Progress: Added the ability to toggle comments in my code editor
Thoughts: One of the things I noticed about the code editor used on Dave Geddes’ (@geddski) awesome mastery game sites Grid Critters and Flexbox Zombies is the ability to comment out code with a shortcut keystroke.
This can be done on a single line by using the Ctrl/Cmd + / keyboard combination or on multiple lines by selecting a block of code and then using the Ctrl/Cmd + / keyboard combination.
I think this is the coolest thing so I set out to replicate this functionality.
Link to Work:
- MCE v4 - Version 4 of the code editor (work in progress)
93. DOM Manipulation with Range object
Day 93: December 28, 2017 - Thursday
Project: MCE (My Code Editor) project
Progress: Work in progress…
Thoughts: One of the things I had been working on is writing a simple code editor that would live on a page and allow you to update page content in real-time.
Besides being really hard, I found out that in order to do this you really need to have the code displayed in a content editable div. This allows for syntax highlighting and formatting. The problem is that it is a huge pain in the ass to manipulate dynamic content in a content editable div in a way that’s consistent across all platforms and browser flavors.
Regardless, I put together something detailing the DOM Range object, what it does, and how to use it.
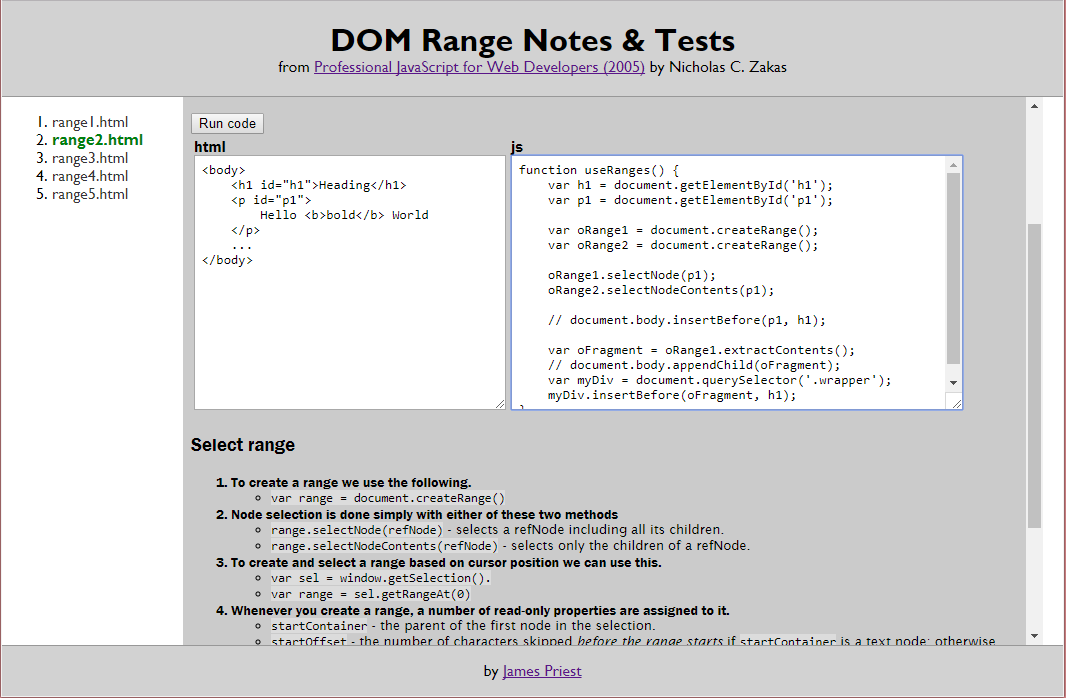
Link to Work:
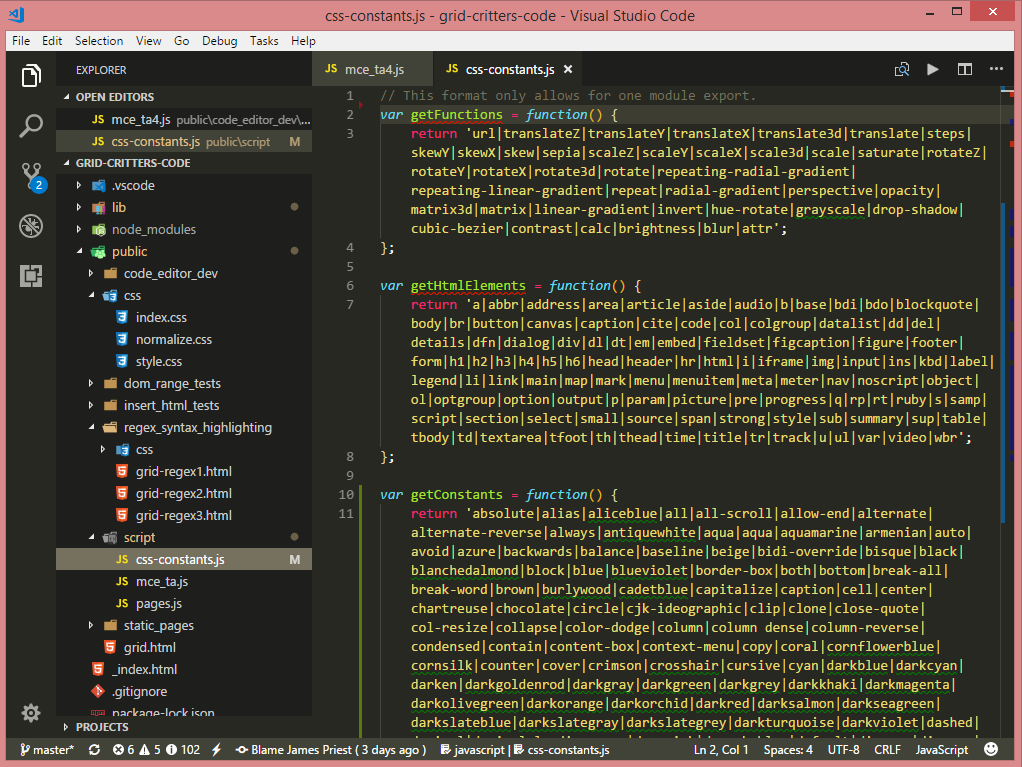
92. JavaScript Namespace with Module Pattern
Day 92: December 27, 2017 - Wednesday
Project: MCE (My Code Editor) project
Progress: Work in progress…
Thoughts: Here’s a beautifully elegant pattern to use for your JavaScript code.
var CSSVALUES = (function() {
    var cssFunctions = 'url|translateZ|translateY|translateX|translate3d|...';
    var cssHtmlElements = 'a|abbr|address|area|article|aside|audio|b|base|...';
    var cssConstants = 'absolute|alias|all|all-scroll|allow-end|alternate|...';
    var cssColors = 'aliceblue|antiquewhite|aqua|aqua|aquamarine|azure|...';

    return {
        getFunctions: function() { return cssFunctions; },
        getHtmlElements: function() { return cssHtmlElements; },
        getConstants: function() { return cssConstants; },
        getColors: function() { return cssColors; }
    };
} )();

console.log(CSSVALUES.getHtmlElements());
It uses the Module Pattern with an Immediately Invoked Function Expression (IIFE).
What’s happening in the code is:
- Private properties are created in the local scope of the function expression.
- Public properties are built within the object which is then returned to become the namespace.
- Access to private data is made possible because of closure within the larger module.
What enables the CSSVALUES variable to immediately provide access to the object that serves as our module is the parentheses at the end of the expression which immediately invoke the function! Without i we would simply have a function expression.
We are then free to define anything in the return object that we want to expose. In turn, that code is free to access anything defined in the local scope of the function expression.
This will provide you the following benefits:
- Organization of your code
- Avoids polluting the global namespace
- Encapsulates & protects your private data
- Returns an object that exposes public methods and properties
- Allows your namespace variable to be immediately accessible
Lastly, you will have bragging rights to say you’ve used:
- An Immediately Invoked Function Expression (IIFE)
- object encapsulation
- JavaScript closure
- public methods
- a private namespace
- & the Module Pattern.
Link to Work:
- mce_ta.js - An example of this pattern in my code.
- Stack Overflow - How to add private variables to an object literal - Related info that shows this same pattern incorporated into an object literal.
91. CSS Props & Values - JavaScript Function Expressions
Day 91: December 26, 2017 - Tuesday
Project: MCE (My Code Editor) project
Progress: Work in progress…
Thoughts: Now that I had a working master list of all CSS property values I could start using that to match against a string of text entered into the browser as code.
Ideally, the matches would happen dynamically and after each keypress. For now I set off to write the code around matching a static string.
The first step was to get my values into a format that could easily be brought into a RegEx object constructor. This would have to be a string. I did this with function expressions and this is what that looked like.
I used an object literal to define my code editor so as not pollute the global namespace. I did this later for the function expressions as well. The properties of the object literal that uses these function expressions looks like this:
var myTACodeEditor = {
  rxHtmlElements: new RegExp('\\/\\*.*|<.*?>|\\b(' + getHtmlElements() + ')\\b(?=.*{)','gm'),
  rxConstants: new RegExp('^[\\s\\w-]+|.*?{|\\w+\\(.*\\)|\\/\\*.*|<.*>|(\\b(' + getConstants() + '|' + getColors() + ')(?![\\w-\\()]))', 'gm'),
  rxKeywords: new RegExp('^[\\s\\w-]+:|\\/\\*.*|\\(.*\\)|([\\d.]+)(ch|cm|deg|em|ex|fr|gd|grad|Hz|in|kHz|mm|ms|pc|pt|px|rad|rem|s|turn|vh|vm|vmin|vmax|vw|%)(?=\\W)', 'gm'),
  rxNumbers: /^[\s\w-]+:|.*?{|[a-z]\d+|\/\*.*|\(.*\)|([^:>("'/_-]\d*\.?\d+|#[0-9A-Fa-f]{3,6})/gm,
  rxProperties: /^[^{][ \t\w-]+(?=:)/gm,
}
Link to Work:
- css-constants.js - js function expressions for property values
- CSS Master list of unique property values - HTML output which contains css functions, named-colors, & values
90. CSS Props & Values - Array & String Manipulation
Day 90: December 25, 2017 - Monday
Project: MCE (My Code Editor) project
Progress: Work in progress…
Thoughts: I previously wrote some code that took a JSON file containing a master list of every CSS property value and output that to the browser. The only problem is that this list was polluted with duplicates, embedded arrays, and redundant shorthand properties which provided other properties as their value.
I needed a single, cleaned-up list of CSS property values only. Here are some of the Array and String methods I used to achieve this.
- forEach - executes a provided function once for each array element.
- filter - creates a new array with all elements that pass the test implemented by the provided function.
- trim - removes whitespace from both ends of a string.
- map - creates a new array with the results of calling a provided function on every element in the calling array.
- split - creates a new array with the results of calling a provided function on every element in the calling array.
- push - adds one or more elements to the end of an array and returns the new length of the array.
- sort - sorts the elements of an array in place and returns the array.
- reverse - reverses an array in place.
- indexOf - returns the first index at which a given element can be found in the array, or -1 if it is not present.
- splice - changes the contents of an array by removing existing elements and/or adding new elements.
Link to Work:
- CSS Master list of unique property values - contains css functions, named-colors, & values
- test6-list.html - A very messy javascript/html/css source file. This was a quick n dirty way of creating a text output of values for use as a constant list in other code. So, for this reason I didn’t really clean it up.
89. CSS Props & Values - Parsing JSON
Day 89: December 24, 2017 - Sunday
Project: MCE (My Code Editor) project
Progress: Iterative..many pieces…
Thoughts: I now had the JSON file in a local directory but had to get it from this:
[
  {"property":"align-content","values":["stretch","center","flex-start","..."]},
  {"property":"border","values":["border-width","border-style","..."]},
  {"property":"color","values":["color","initial","inherit"]}
]
to this:
var cssProperties = "align-content|border|color|...";
var cssValues = "border-color|border-width|border-style|center|flex-end|...";
I went old-school XMLHttpRequest on this…
var xmlhttp = new XMLHttpRequest();
xmlhttp.onreadystatechange = function() {
  if (this.readyState == 4 && this.status == 200) {
    var myArr = JSON.parse(this.responseText);
    var propArr = [], valArr = [];
    myArr.forEach(item => {
      propArr.push(item.property);
      item.values.forEach(val => {
        valArr.push(val);
      });
    });
  }
};
xmlhttp.open("GET", "css-properties-values.json", true);
xmlhttp.send();

document.getElementById("prop").innerHTML = propArr.join('|');
document.getElementById("vals").innerHTML = valArr2.join('|');
The HTML table format of the output looks like this.
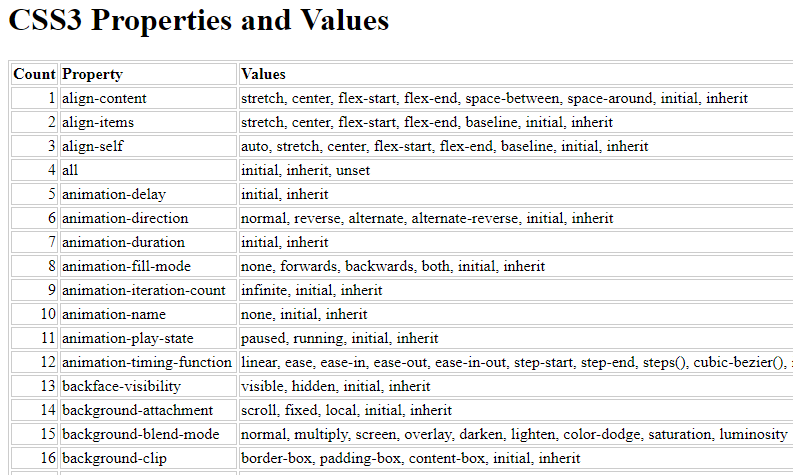
I also ended up doing quite a bit of filtering, sorting, de-duping, etc. A word of warning… the code is icky since it was a quick and dirty way to get my list of unique CSS values.
Link to Work:
- Master CSS list of unique values - HTML Table ( source)
- Master CSS list of unique values - List format (source)
88. CSS Props & Values - Submit a Pull Request
Day 88: December 23, 2017 - Saturday
Project: Update css-properties-values node.js package
Progress: Completed!
Thoughts: I mentioned in my last post that I would cover the parsing of the JSON file that the css-properties-values package produced but I forgot one IMPORTANT step I took once I finished fixing the package. That was to close the loop and do a Pull Request.
I wanted to contribute the fix to the author and the community.
So, once I updated the node.js code locally I pushed it back up to the server. I probably should have created a new branch for my updates but I kept it on master.
Now it was time to do a Pull Request. I went onto GitHub and clicked the Pull Request button. The system was smart enough to know where it should go based on the repo I originally forked from.
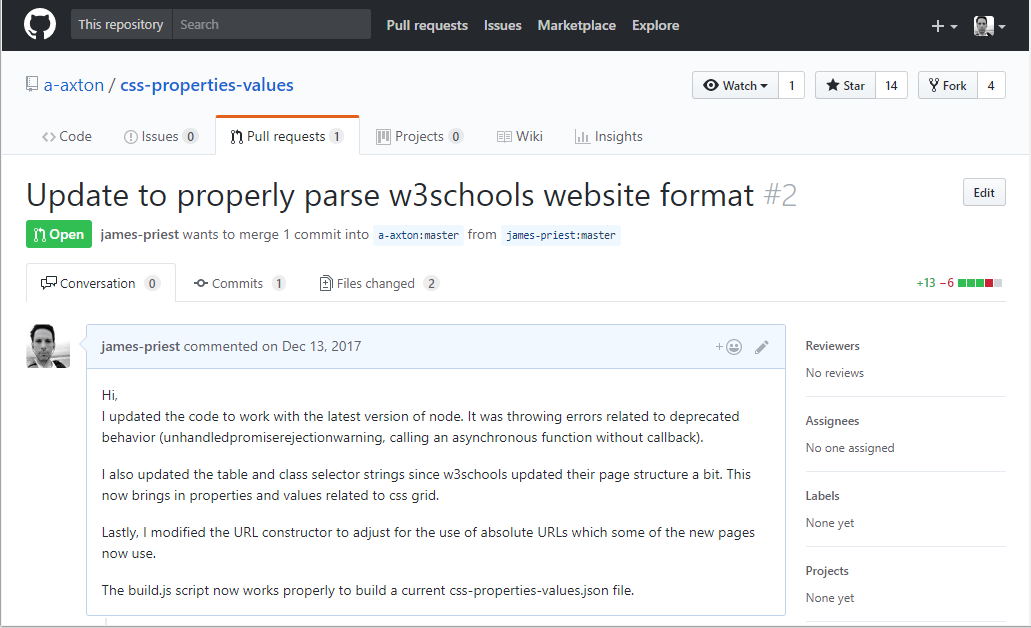
I then created a message detailing what had been done. It said,
Hi, I updated the code to work with the latest version of node. It was throwing errors related to deprecated behavior (unhandledpromiserejectionwarning, calling an asynchronous function without callback).
I also updated the table and class selector strings since w3schools updated their page structure a bit. This now brings in properties and values related to css grid.
Lastly, I modified the URL constructor to adjust for the use of absolute URLs which some of the new pages now use.
The build.js script now works properly to build a current css-properties-values.json file.
That was it. Now if the author decides to use it he can. He can also start a dialogue with me through GitHub to discuss any other issues or changes. Pretty Cool!
Link to Work:
- Link to my Pull Request
- My fork of css-properties-values repo on GitHub
87. CSS Props & Values - Update Node.js Code
Day 86: December 22, 2017 - Friday
Project: Update css-properties-values node.js package
Progress: Steady
Thoughts: Now that I had my own personal copy of the repo, I set off to work.
The code was good but hadn’t been updated in two years. This meant that the package relied on markup used on the site two years ago. Also, node now requires some more robust error handling which the package was short on.
Luckily, that was about it - a few css class names had been updated on the website and a couple semantic hierarchies had been modified but overall it looked like capturing 100% of the content was going to be doable. Below is a diff of some of the changes I made.
git diff
diff --git a/build.js b/build.js
index d80f41c..62f8223 100644
--- a/build.js
+++ b/build.js
@@ -14,7 +14,7 @@ const getPropValues = (url) => {
     got(childUrl(url))
       .then(response => {
         let $child = cheerio.load(response.body);
-        let $rows = $child('.w3-table-all tr');
+        let $rows = $child('.w3-table-all.notranslate tr');
         let results = [];

         $rows.each((i, row) => {
@@ -31,21 +31,28 @@ const getPropValues = (url) => {
 };

 const saveResults = () => {
-  fs.writeFile('css-properties-values.json', JSON.stringify(results));
+  fs.writeFile('css-properties-values.json', JSON.stringify(results), function(err) {
+    if(err) throw err;
+    console.log('Saved!');
+  });
 }

 got(parentUrl)
   .then(response => {
     let $parent = cheerio.load(response.body);
-    let $rows = $parent('.w3-table-all tr');
+    let $rows = $parent('.w3-table-all.notranslate tr');

     each($rows.toArray(), (row, next) => {
       let $cols = $parent(row).find('td');
       let property = $cols.eq(0).text();
-      let childUrl = $parent(row).find('a').attr('href');
+      let childUrl = $parent(row).find('a').attr('href') || '';
+      if(childUrl.charAt() === '/') {
+        childUrl = childUrl.replace(/\/cssref\//, '');
+      }
+      console.log('childUrl', childUrl);

       // no prop, skip
-      if (!property.length) {
+      if (!property.length || !childUrl.length) {
         next();
       } else {
         if (childUrl) {
The nice thing about the code relying on the cheerio package is that cheerio is a subset of jQuery ported over to node.js. So, the syntax was familiar.
Once I looked at how w3school’s markup was laid out I could then see where the code was not capturing certain HTML nodes properly. I made the changes and was good to go.
The output produced looked like this.
output
[
  {
    "property":"align-content",
    "values":["stretch","center","flex-start","flex-end","space-between"]
  },
  {
    "property":"border",
    "values":["border-width","border-style","border-color","initial","inherit"]
  },
  {
    "property":"color",
    "values":["color","initial","inherit"]
  }
]
I still wasn’t done. What I had was good but what I needed for matching purposes had to be de-duped, filtered, ordered, and had to end up looking like this:
needed
var cssProperties = "align-content|border|color|...";
var cssValues = "border-color|border-width|border-style|center|flex-end|...";
That was what I tackled next and will detail in my next post.
Link to Work:
- My fork of css-properties-values repo on GitHub
- build.js code on GitHub which scrapes and parses the html
- css-properties-values.json - the output of build.js
86. CSS Props & Values - Forking on GitHub
Day 86: December 21, 2017 - Thursday
Project: Update css-properties-values node.js package
Progress: Work in progress
Thoughts: When we last left our hero, he was scratching his head wondering who was going to fix the node.js css-properties-values package. This package is used to screen scrape the w3schools CSS Reference page. It then dynamically builds a JSON file containing ALL css properties and associated values.
Well, before I could fix anything I first needed to fork the repository.

From the GitHub Guides page on Forking Projects:
Creating a “fork” is producing a personal copy of someone else’s project. Forks act as a sort of bridge between the original repository and your personal copy. You can submit Pull Requests to help make other people’s projects better by offering your changes up to the original project.
So, I “forked” the repository by going to the source repo and clicking the Fork button in the upper right hand corner of the page. Now a copy existed on GitHub under my account but I still needed to clone it so I could work on it locally.
Once cloned, I got to work updating the code. More in my next post…
BTW, most folks recommend you create a feature branch to work on and then push that branch to GitHub before making the Pull Request. This keeps everything nice & tidy for the project owner who can then decide which feature branches to merge into their repo.
Here’s a link to and great post that discusses Using Fork & Branch GitHub Workflow.
Link to Work:
- My fork of css-properties-values repo on GitHub
- Forking Projects GitHub Guides (4 minute read)
- Using Fork & Branch GitHub Workflow by Scott Lowe
85. CSS Props & Values - NPM Package
Day 85: December 20, 2017 - Wednesday
Project: MCE (My Code Editor) project / css-properties-values node.js package
Progress: Installed & ran the css-properties-values node.js package. Hit a few bumps in the road but got an opportunity to code node.js.
Thoughts: In writing regex patterns to match css properties and values, I needed a master list from which to match against. I briefly looked online for a text file containing all css props & vals but didn’t find one.
What I did find was no shortage of sites that laid out all 230+ properties (along with hundreds of values) as scrollable or searchable HTML. This didn’t make it easy to pull into a hierarchical text format for my regular expressions to use.

I then found a node.js package by Andy Axton published two years ago that screen scrapes from http://w3schools.com/cssref to dynamically build a JSON file containing ALL css properties and their values. Whew! This was just what I needed!😁😇
I quickly set to work by installing the packing into my current project.
npm install css-properties-values --save
npm run build
I ran the build which uses cheerio (an npm package which implements a subset of jQuery for use in a node.js server-side environment), to do an AJAX request for the web content. It then parses that into a JSON file. It was quick and managed to get about 80% of data.
But wait!… I needed 100%.
Apparently, the folks at w3schools changed the way they tagged their new properties so things like flexbox and grid items where missing or incomplete in the JSON file.
“Someone should fix this”, I thought…😏😁
More in my next post.😄
Link to Work:
- npm css-properties-values package.
- RunKit playground to test the css-properties-values package with.
- npm cheerio package.
84. Syntax Highlighting - JavaScript
Day 84: December 19, 2017 - Tuesday
Project: MCE (My Code Editor) project
Progress: Work in progress
Thoughts: Now that I had the RegEx going (from my previous posts), it was time to write the JavaScript to output my matched and augmented strings to the content editable div.
At it’s simplest this is a one liner for String.replace().
var rxProperties = /^[ \t\w-]+(?=:)/gm;

formatted = formatted.replace( this.rxProperties,
  '<span class="mce-property">$&</span>' );

document.querySelector('.myCodeEditor').innerHTML = formatted;
The more involved syntax uses a callback to access matched regex groups.
var rxQuotes = /^[/*].*\*\/|("[\w\s-]*"(?!>)|'[\w\s-]*'(?!>))/gm;

formatted = formatted.replace( this.rxQuotes, function(m, group1) {
  if (group1 !== undefined) {
    return '<span class="mce-quotes">' + group1 + '</span>';
  }
  return m;
} );

document.querySelector('.myCodeEditor').innerHTML = formatted;
The result is this.
Link to Work:
- MCE (My Code Editor) v4
- Source on GitHub (html, css, javascript)
83. Syntax Highlighting - RegEx Patterns
Day 83: December 18, 2017 - Monday
Project: MCE (My Code Editor) project
Progress: Moving along
Thoughts: With the RegEx tools mentioned in my previous post, I was ready to start writing patterns to match each part of a CSS expression or rule. First I had to break these down:
| Isolate | these | elements |
|---|---|---|
| Selectors | HTML Elements | Rules |
| CSS Constants | CSS Keywords | Numbers |
| Properties | Functions | Quotes |
With that I fired up my RegEx tools and set to work. After days and weeks of going back and fine tuning as necessary I ended up with this set of RegEx sorcery.
var myCodeEditor = {
  rxSelectors: /^[\w .\-#[\]'"=:()>^~*+,|$]+(?={)/gm,
  rxHtmlElements: new RegExp('\\/\\*.*|<.*?>|\\b(' + getHtmlElements() + ')\\b(?=.*{)','gm'),
  rxConstants: new RegExp('^[\\s\\w-]+|.*?{|\\w+\\(.*\\)|\\/\\*.*|<.*>|(\\b(' + getConstants() + ')(?![\\w-\\()]))', 'gm'),
  rxKeywords: new RegExp('^[\\s\\w-]+:|\\/\\*.*|\\(.*\\)|([\\d.]+)(ch|cm|deg|em|ex|fr|gd|grad|Hz|in|kHz|mm|ms|pc|pt|px|rad|rem|s|turn|vh|vm|vmin|vmax|vw|%)(?=\\W)', 'gm'),
  rxNumbers: /^[\s\w-]+:|.*?{|[a-z]\d+|\/\*.*|\(.*\)|([^:>("'/_-]\d*\.?\d+|#[0-9A-Fa-f]{3,6})/gm,
  rxProperties: /^[^{][ \t\w-]+(?=:)/gm,
  rxFunctions: new RegExp( '\\/\\*.*|((' + getFunctions() + ')\\([\\w\\d `~!@#$%^&*()\\-_=+[\\]{}\\\\|:;' + String.fromCharCode(39) + '",.\\/?]*\\))', 'gm' ),
  rxQuotes: /^[/*].*\*\/|("[\w\s-]*"(?!>)|'[\w\s-]*'(?!>))/gm,
  rxRules: /(.+)\s*(?={)|^[\t\s]*(.+;)/gm,
  rxTextToWrap: /[\w\d\-[\] {}.:;#,>+'"=()/~^$*]+$/gm,
  rxBlockToWrap: /[\w\d\-[\] {}.:;#,>+'"=()/~^$*%\t]+$/gm,
  rxFindComment: /\/\*|\*\//,
  rxReplaceComment: /\/\*|\*\//gm,
  rxComments: /\/\*.*\*\//gm,

  init: function()  {..}
  ..
}
I love that it looks completely crazy and illegible but is also readable and understandable now that I spent a month in the trenches writing patterns.😃😎
One thing I can say is that I am now a convert and true believer in regular expressions. It has an unprecedented ability to match, group, and replace portions of strings like no other technology.
It is also very properly supported and baked into JavaScript.
Link to Work:
- My Code Editor js file on GitHub - mce_ta6.js
- The Greatest Regex Trick Ever article on rexegg.com
82. Syntax Highlighting - RegEx Tools
Day 82: December 17, 2017 - Sunday
Project: MCE (My Code Editor) project
Progress: Fun & challenging
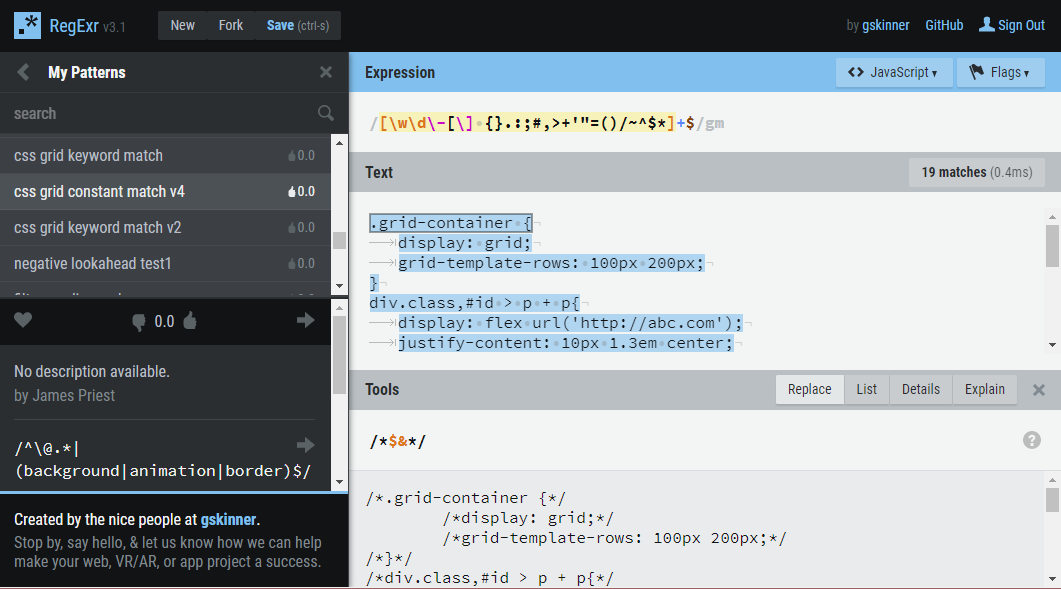
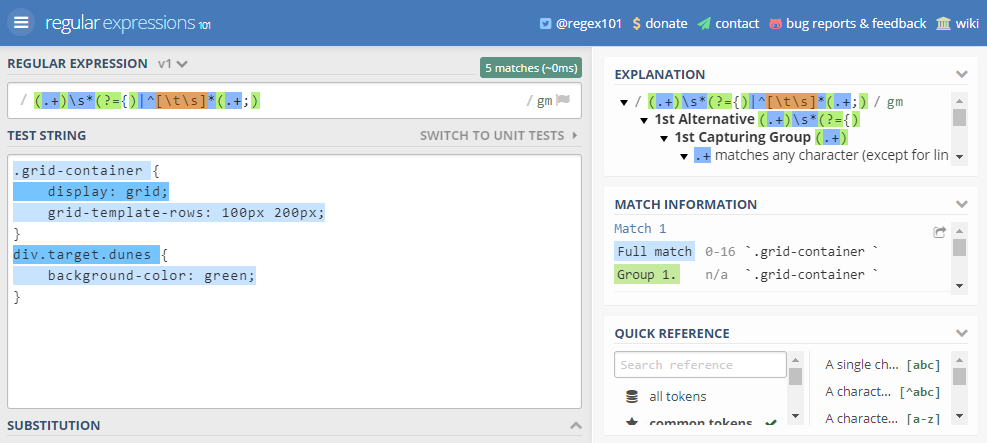
Thoughts: For the RegEx part of this project I needed to rely on some online Regular Expression editors and testers. The two I used are RegExr.com & RegEx101.com.
These tools allowed me to write and test various RegEx patterns. Here are some of the features that both tools have.
- Ability to save, share, and version your regular expressions
- Visual indication of matches
- Syntax highlighting of matches and grouping
- Reference and cheatsheets for
- Anchors
- Escaped characters
- Groups and references
- Lookahead/Lookbehind
- Quantifiers and Alteration
- Substitution
- Flags
Additionally, each tool offers an output window that shows you matches, replacements, groupings, and even explanations by simply hovering over the syntax in question.
Link to Work:
- RegExr.com - My RegEx to Wrap code with comment blocks
- RegEx101.com - My RegEx to Group css rules & property/values
81. Syntax Highlighting - HTML/CSS
Day 81: December 16, 2017 - Saturday
Project: MCE (My Code Editor) project
Progress: Slow & steady
Thoughts: This was actually a pretty cool and fun part of the project.
I recently completed Code School’s Regular Expressions course and now had a chance to put what I learned into practice. Armed with this new knowledge, I embarked on keyword matching for syntax highlighting.
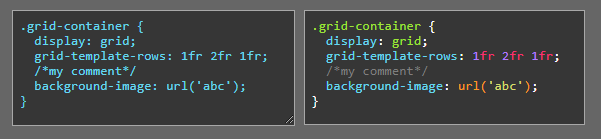
The concept is to match a css keyword such as flex or grid and then wrap it with <span> tags such as <span class="keyword">grid</span>. We can then set the css class to specify a color or style for all css keywords. The output looks like this:
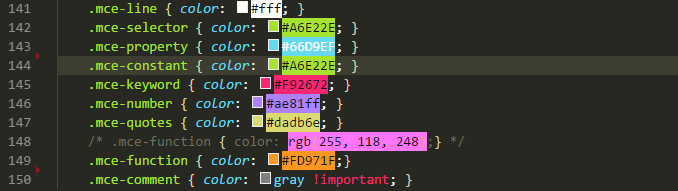
The classes I set look like this:
I’ll discuss the necessary RegEx in my next post.
Link to Work:
- MCE (My Code Editor) v4
- Source on GitHub (html, css, javascript)
80. Content Editable Div
Day 80: December 15, 2017 - Friday
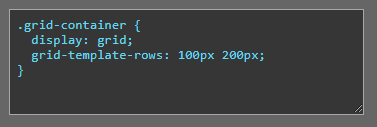
Project: Create a simple code editor by upgrading my <textarea> input element to a contenteditable <div>.
Progress: Hit lots of roadblocks which made progress VERY slow.
Thoughts: So, one of the benefits of using a contenteditable <div> is that you can style the content in the same way a code editor does.
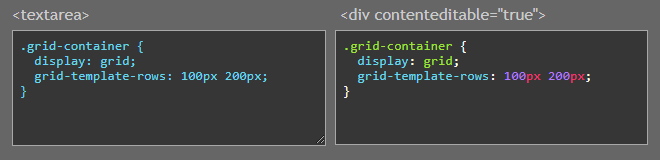
The problem is that the html produced varies across browsers. Manipulating the content is a bear, and dealing with cursor placement and positioning is much more code intensive. This is because we are now manipulating around html elements rather than straight text as is used in a textarea control.
So,this was not as easy as using a <textarea> element. As it turns out, various browsers handle simple things like the <Enter> key differently. Some wrap with a <div>, some use <p>, and others use <br>.
This is just one example of the lack of standard behavior across browsers. Apparently the issue is less fractured now but there still exists many inconsistencies that become difficult to work with.
Link to Work:
- Making Content Editable article on MDN
- Proof-of-concept page using content editable div as editor
- Source on GitHub (html, css, javascript)
79. Writing My Own Code Editor
Day 79: December 11, 2017 - Monday
Project: To write a web-based CSS code editor in JavaScript for embedding in a web page.
Progress: How hard could it be, right?😁😉
Thoughts: So, in the interest of full disclosure, I am writing this one month after going MIA on my #100DaysOfCode twitter posts. Its not that I didn’t code, it’s that I didn’t come out of the JavaScript hole for 4 weeks!
Let me step back and start with what started it all…
I loved how cool Dave Geddes’ web apps Grid Critters and Flexbox Zombies were. They allowed me to read some narrative (the lesson), write some code (in browser), and see the results immediately.
This was awesome!!!
I wanted to see if I could write my own poor man’s version of the same, mostly as a coding exercise and proof of concept.
I managed to do this in a day with 35 lines of non-optimized code. Pretty cool!
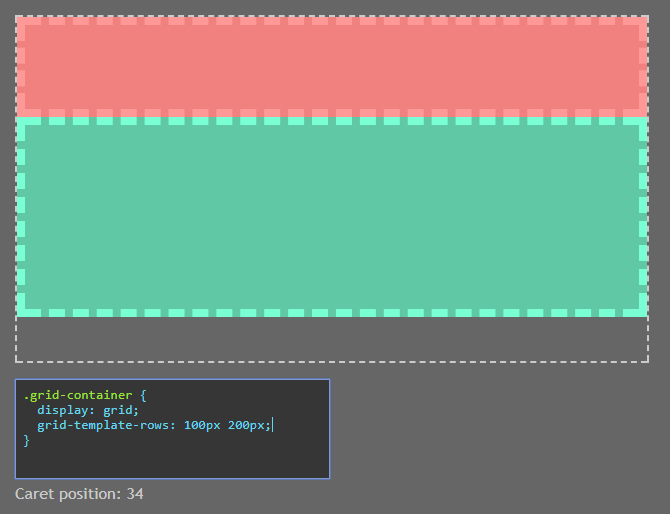
var myCodeEditor = {
  gridContainer: document.querySelector( '.grid-container' ),
  codeEditor: document.querySelector( '.ta-code-editor' ),
  init: function(preFill) {
    var thisGrid = this;
    thisGrid.codeEditor.defaultValue = preFill;
    thisGrid.codeEditor.selectionStart = thisGrid.codeEditor.selectionEnd = 20;
    thisGrid.codeEditor.oninput = function( evt ) {
      thisGrid.applyStyle(evt);
    };
    thisGrid.codeEditor.onkeypress = function( evt ) {
      var val = this.value;
      if ( evt.keyCode === 13 || evt.which === 13 ) {
        var newLineIndent = '\u000A\u0020\u0020';
        var start, end;
        if ( typeof this.selectionStart === 'number' && typeof this.selectionEnd === 'number' ) {
          start = this.selectionStart;
          end = this.selectionEnd;
          this.value = val.slice( 0, start ) + newLineIndent + val.slice( end );

          // move the caret
          this.selectionStart = this.selectionEnd = start + 3;
        }
        return false;
      }
    };
  },
  applyStyle: function( evt ) {
    var css = evt.target.value;
    var pattern = /([\w-]+:\s*[\w-#\s]+;?$)/gm;
    var cssStatements = css.match( pattern );
    if ( cssStatements ) {
      this.gridContainer.setAttribute( 'style', cssStatements.join( ' ' ) );
    }
  }
};
I figured it was clear sailing from here on out - that I would be done replicating the in-browser code editor inside a week.
Well that turned out to not be true. The next dozen posts will detail what I learned.
Link to Work:
- An early version of my simple but working code editor
- Source on GitHub (html, css, javascript)
78. CSS Grid Critters
Day 78: December 10, 2017 - Sunday
Project: Grid Critters (https://gridcritters.com) game-based learning course.
Progress: This a a paid course but the first chapter is free. It took me a day to complete.

Thoughts: If you’ve already taken the Flexbox Zombies course (https://flexboxzombies.com) then you know what a great learning method this is. If not then I highly recommend you do.
By employing spaced repetition and game-based learning this course manages to help commit the material to memory in a way that’s fun and rewarding.
Learning comes through a series of narratives and challenges so it almost doesn’t feel like you’re absorbing material as much as learning how to beat each challenge.
I highly recommend taking the free lesson to get started. The cost of the course is $225 but a request has been made to the author to consider a discounted rate for students. We’ll see if he’s able to do that.
In the meantime, you can follow him on twitter (@geddski) and check his feed to get info and updates on the course.
Link to Work:
- Grid Critters (https://gridcritters.com) site
- @geddski on twitter (https://twitter.com/geddski)
77. Regular Expressions
Day 77: December 9, 2017 - Saturday
Project: Completed Code School’s Breaking the Ice with Regular Expressions course.
Progress: This took me 3 days to complete.
Thoughts: The class was a great start to learning the basics behind regular expressions. The course used a pirate theme and was pretty fun to puzzle through.
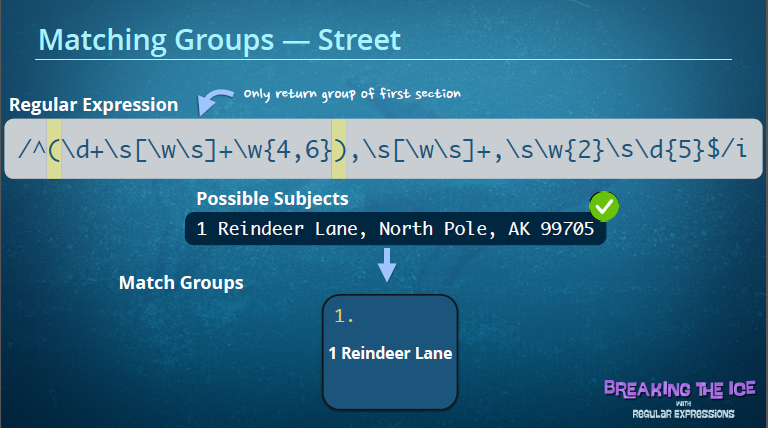
The subjects covered were:
- Literals, operators, character sets, & modifiers
- Wildcards, escaping characters, groups, and anchors
- Word boundaries, negating character sets, and accumulators
- global, multi-line and case-insensitive modifiers
- Capture groups & non-capturing groups
Link to Work: These are some great regex testing sites
76. Mobile Web Design
Day 76: December 5, 2017 - Tuesday
Project: Completed Code School’s Journey Into Mobile Intermediate CSS Course
Progress: This took two days to complete.
Thoughts: This course covered the following Intermediate CSS design topics.
- Fluid Layouts
- Adaptive Design
- Responsive Design

Some of the specific areas include.
- Relative font size formulas using em’s
- Calculating and setting relative container sizes using percentages(%)
- Adaptive markup
- Media queries & advanced media queries
- Display breakpoints
- Mobile first design
- Combining adaptive and responsive design
- Successfully targeting multiple contexts, devices, and display sizes with a single codebase
This course is about three years old but covers techniques that are widely in use today. I’m in the process of transitioning to using Flexbox and CSS Grid, now that all the major browsers support these, but it’s still important to understand older style responsive and adaptive layout.
This course also gave me a solid set of steps to follow when using media queries and converting fixed-based layouts to responsive ones.
I would definitely recommend this course to make sure you have a solid understanding of these techniques before jumping into exclusive use CSS Grid and Flexbox.
Link to Work: Code School’s Journey Into Mobile Intermediate CSS Course
75. Flexbox Zombies
Day 75: December 3, 2017 - Sunday
Project: Flexbox Zombies (https://flexboxzombies.com) game-based learning course.
Progress: This course took ten days to complete.

Thoughts: This course was so thoughtfully designed and so thoroughly thought out that it completely succeeded in helping me commit the lessons learned to long-term memory.
This was the third flexbox course I’ve taken and I didn’t have a tenth of the recall available to me that this game provided me with. I cannot recommend this method of learning enough.
One of the additional things I did to help commit the lessons to memory was to code along and create my own flexbox displays to mirror what I was learning in the game. This quickly showed me any errors I had made because the zombies did not match the layout presented me in the game.
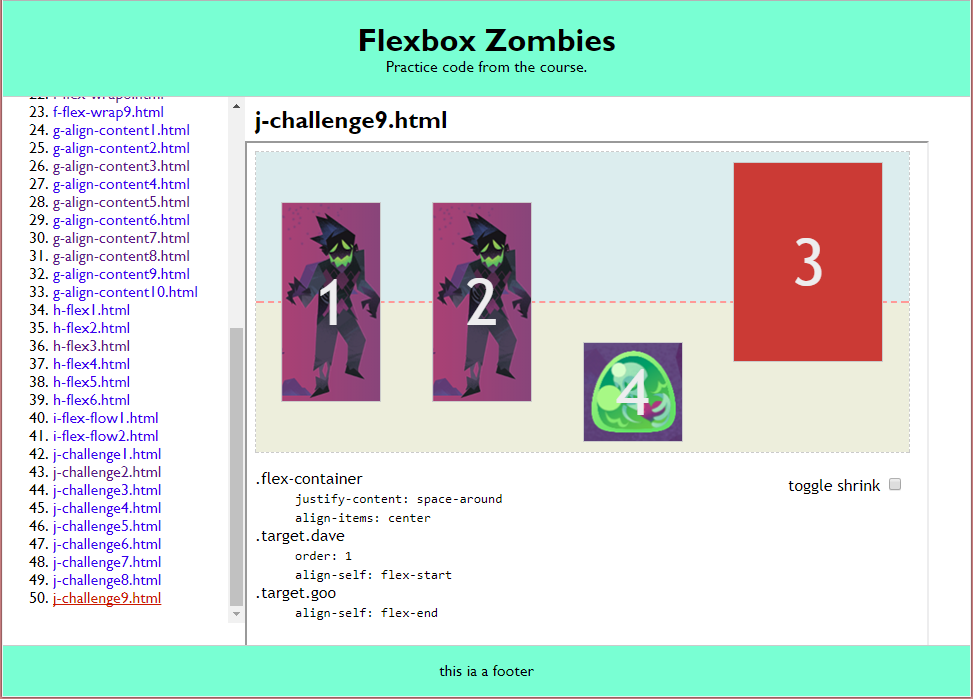
This process of coding along also gave me a good amount of practice solving real-world implementation issues involving multiple flexbox displays.
Link to Work:
- Flexbox Zombies (https://flexboxzombies.com) site
- My Flexbox Zombies pages - My Flexbox Zombies practice code
- Flexbox Zombies practice code on GitHub - GitHub repo of code
74. Web Image Optimization
Day 74: November 28, 2017 - Tuesday
Project: I needed a way to reduce the load time of this code log.
High quality PNGs were originally used but these proved too expensive with 50+ images on the page and was clocking in at 35.22 seconds for a complete page load. I needed a way to Batch optimized the images for web.

Progress: This took a few hours to complete.
Thoughts: I used Photoshop and this article: “Use Photoshop’s Batch Command to Quickly Save Images for Web” to optimize all images in this code log.
This was done by creating a set of Photoshop actions which are run as part of a batch routine to convert, downsize, and optimize all images in a given folder.
Once this was done I was able to use the smaller sized JPGs and link to higher quality PNGs. This reduced load time to 8.41 seconds.

Perhaps the next thing I’ll explore is lazy loading of images so they only get loaded when someone scrolls to that point in the page.
Link to Work: “Use Photoshop’s Batch Command to Quickly Save Images for Web”
73. Cracking the Case with Flexbox
Day 73: November 23, 2017 - Thursday
Project: Completed Code School’s Cracking the Case with Flexbox
Progress: Spent five days with this course and coded lots of examples to make it stick!

Thoughts: I really enjoyed learning flexbox! It was something I put off because I had this fear it might prove to be confusing and difficult to understand. This was not the case at all.
Doing floats, positioning and clears always felt like a hack to me. This finally addresses that and provides clear-cut ways to align and format content in a way that makes sense. I didn’t want to learn another layout spec that consisted of more tweaks and fixes than actual working code.
This was not the case with flexbox. I can say I prefaced this course with Flexbox Froggy which provided a GREAT and gentle introduction to the basics of flexbox and the various css properties it uses.
Link to Work:
- Flexbox code on GitHub - This is my sample code used to test different flexbox layouts and properties.
72. CSS Grid Garden
Day 72: November 14, 2017 - Tuesday
Project: CSS Grid Garden - A 28 lesson game for learning CSS .
Progress: This took one day to complete and was a bit more involved than Flexbox Froggy IMO.
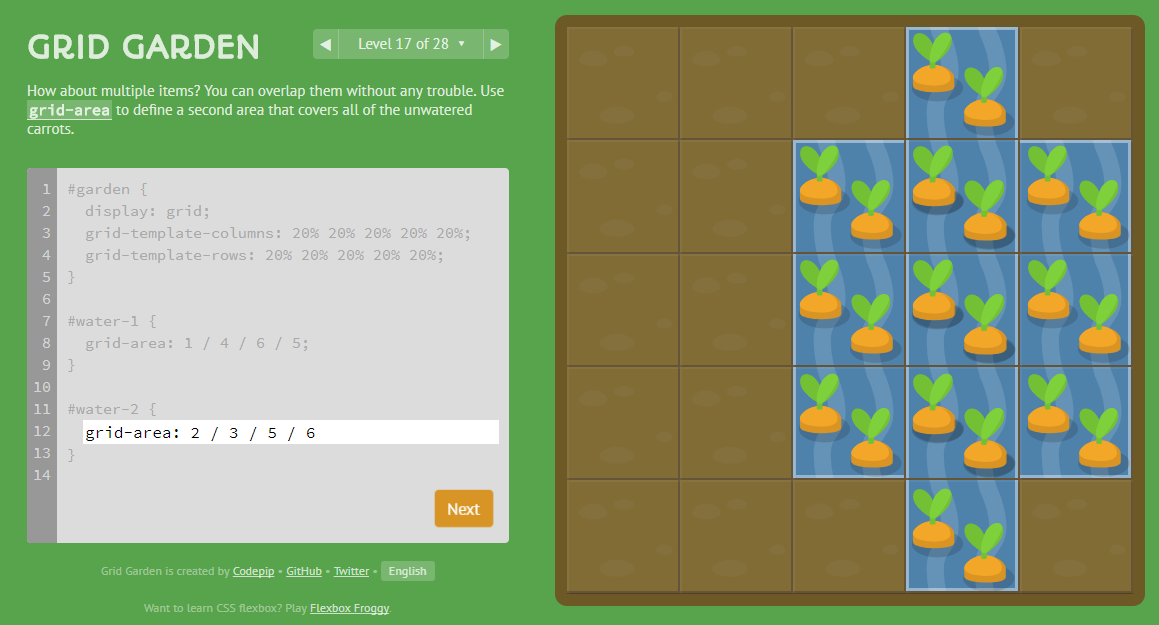
Thoughts: This was another great introduction to a new CSS3 layout mode. It introduces concepts and properties in a fun and easy to understand way.
Completing this course after having finished Flexbox Froggy gave me a sense of how each worked and which method was best suited for different layout needs. In fact, you can even combine the two in a way that utilizes each one’s strengths.
Grid seems to be best suited for page layout and flexbox shines when used to format components or content areas on a page. Flexbox and Grids, your layout’s best friends helped put into context how the two where designed and which one is best suited for each task.
Link to Work:
71. Flexbox Froggy
Day 71: November 13, 2017 - Monday
Project: Flexbox Froggy - A 24 lesson game for learning CSS flexbox.
Progress: This took a day to complete… Very straightforward.
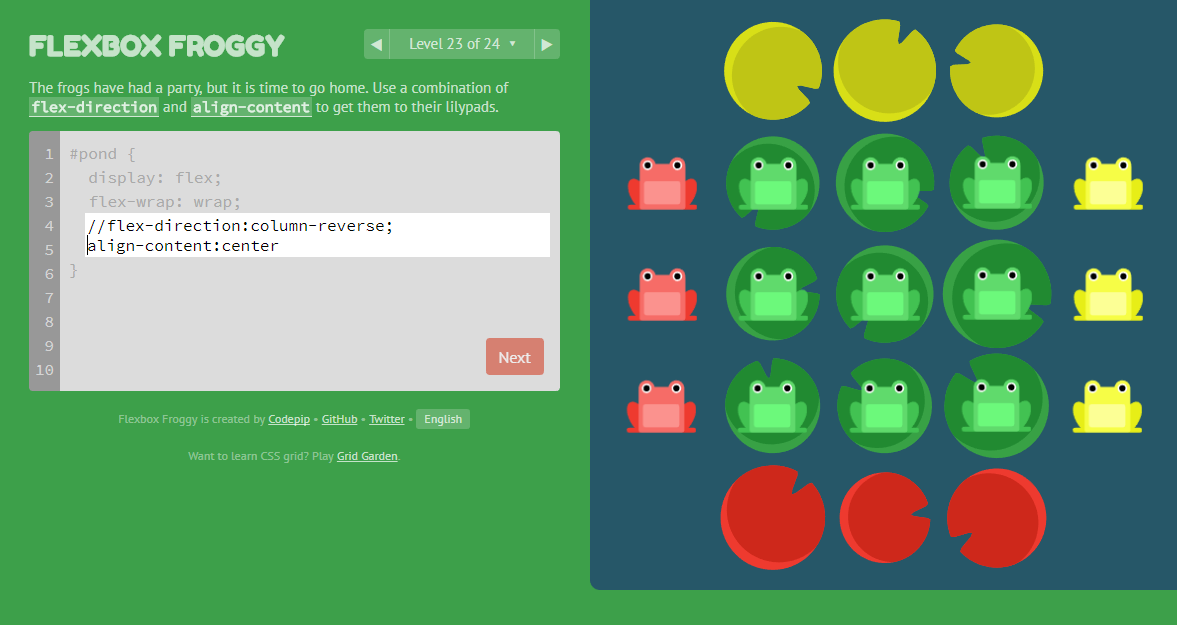
Thoughts: I cannot recommend this game enough as a gentle introduction to the keywords, properties, and concepts of flexbox. Flexbox is a CSS3 layout mode that replaces old school table-based layout and the more recent but frustratingly awkward ‘position & float’ layout method.
I would definitely recommend going through this game before taking your first flexbox course. It will help with absorbing the material because it will be familiar when learning the concepts in more detail.
Link to Work: Flexbox Froggy (http://flexboxfroggy.com)
70. CSS Web Animations
Day 70: November 18, 2017 - Saturday
Project: Code School’s Adventures in Web Animation course.
Progress: I kind of took my time with this and did it over four days.
Thoughts: This course was broken down into four sections.
- transition (color, position, & visibility)
- transform (rotate, translate, & scale)
- keyframe animations
- SVG animations
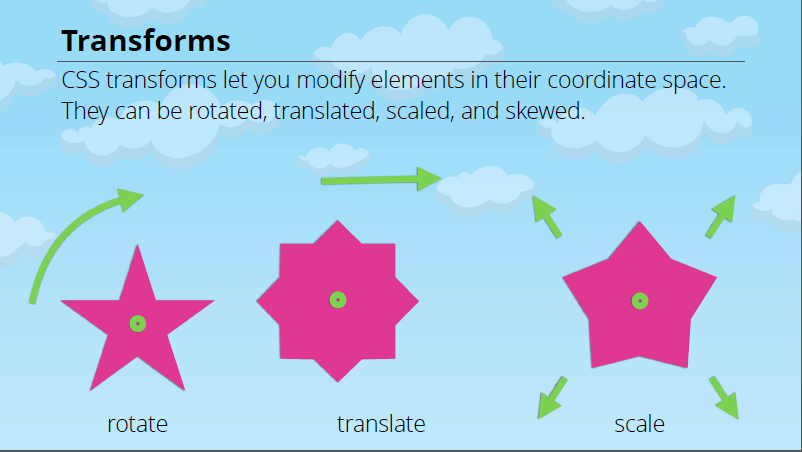
So this course is different than one with the kinds of animations you’d produce with a JavaScript library like p5.js. I haven’t gone through too many of @shiffman’s tutorials but from what I’ve gathered, those produce scalable vector graphics through the use of the HTML5 <canvas> element. Everything is code driven and relies on JavaScript.
This course deals with CSS3 animations on HTML elements & SVGs (although, technically you can also animate PNGs, GIFs, and JPGs as well). All animations are done in the stylesheet by specifying various property settings and applying those to different elements on the page through CSS selectors.
I imagine it’s a little more low-level than JavaScript animation with canvas. The CSS style animation method is great for simple user interface, form element, or SVG image animations that you want use to enhance a website with.
The other thing that took some time was tracking down the HTML/CSS used in the course. Once I had that I deleted the code the lesson covered and followed along.
The other thing I like to do is download the PDF slide deck and create an outline/TOC that I can refer to during the tests or use later as part of my notes.
Link to Work:
- GitHub repo of code exercises - This has links to starter HTML/CSS for those who like to code along in their editor of choice.
69. Advanced jQuery
Day 68: November 12, 2017 - Tuesday
Project: Code School’s Advanced jQuery - The Return Flight course.
Progress: This took me five days to complete and the material went deeper than before.
Thoughts: This course covered the following topics:
- Ajax Basics
- Setting Ajax options
- Refactoring code to use JavaScript objects
- Refactoring JS objects to JS constructor functions for reusability
- Working with Ajax Forms
- Using Ajax to process, send, & receive JSON data
- Using jQuery Utility Methods
- Advanced Event Handling including namespaced events
- Authoring jQuery Plugins
- Using Promise objects
- Chaining asynchronous calls
- Use of $.when() and .then
The beautiful thing about taking this course after having taken Code School’s Real-time Web with Node.js is that I was able to write all my own node servers to properly return formatted text, HTML, JSON, & script depending on what the Ajax call expected.
The course has you do the exercises in-browser so there’s no need to worry about server-side code implementation, but I also like to follow along in my code editor (Visual Studio Code) so I can play and expand upon the code examples.
By writing both Front End and Back End code, I was able to get some solid experience in end-to-end development. It allowed my to fine-tune my Ajax calls, optimally format my json & HTML data payloads, and practice processing data on the server with node.js and Express.
Link to Work:
68. Git Real - Advanced Intro to Git
Day 68: November 7, 2017 - Tuesday
Project: Completed Code School’s Git Real course. This uses command line Git to solve all your day to day needs.
Progress: This took about three days to complete and by the end I had 16 pages of notes that cover all beginning and intermediate git usage scenarios.
Thoughts: This was a great class! It has everything you need to go from beginner to git cli master. It also covers GitHub and some Heroku deployment scenarios.
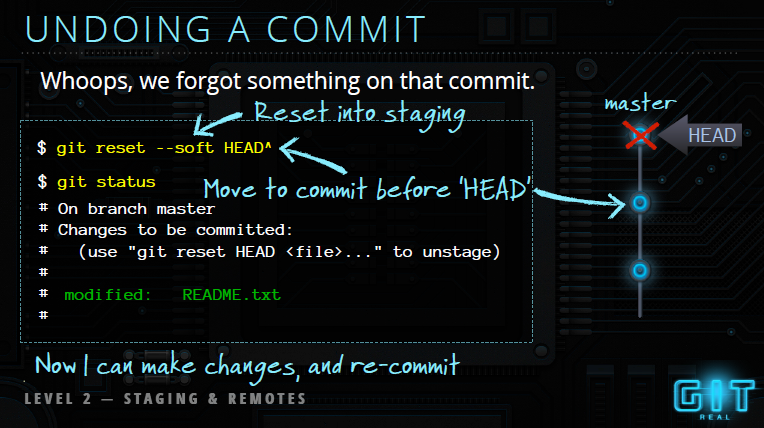
The class was divided into the following sections.
- Git Basics
- Staging and Remotes
- Cloning and Branching
- Collaboration Basics
- Remote Branches and Tags
- Rebase & Conflict Resolution
- History and Configuration

Here are some of the useful skills and techniques I learned.
- Unstaging files
- Discarding changes
- Adding to a commit
- Undoing a commit
- Viewing file diffs (by commit, by branch, by date, by user, etc.)
- Resolving merge conflicts
- Branching, fast-forward merges, and recursive merging
- Reading the log
- Working in the commit editor (vi)
- Merging and deleting remote branches
- Understanding pull with merge vs. fetch and rebase
- Searching through and working with history
- Configuring aliases for common cli tasks
Link to Work: Git Real by Code School
67. jQuery Promises
Day 67: November 5, 2017 - Sunday
Project: Converted Ajax calls to use jQuery Promises.
This was from Lesson 2 of Chapter 8: Working with Web Services from Programming in HTML5 with JavaScript and CSS3 Training Guide by Glenn Johnson.
Progress: It took 30 minutes to write the code and a day of reading and experimenting to understanding it thoroughly.
Thoughts: I learned the following about the jQuery Promise object:
- You can use promises to execute another ajax call after the first one is successful
- When you use jQuery to execute an ajax call, a promise object is returned
- The promise object enables you to register a callback to execute when the ajax call is successful, has failed, is progressing, and has completed.
The promise object has the following methods that can be used to register called functions:
- .always() - add handlers to be called when ajax has completed regardless of success or not
- .done() - called when ajax call is successful
- .fail() - called when ajax call has failed
- .progress() - called when ajax call generates progress notifications
Here’s a portion of the modified code.
// collects data, passes it to serverAddition, & decides how to process the results
function addNumbers( e ) {
    var data = getFormData();
    serverAddition( data ).done( displayResult ).fail( displayError );
}

// format data for the ajax call - optional args
function getFormData( x, y ) {
    x = x || $( '#x' ).val();
    y = y || $( '#y' ).val();
    return { 'x': x, 'y': y };
}

// handles ajax call to the server and returns a promise object
function serverAddition( data ) {
    return $.getJSON( '/addition', data );
}

function displayResult( serverData ) {
    $( '#result' ).html( serverData.result );
}
Link to Work: default-promise.js on GitHub
66. Ajax, XMLHttpRequest, & jQuery
Day 66: November 3, 2017 - Friday
Project: Chapter 8: Working with Web Services from Programming in HTML5 with JavaScript and CSS3 Training Guide by Glenn Johnson.
Progress: Created a Node.js web service that performs a basic arithmetic calculation - add, subtract, multiply, or divide. It takes two operands, x and y and returns a result.
The web service is accessed through Ajax. I had practice using the XMLHttpRequest object as well as jQuery’s $.ajax(), $.get(), $.getJSON(), and $.post() methods.
Thoughts: This was great practice using a varied mix of Asynchronous JavaScript (Ajax) calls to get data from a web service or web api. Below are a few examples of the different Ajax function calls I used.
Asynchronous XMLHttpRequest() method
function addNumbersXhrAsync( e ) {
    e.preventDefault();
    var x = document.getElementById( 'x' ).value;
    var y = document.getElementById( 'y' ).value;
    var result = document.getElementById( 'result' );
    var xmlhttp = new XMLHttpRequest();

    xmlhttp.onreadystatechange = function() {
        if ( xmlhttp.readyState === 4 && xmlhttp.status === 200 ) {
            var jsonObject = JSON.parse( xmlhttp.response );
            result.innerHTML = jsonObject.result;
        }
    };

    xmlhttp.open( 'GET', '/addition?x=' + x + '&y=' + y, true );
    xmlhttp.send();
}
Asynchronous jQuery $.ajax() method with HTTP GET
function addNumbers$ajax_typeGET(e) {
    e.preventDefault();
    console.log( ' ', '$.ajax() call' );

    $.ajax( {
        url: '/addition',
        data: ajaxData(),   // { 'x': x, 'y': y }
        type: 'GET',
        cache: false,
        dataType: 'json',
        success: function( data ) {
            $( '#result' ).html( data.result );
        }
    } );
}
Asynchronous jQuery $.get() method with HTTP GET
function addNumbers$get( e ) {
    e.preventDefault();
    var ajaxData = formatAjaxData();   // { 'x': x, 'y': y }

    $.get( '/addition', ajaxData, function( data ) {
        $( '#result' ).html( data.result );
    }, 'json' );
}
Asynchronous jQuery $.getJSON() method with HTTP GET
function addNumbers$getJSON( e ) {
    e.preventDefault();
    var ajaxData = formatAjaxData();   // { 'x': x, 'y': y }

    $.getJSON( '/addition', ajaxData, function( data ) {
        $( '#result' ).html( data.result );
    } );
}
Asynchronous jQuery $.post() method with HTTP POST
function subtractNumbers$post( e ) {
    e.preventDefault();
    var ajaxData = formatAjaxData();

    $.post( '/subtraction', ajaxData, function( data ) {
        $( '#result' ).html( data.result );
    }, 'json' );
}
Along with the various Ajax methods, I also learned what dataType’s you can work with and expect to receive from the server. These are json, xml, html, script, jsonp, or text.
There’s an amazing amount of flexibility revolving around Ajax and using it to consume services. I used to be intimidated by the syntax until I spent the time to understand each variation and how they work.
Link to Work:
65. Published My First NPM Package
Day 65: October 31, 2017 - Tuesday
Project: logcl - Created a simple set of wrapper methods to console.log(). These methods output formatted text to the command line with headers and indentation for legibility.
Progress: Took a day to put everything together for the package. This included cleaning up the code, properly commenting the methods, creating the README.md, creating the package.json and setting up the GitHub repo.
The recipe I followed was from Chapter 8: Websites & Services of Programming in HTML5 with JavaScript and CSS3 Training Guide by Glenn Johnson.
Link to Work: logcl package on npm
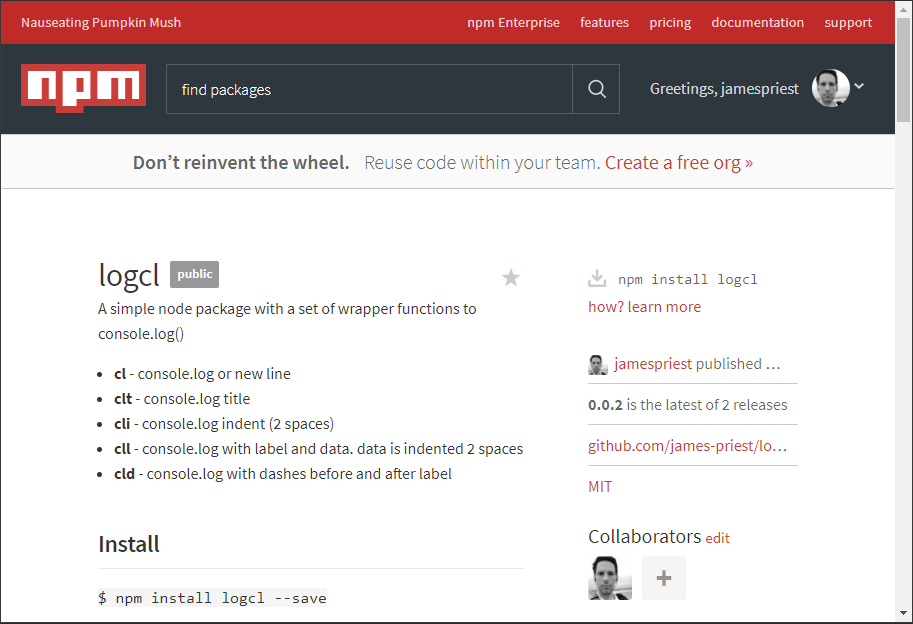
Thoughts: I had been using a set of wrapper functions to console.log() for debugging purposes in many of my projects. Initially, I would copy the functions to my code file and reference them directly.
I then separated the code out to its own module from which I exposed its methods. I was then free to use these methods in my application code by using the require keyword.
In order to truly be DRY (Don’t Repeat Yourself), I needed to put this code into a package that I could install and include in any of my projects.
This was the motivation for looking up how to do this. I’m glad I now know the process for structuring a package and how to utilize, access, and maintain it.
64. Hacktoberfest & GitHub Pull Requests
Day 59: September 30, 2017 - Saturday
Project: Hacktoberfest, GitHub PRs, & freeCodeCamp Guide contributions
Progress: Completed four GitHub PRs as part of GitHub & Digital Ocean’s Hacktoberfest 2017 event. I was able to do this in one day.
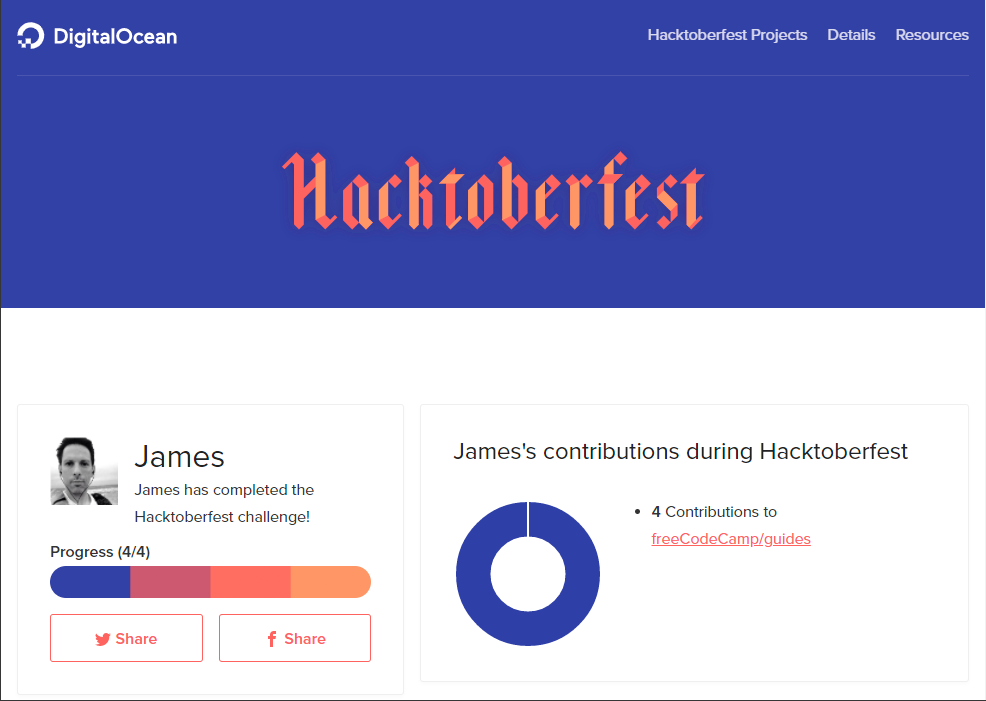
Thoughts: This was a great exercise in learning the process of how to maneuver GitHub Pull Requests.
What made it an even easier learning curve was the option to contribute to the freeCodeCamp Guide right through the browser. You can do this through GitHub’s edit feature and Quincy walks you through it in his post.
I did the first two PRs in this way and then read the README.md for the freeCodeCamp Guides on GitHub for step by step instructions on how to clone the repo, set my upstream connection, create a dev branch, make my changes, commit those changes, push the branch to GitHub, and then initiate the PR.
It sounds like a lot but it was straight forward and worked beautifully. I was even able to add new commits to a PR I had already submitted without any issues. I now feel comfortable contributing to any GitHub project without fear of anything breaking!
Link Resources:
- Quincy Larson’s Medium article, “I just got my free Hacktoberfest shirt. Here’s a quick way you can get yours.”
- The README.md for freeCodeCamp Guides on GitHub
63. Real-time Web with Node.js
Day 63: October 25, 2017 - Wednesday
Project: Completed Code School’s Real Time Web with Node.js course
Progress: Took me 5 days to complete.
Link to Work: Real Time Web with Node.js
Thoughts: This course was a great introduction to Node.js and the many technologies surrounding it. I had to table my need to understand every detail and just watch the videos, listen to the lectures, and take notes. The challenges reinforced what I learned and gave me a sense that I could write the code without fully understanding every detail of what was going on under the hood.
This course covered:
- Creating non-blocking, http node servers.
- Event emitters & event requests
- Streams
- Creating and requiring modules
- NPM & packages
- Web framework with Express
- JavaScript templating library with EJS (Embedded JavaScript)
- Web Sockets with Socket.io
- Persisting data with Redis (a NoSQL, in-memory, key-value data store)
The course was created in 2014 but is very much current and a great introduction to the node.js toolset, environment, and ecosystem. I would definitely recommend this course.
62. Try jQuery
Day 62: October 21, 2017 - Saturday
Project: Completed Code School’s Try jQuery course
Progress: Spent 2-3 days working through this and taking notes. It also has a great slide deck you can download.
Link to Work: Free Try jQuery course
Thoughts: This was a great introductory course on jQuery. It covered the following:
- CSS Selectors
- Traversing the DOM
- jQuery methods
- DOM Manipulation
- Refactoring and Filtering
- Event Handling
- CSS Styling
- Effect and Animations
This takes what I learned from Free Code Camp and expands on my understanding of what’s possible through the jQuery library. In total it took 6-8 hours to complete. The exercises were all done in the browser but I also worked out the code in my editor. Very well worth it!
61. You, Me, & SVG
Day 61: October 18, 2017 - Wednesday
Project: Completed Code School You, Me, & SVG class
Progress: Finished over two days
Link to Work:

Thoughts: This was a great class that covered the basics of writing SVG by hand as an exercise toward understanding it s structure under the hood. SVG stands for Scalable Vector Graphics and is supported in all major browsers.
While its recommended that we use a vector-based image editing program when creating these, it is useful to know how to read, understand, and modify the text output of an SVG file.
Knowing how these are structured also allows use to modify these through CSor JavaScript and to even animate SVG though CSS transform directives.
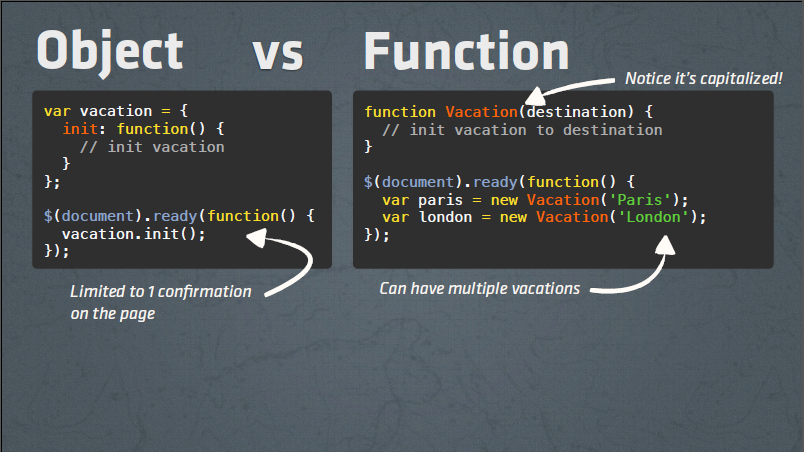
60. Creating JavaScript Objects
Day 60: October 14, 2017 - Saturday
Project: Completed “Creating Javascript Objects” repo on GitHub - This is taken from the Essential JavaScript chapter of Programming in HTML5 with JavaScript and CSS3 (MS Press)
It applies object-oriented design techniques to JavaScript and shows you how to architect your code to use objects, prototypes, constructors, and inheritance. It also touches on using the following design patterns:
- object literal pattern
- factory pattern
- prototype pattern
- module pattern
The sample code also uses a Test Driven Design (TDD) approach to test the functionality of properties and methods of the objects we create.
Progress: Finished both the object-oriented walk-thru and the accompanying code samples for each section.
Link to Work: GitHub repo: Creating JavaScript Objects
Thoughts: This took about a week to complete. I mostly did this as an exercise to walk through writing out each section of the book’s chapter. I also took my time in writing out all the sample code and testing it with a light-weight TDD framework called Tape. This allows you to write tests (assertions) to verify the code is doing what you expect it to do. These are small unit tests which are performed as a group and can be very helpful for proof-of-concept code.
Here’s a sample of the kind of code this walk through builds:
var Vehicle = (function() {
    function Vehicle( theYear, theMake, theModel ) {
        this.year = theYear;
        this.make = theMake;
        this.model = theModel;
    }
    Vehicle.prototype.getInfo = function() {
        return this.year + ' ' + this.make + ' ' + this.model;
    };
    Vehicle.prototype.startEngine = function() {
        return 'Vroom';
    };
    return Vehicle;
})();

var v = new Vehicle( 2012, 'Toyota', 'Rav4' );
var actual = v.getInfo();
var expected = '2012 Toyota Rav4';
It also explains exactly what is happening and why we construct the code as shown.
59. JavaScript Best Practices
Day 59: October 7, 2017 - Saturday
Project: Completed Code School’s JavaScript Best Practices course
Progress: Worked on this for about one week
Link to Work:
Thoughts: Learned the following:
- Ternary conditionals, logical ‘Or’, logical ‘And’, operators & assignment
- Loop optimization,script execution, & performance tips
- Exception handling, object & type comparisons
- Coding conventions, numerical anomalies & work-arounds
- Namespaces & object prototype constructor
- Anonymous closures & Immediately Invoked Function Expressions (IIFEs)
- Module pattern, Factory Pattern and namespace
- Global imports and namespace augmentation
Example of course material & code:
/**
 * Anonymous Closures - Making data & methods private using the Module Pattern
 * So far we've seen modules that only have public properties..
 * what if we wanted some stuff to be accessible only to the module?
 *
 * First decide which properties should be public and which should be private
 * Then... have public methods signal private methods to update/modify private data
 */

var ARMORY = {
    // should be private - module's internal data
    weaponList: [ ' * list of weapon Objects * ' ], // these are modified only by internal methods
    armorList: [ ' * list of armor Objects * ' ],

    // should be public - external code can make requests
    makeWeaponRequest: function() { }, // these access methods below
    makeArmorRequest: function() { },

    // should be private - only module should access these
    removeWeapon: function() { }, // these access data above
    replaceWeapon: function() { },
    removeArmor: function() { },
    replaceArmor: function() { }
};

// Step 1 - Wrap entire set of properties in an IIFE
var ARMORY = ( function() {
    // props go here...
} )(); // <--- these last parens indicate the Function Expression should be immediately executed, therefore, an IIFE


// Step 2 - Make desired private props into local executable code
var ARMORY = ( function() {
    var weaponList = [ ' * list of weapon Objects * ' ]; // these become local vars for IIFE's scope,
    var armorList = [ ' * list of armor Objects * ' ]; // and therefore, are private

    makeWeaponRequest: function() { },
    makeArmorRequest: function() { },

    var removeWeapon = function() { }; // these become local vars which now belong to the IIFE's scope
    var replaceWeapon = function() { }; // instead of the namespace, and are, therefore, private
    var removeArmor = function() { };
    var replaceArmor = function() { };
} )();

// Step 3 - Pull all private values and methods to the top of the function (for easy reference & good code organization)
var ARMORY = ( function() {
    var weaponList = [ ' * list of weapon Objects * ' ]; // these become local vars for IIFE's scope,
    var armorList = [ ' * list of armor Objects * ' ]; // and therefore, are private

    var removeWeapon = function() { }; // these become local vars which now belong to the IIFE's scope
    var replaceWeapon = function() { }; // instead of the namespace, and are, therefore, private
    var removeArmor = function() { };
    var replaceArmor = function() { };

    makeWeaponRequest: function() { },
    makeArmorRequest: function() { },
} )();

// Step 4 - Here's the money: To make some properties public, return an object
// Add the public properties to their own object which, when returned, becomes the ARMORY namespace
var ARMORY = ( function() {
    var weaponList = [ ' * list of weapon Objects * ' ]; // these become local vars for IIFE's scope,
    var armorList = [ ' * list of armor Objects * ' ]; // and therefore, are private

    var removeWeapon = function() { }; // these become local vars which now belong to the IIFE's scope
    var replaceWeapon = function() { }; // instead of the namespace, and are, therefore, private
    var removeArmor = function() { };
    var replaceArmor = function() { };

    return {
        makeWeaponRequest: function() { }, // because the FE is immediately called, the returned object
        makeArmorRequest: function() { } // will be handed immediately to the ARMORY variable and become a namespace
    };
} )();

/**
 * Closure now produces our desired private methods and values
 * Everything with a var is "bound down" within the scope of the returned namespace object.
 *
 * Notice that none of our function's local variables are ever properties with the returned
 * namespace object..
 *
 * ..but they are there nonetheless, visible to, and able to be referenced by, ONLY the members
 * of the local namespace scope!
 */

var mySword = ARMORY.makeWeaponRequest( "Excalibur" );
/**
 * makeWeaponRequest() calls an invisible removeWeapon() which, if some conditions are met,
 * deletes and retrieves an object from an invisible weaponList.
 * weaponList returns that object to the removeWeapon() function, which then returns the object
 * for use to the scope of WeaponRequest()
 */

/**
 * In short...
 * Private properties are created in the local scope of the function expression.
 * Public properties are built within the object which is then returned to become the namespace.
 * Access to private data is thus possible only because of closure within the larger module
 */
58. JavaScript Road Trip Part 3
Day 58: September 30, 2017 - Saturday
Project: JavaScript Road Trip Part 3 course
Progress: This took 3-4 days to complete and covered some advanced JavaScript subjects
Link to Work:

Thoughts: The subject matter areas covered ere:
- Function Expressions - Used to assign a function (usually anonymous function) to a variable or to assign a function to an object property to create a property method.
- Closures - Used in factory patterns and creating function “makers”.
- Hoisting - Refers to the order in which the compiler reserves memory for variables through declaration. All formally declared variables and function statements are hoisted on the compiler’s first pass; function expressions are not. They are processed during the compiler’s execution stage in which the code is actually run.
- Objects - creation and manipulation of objects in all forms.
- Prototypes - Creation of function constructor’s and moving of shared methods to an object’s prototype for efficient memory footprint when many objects are created and used.
This course was really the missing set of lessons I needed to in order to know how to best structure my code. I now have a set of code examples to refer to when building the structure of my Free Code Camp projects.
Beyond the many in-browser exercises, I also copied much of the code into my VS Code editor and ran these from terminal with node. At other times I ran various code examples in Console right through Chrome DevTools.
This course is not for the faint of heart but is great for those with an intermediate grasp of JavaScript who want to kick it up to the next level.
57. JavaScript Road Trip Part 2
Day 57: September 26, 2017 - Tuesday
Project: JavaScript Road Trip Part 2 course on Code School
Progress: This took about a day and a half to complete
Link to Work: Code School JavaScript Path

Thoughts: Part 2 covered Loops, Conditionals, Build-ins, Functions and Arrays. It was pretty straight forward and provided a good refresher to each of these code constructs.
Additionally, the course focused on how to optimize each of the constructs for efficiency and readability.
I enjoy these lessons because they can be completed in a day or two and are pretty straight forward to grasp. I have lots of notes and sample code that I can refer to when building my next FCC project.
56. Weather App Fix & GitHub Pull Request
Day 56: September 25, 2017 - Monday
Project: Updated Weather App on CodePen & Netlify with CSS Prefixes, JavaScript retooling, & cross-browser testing. (Whew!😅)
Progress: Once I had the Mac VM in place I was able to reproduce and fix some of the errors that folks reported. I got help regarding CSS pre-fixes from one of our #100DaysOfCode members who suggested Grunt, Gulp, or Webpack to automate the process.
The final bits of fine-tuning came from another #100DaysOfCode friend who was awesome enough to clone the repo, streamline the bad bits, and submit a Pull Request to integrate the changes.
- Thank you Peter (@PeteCapeCod) for the spark of insight and point in the right direction!
- Thank you Vlad (@_vladbogdan) for code fixes, cross-browser testing, & the GitHub Pull Request!
Links:
Thoughts: Testing on Safari & Mac OS required setting up a Mac VM in which to debug both the stand-alone & CodePen version of the app. Once this was done I proceeded to retool the the markup, css, & javascript.
I added CSS pre-fixes to target specific versions of older browsers and integrated help from Vlad which consisted of switching ES6 to ES5 syntax (let to var) and using forEach rather than for to fix a scope issue.
The prefixing was done through a great tool that takes your CSS and adds the prefixing where needed. All you do is paste your source and the updated CSS is produced.
I’ll look into automating this process with Grunt, Gulp, or Webpack in the future.. possibly once I integrate Sass or SCSS into my process.😁
Now that I’m done, I can say it took longer to set up the test environment than it did to debug the code but was definitely a good experience. I now have three separate guest VMs from which to test and develop from:
- Windows 10
- Ubuntu 16.04
- Mac Sierra 10.12.6
Pretty cool!😎😀
Also, I got to integrate my first outside Pull Request. (Thanks again to Vlad!) I had done this on my own as practice but hadn’t actually collaborated on any codebase. I guess its time for me to practice contributing to someone else’s codebase by submitting my first pull request as well.
55. Mac VM on Windows - macOS Sierra 10.12.6
Day 55: September 24, 2017 - Sunday
Project: Set up macOS Sierra 10.12.6 (previously Mac OS X) on Windows as a VM.
Progress: It took one day to download the vdsk, install the VM, & update the OS. I took another couple days to install Brew, Node, Git, Chrome, VS Code, Xcode Command Line Tools, Git Bash for Mac and some npm packages (http-server, eslint, etc.). Once done, I had a proper test environment to work from.

Link: Complete Tutorial Steps including link to fully configured macOS Sierra VM Disk
Thoughts: This tutorial was perfect. It worked as advertised and without any hitches or problems. The part that took the longest was downloading the VM disk. It’s 4-5 GB. If anyone is looking to run macOS inside a VM then I would definitely recommend this guide.
I also applied the latest updates and logged in with my Apple ID to integrate iCloud services. I currently run the VM with 16 GB of allocated memory although you can run it with as little as 4 GB.
54. JavaScript Road Trip Part 1
Day 54: September 21, 2017 - Thursday
Project: Completed Code School’s JavaScript Road Trip Part 1 course
Progress: This took about a day to complete
Link to Work: Code School JavaScript Path
Thoughts: All challenges took place in the browser and covered things like Booleans, Strings, and Variables. Additionally, we covered some intrinsic js object methods such as String.charAt, String.indexOf, concatenation & arithmetic operations including modulus(%).
Besides coding in the browser environment provided by the course, I also opened up Console in Chrome DevTools for quick proof-of-concept tests.

For longer tests I usually create a js file in VS Code and then run the file with node. This gives me the added benefit of syntax highlighting, linting, & debugging if necessary. For the purposes of this course the console was enough.
In all, Part 1 of this course covers only the most basic JavaScript concepts and is good for those new to programming or those, like me, who enjoy quick refreshers.
53. Weather App on CodePen
Day 53: September 19, 2017 - Tuesday
Project: Weather App on CodePen
Progress: Added background crossfade transitions to the Weather App, updated it on netlify, and posted it on CodePen. I had to make some modifications on the CodePen version to get everything to work alright.
Link to Work:

Thoughts: The changes needed for CodePen involved removing styling from the body tag and instead creating a container that I could wrap my application in and style as needed.
I also had issues with linking directly to SVGs on GitHub. These were being served as ‘text/plain’ rather than ‘svg+xml’ mime type. Instead I accessed these through Netlify and all was good.
52. True Crossfade Effect
Day 52: September 18, 2017 - Monday
Project: Completed a CSS Crossfade & Carousel Effect using stacked divs, css, & jquery
Progress: I thought this would take me 2-3 hours but took more like 1-2 days
Link to Work:
- CodePen - Crossfade: https://codepen.io/james-priest/pen/boEVXR
- Crossfade on Netlify: https://local-weather-app.netlify.com/crossfade.html
- CodePen - Carousel: https://codepen.io/james-priest/pen/EwPpaw
- Carousel on Netlify: https://local-weather-app.netlify.com/carousel.html

Thoughts: There were lots online references to jQuery fadeIn, fadeOut, and fadeToggle but these didn’t do the trick. One image would fade all the way down and then the next would fade up. This wasn’t as clean. You can see here.
https://local-weather-app.netlify.com/transition1.html
I went through LOTS of posts, jquery docs, & stack overflow q&a’s until I found something that I could adapt. That was here:
http://www.simonbattersby.com/blog/simple-jquery-image-crossfade/
I had to change quite a few things around to adapt the sample to what I had in mind but the basic structure/logic was sound and worked great!
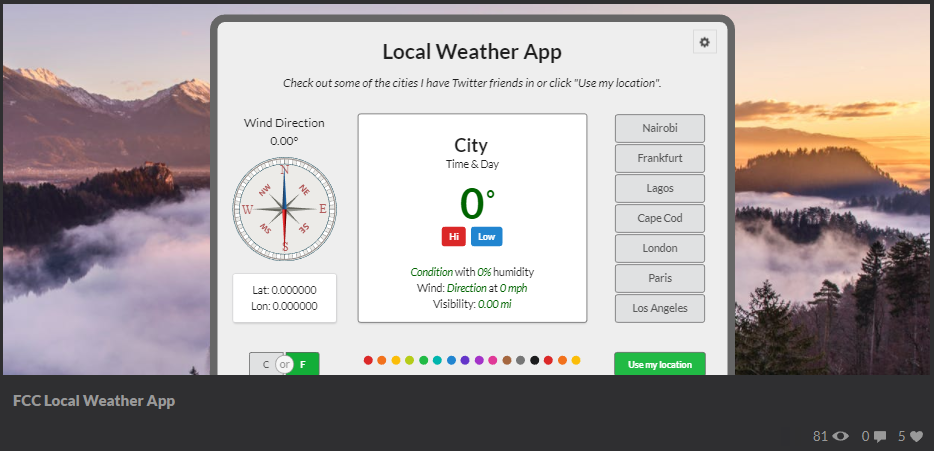
51. Local Weather App
Day 51: September 15, 2017 - Friday
Project: Completed FCC Local Weather App
Progress: Originally estimated 2-3 days to complete but I had fun and put more effort into it.
Link to Work: https://local-weather-app.netlify.com/

Thoughts: So, it took me five days to complete this once I got started but it feels like I’ve been working on this for weeks. Here’s a list of features:
- Built with Semantic-UI for responsive layout
- Used both jQuery and standard javascript ajax to pull from the following APIs
- freeCodeCamp weather API based on http://openweathermap.org
- Google Maps Timezone API for local time
- Google Maps Geolocation API (will integrate this later; currently using FCC API for geolocation)
- Created an SVG compass that uses CSS transform and rotate along with transitions to show wind direction. It also animates on mouse-over.
- Added Debug panel which uses tabbed display. It can be opened with the gear in the upper right corner
- Created a series of colored buttons to allow cycling of all background images.
- Included toggle switch for conversion of imperial and metric units of measurement.
- Lastly, had fun creating messages to Twitter friends by playing extensively with the Popup Module.
Open items / Needs
- Pre-load images
- CSS transitions between clicks
In the end it was fun and I got a lot of practical experience with js, jquery, json/ajax, css, & semantic-ui.
50. Semantic-UI CSS framework
Day 50: September 10, 2017 - Sunday
Project: Testing and evaluating Semantic-UI
Progress: I spent two days reading documentation and playing around with layout combinations.
Link to Work: Links coming in next post.

Thoughts: Sematic-UI definitely gets my vote as far as a clean framework to develop from. It has semantic layout and many variations to choose from. There are quite a few components available and lots of ability for fine-grain control of behavior through js. UI features are broken down into elements, collections, views, and modules but these are all really just UI components.
One thing I can say though is that I struggled with the responsive portion for a few days before it fell into place. Now it works brilliantly and is actually very flexible without having to add any extra html elements (divs, spans, wraps, etc). I would definitely recommend this framework as a Bootstrap alternative and maybe even over bootstrap.
49. FCC Local Weather App
Day 49: September 8, 2017 - Friday
Project: Build A Local Weather App from freeCodeCamp
Progress: So I’ve been working on this for 4 days. Most of the work was on writing code to use Geolocation to get JSON data back from a weather service that uses your location as input. The data that came back looked like this:
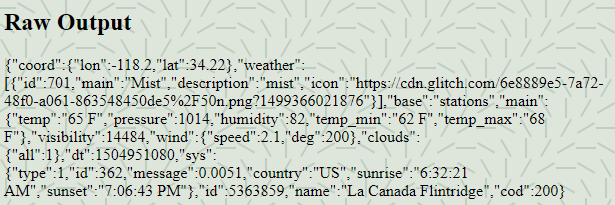
I wrote this :
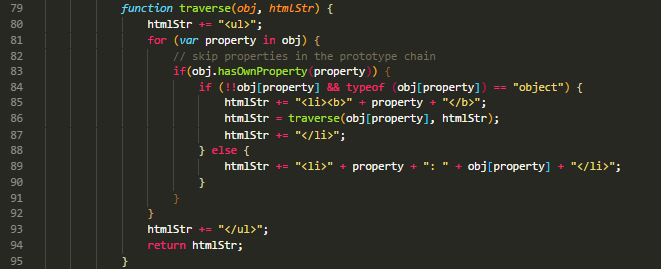
To get this:

Here’s short list of the things I researched for this project:
- Iterating through an object
- Conversion formulas
- Frameworks including:
- Bootstrap 3
- Bootstrap 4
- Bulma
- Foundation
- Look up jQuery methods for
$.getJSON()and$.ajax()
Link to Work:
Thoughts: I saw some great looking weather app projects including this one https://nawnaw7.github.io/weatherapp/ from Nawnaw. The code is clean and the interface is beautiful. Great use of open space.
This confirmed to me that I need to a framework in order to best layout the information. That along with images, font, icons and functionality should be all my project needs. :)
48. FCC Random Quote Generator on CodePen
Day 48: September 4, 2017 - Monday
Project: Build A Random Quote Machine from freeCodeCamp
Progress: I built this over two days and hit some stumbling blocks when it came to using JSON. Instead I had to use the JSONP format. Here’s short list of the things this project required:
- Investigate available free quote generation web APIs
- Look up jQuery methods for
$.getJSON()and$.ajax() - Look up Twitter API to include a Tweet button.
Link to Work: FCC Random Quote Generator on CodePen
Thoughts: Practiced the art of reading docs and writing code based on API documentation. I thought it would take a day to finish the project but it took longer due to the CORS security restrictions around cross-domain json. Once I got this working I practiced adding in the following:
- CSS box-shadows, transitions & blockquote formatting
- SVG backgrounds
- Use of Google fonts
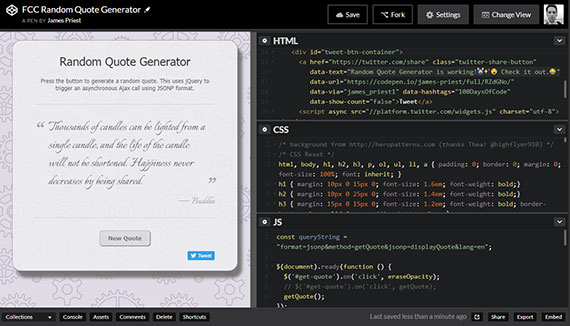
47. Completed FCC JSON, APIs & Ajax
Day 47: September 2, 2017 - Saturday
Project: FCC JSON, APIs & Ajax section
Progress: Completed each exercise.
Link to Work: -
Thoughts: Completing the JSON, API, and Ajax section was very straight forward compared to the hairpulling exercise of a couple of the algorithms challenges.
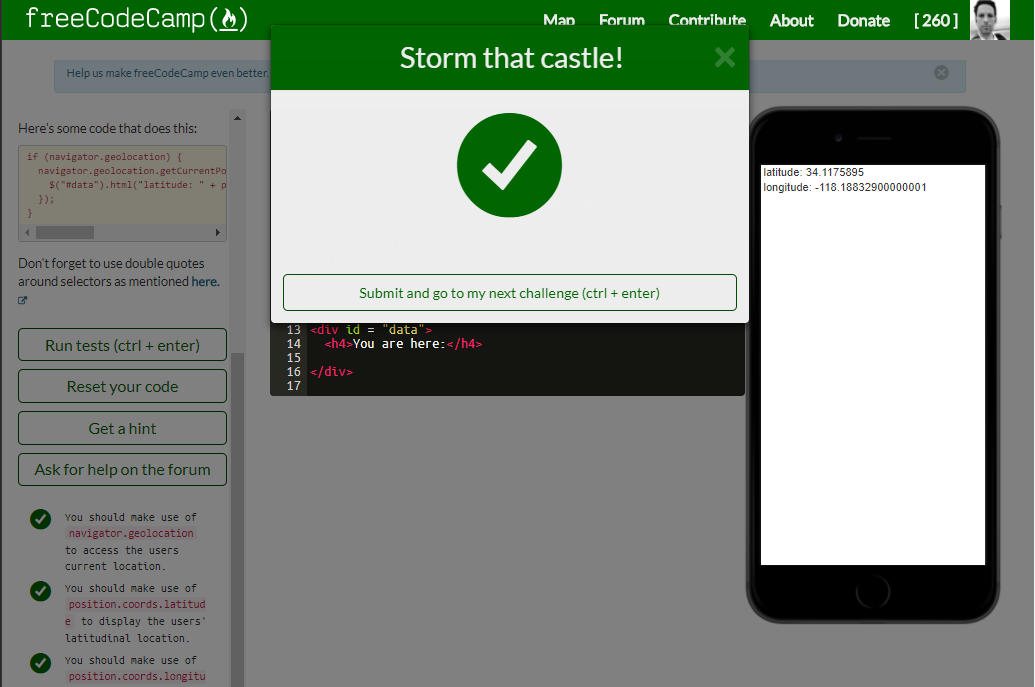
46. Completed FCC Basic Algorithm Scripting
Day 46: September 1, 2017 - Friday
Project: FCC Basic Algorithm Scripting
Progress: Completed all the challenges.
Link to Work: -
Thoughts: It took one day to figure out 15 of them and two and a half days to struggle through the remaining one - the “seek and destroy” challenge. This one killed me. I didn’t want to look up the answer so I struggled through it and would tweet excessively as a distraction. (Sorry #100DaysOfCode party-ppl)
This did help to spark that diffuse mode of thinking and finally worked out. It was combining the Array.filter function with the built-in arguments object, throwing it in a loop and wrapping it all in a callback that screwed me up. (Won’t make that mistake again :))
Marking up my screenshot with derogatory callouts did help me work out my frustration a bit. It helped me vent. :)
45. FCC Basic Algorithm Scripting
Day 45: August 30, 2017 - Wednesday
Project: FCC Basic Algorithm Scripting
Progress: Completed first half of 12 challenges
Link to Work: -
Thoughts: I’m working through these with the examples from the Object Oriented & Functional Programming sections open in my VS Code Editor.
This has been a bit slow at times but I can tell some real learning is taking place; that point were we go from merely understanding and following a solution to creatively constructing and developing our own. It is this critical part that deeply engrains the mental patterns necessary to truly gain efficiency and then mastery of the material.

44. FCC Object Oriented and Functional Programming
Day 44: August 29, 2017 - Tuesday
Project: Completed FCC Object Oriented and Functional Programming section
Progress: This covered about about a dozen 30 challenges
Link to Work: -
Thoughts: Covered specific Array methods: concat, filter, join, map, reduce, reverse, sort & split. Also covered Object Oriented concepts such as creating objects as variables, constructing objects with functions, object instances with constructor function, passing parameters to constructor function and making object properties private.
43. Completed FCC Basic JavaScript Challenges
Day 43: August 28, 2017 - Monday
Project: Free Code Camp Basic JavaScript challenges
Progress: Completed Basic JavaScript section (about 30 challenges today)
Link to Work: - My FCC Code Portfolio
Thoughts: Covered Arrays, Multi-dimensional arrays, loops, objects, Math object, etc.
42. FCC Basic JavaScript Challenges
Day 42: August 27, 2017 - Sunday
Project: Free Code Camp Basic JavaScript challenges
Progress: Completed two thirds of the Basic JavaScript section (about 70 challenges today)
Link to Work: - My FCC Code Portfolio
Thoughts: Left off on counting cards challenge. Will pick it up tomorrow.

41. SPYCats Website on Netlify
Day 41: August 25, 2017 - Friday
Project: Moved the site to Netlify
Progress: My FCC Personal Portfolio page morphed into the SPYCats project - A website advertising the undercover services of an elite team of cats.
Link to Work: SPYCats Website on Netlify
Thoughts: I will go back and put together a personal portfolio site once I have a recent sampling of work. For now I decided to have fun with the project. I can also add more pages if I want to play with it since its on Netlify.
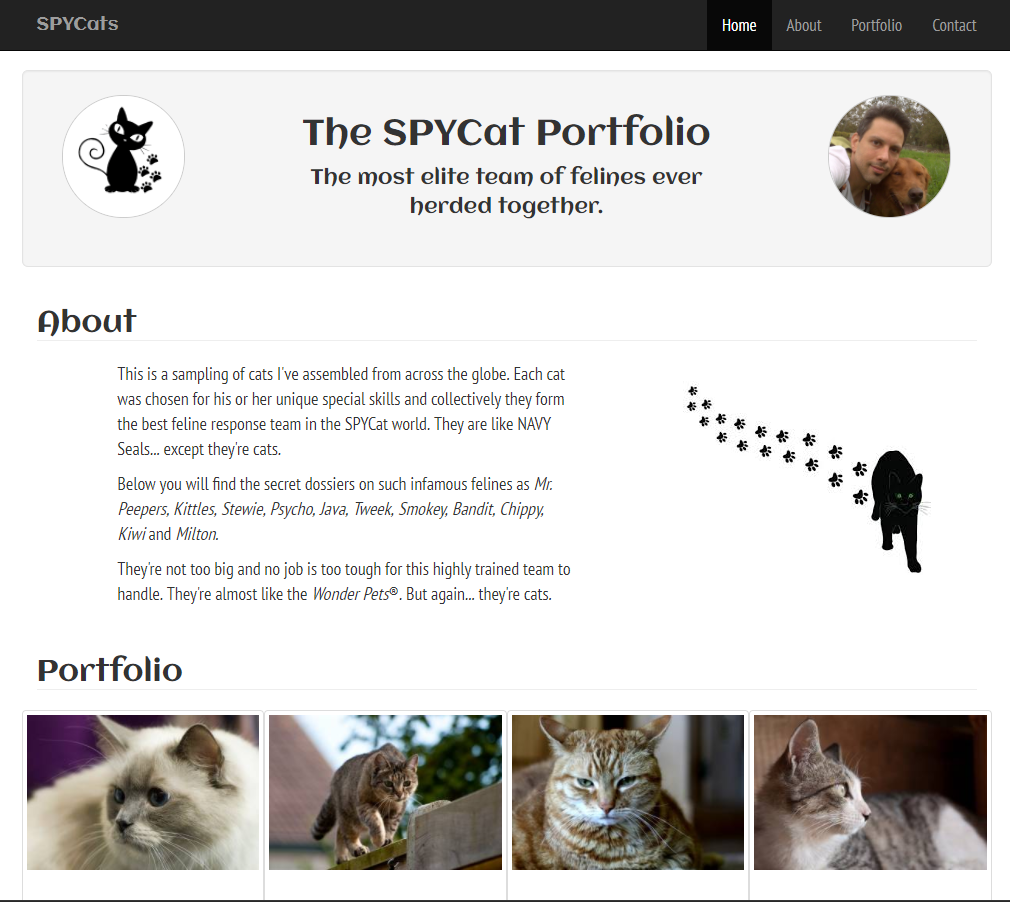
40. FCC Personal Portfolio Project on CodePen
Day 40: August 23, 2017 - Wednesday
Project: Personal Portfolio project from freeCodeCamp
Progress: It was slow going trying to develop on CodePen. Don’t get me wrong, I love the environment but I love my code editor more.😁 (VSCode)
Link to Work: FCC Portfolio Page - Bootstrap 3 on CodePen
Thoughts: CodePen has some great features and I love how flexible it is. It’s an awesome platform for sharing code and showcasing projects but difficult to do extensive development in.
39. Bootstrap 3 Training
Day 39: August 21, 2017 - Monday
Project: Completed Code School class: Blasting Off with Bootstrap.
Progress: Worked on this all day. It covered Bootstrap 3, CSS & Font Awesome
Link to Work:
- My Code School Report Card
- Test code for Blasting Off with Bootstrap on GitHub
- Hosted Page on Netlify
Thoughts: This course helped tremendously on my WIP freeCodeCamp Bootstrap Portfolio project. It was just what I needed to understand the following:
- grids, offsets, and layouts
- components, glyphs, and plugins
- icons, fonts and behavior

38. Intermediate CSS Training
Day 38: August 20, 2017 - Sunday
Project: Completed Code School class: CSS Cross Country.
Progress: Worked on this throughout the day
Link to Work:
- Code School HTML/CSS Course Path
- My Code School Report Card
- Test code for CSS Cross Country on GitHub
- Page in browser
Thoughts: Worked on some of the deeper aspects of css such as:
- Specificity
- Floats, Clearfixes, & layouts
- selector best practices
37. HTML5 & CSS3 Basic Training
Day 37: August 19, 2017 - Saturday
Project: Completed the Code School class: Front End Foundations.
Progress: Worked on this throughout the day
Link to Work:
- Code School HTML/CSS Course Path
- My Code School Report Card
- Test code for Front End Foundation on GitHub
- Page in browser
Thoughts: This was basic/beginning HTML/CSS but was a good refresher.
36. HTML5 & CSS3 Intermediate Training
Day 36: August 18, 2017 - Friday
Project: Completed the Code School class: Front End Formations.
Progress: It took about 5-6 hours to complete. This included tutorials, typing out code exercises, creating my own code proof-of-concepts and taking quizzes & tests.
Link to Work:
- Code School HTML/CSS Course Path
- My Code School Report Card
- My test code for Front End Formations on GitHub
Thoughts: I like the format of Code School’s content. It’s focused and clear.
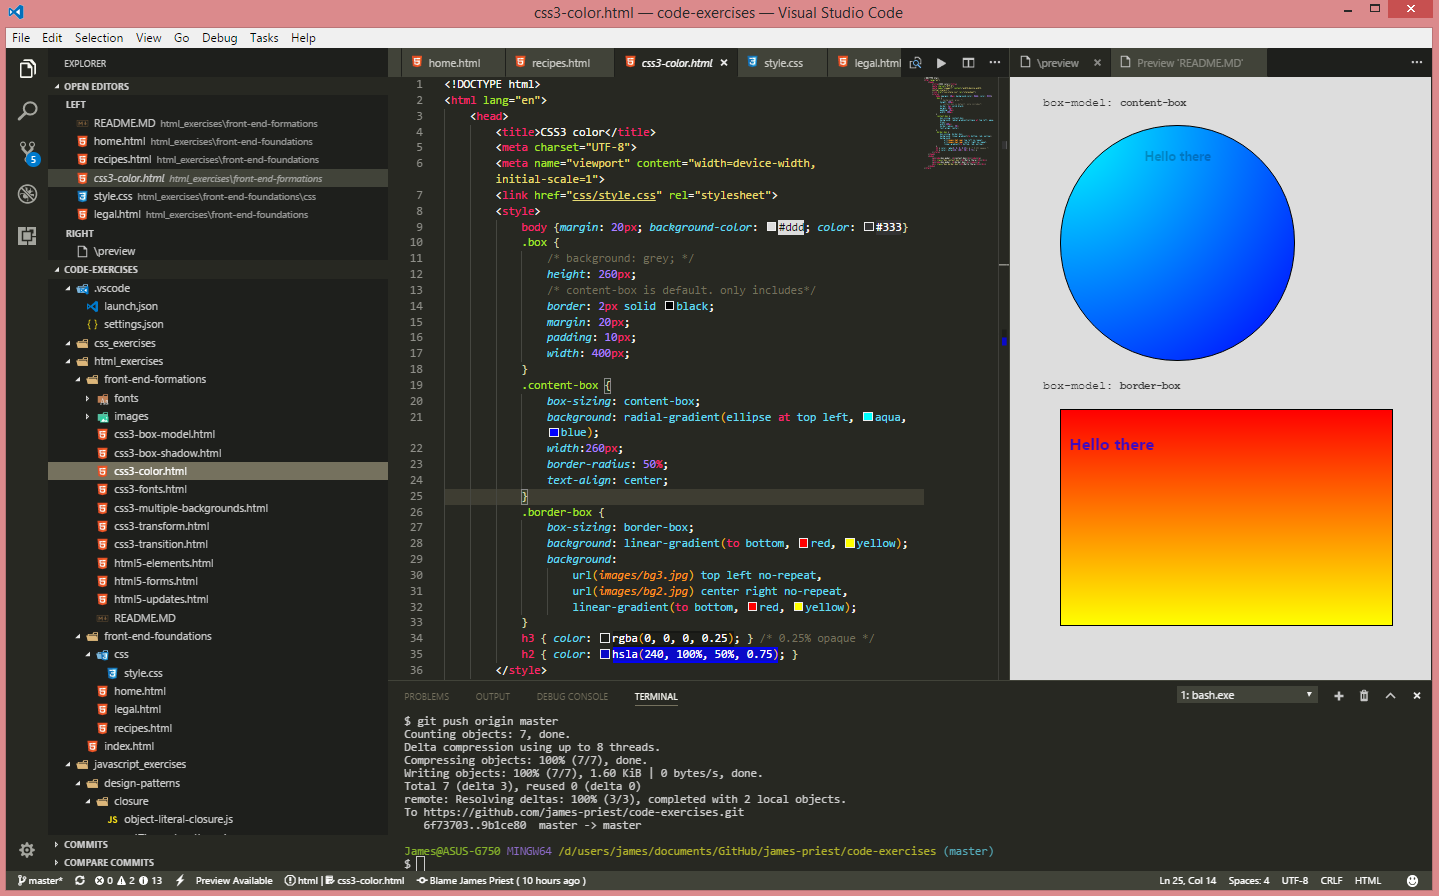
35. FCC Personal Portfolio with Bootstrap 3
Day 35: August 16, 2017 - Wednesday
Project: - FCC Personal Portfolio Webpage project
Progress: Switched to Bootstrap 3
- Created new Pen using Bootstrap 3
- Worked on Responsive/Collapsible Menu
Link to Work:
Thoughts: I had to play with Bootstrap and reference the docs and samples a lot in order to get things working.
Where I had trouble was in trying to change Bootstraps 3’s structural format by eliminating unnecessary elements. I wanted to reduce Bootstrap’s element clutter by removing unnecessary div elements and making the HTML more semantic by attaching class names to HTML5 elements. Things like changing divs to header, section, and article elements.
This didn’t work so well so I changed back to the div heavy structure.
34. FCC Personal Portfolio with Bootstrap 4
Day 34: August 15, 2017 - Tuesday
Project: - FCC Personal Portfolio Webpage project
Progress: - Started with Bootstrap 4
- Added Bootstrap 4 css
- Added Bootstrap 4 js
- Worked on Responsive/Collapsible Menu with limited success
Link to Work:
- Created multiple Pens to test Bootstrap in CodePen
Thoughts: It seems the code samples are not collapsing properly for the responsive menu. I played with this for a while before deciding to switch to Bootstrap 3. I enjoy the challenge of debugging and fine-tuning html/css but I think I’ll wait until Bootstrap 4 is no longer in Alpha to use it on “production” assignments.
33. FCC Tribute Page
Day 33: August 14, 2017 - Monday
Projects:
- Finished FCC Tribute Page on CodePen.io
Progress:
- Knocked it out in a night without too much trouble. 😌
Link to work:
Thoughts: Could have used bootstrap. Instead I hand-coded the css.
32. Node.js HTTP Server
Day 32: August 13 2017 - Sunday
Projects:
- Setup a Node.js http server for running web apps locally
Progress:
- Installed simple http-server:
npm install http-server -g - Ran server from local directory
http-server . -p 8000 - Tested web app
Link to work:
Thoughts: Found a great article on the http://threejs.org site that showed how to get a local http server running with any one of the following technologies:
- Python
- Ruby
- PHP
- Node.js
- lighttpd
Use the link on Link to work: to read the article
31. Debug JS with Node in VSCode
Day 31: August 12 2017 - Saturday
Projects:
- Debug js code from within Visual Studio Code
Progress:
- Set up Node debug configuration
- Configured launch.json file
- Set breakpoints
- Ran debugger and stepped through code
Link to work:
- https://github.com/james-priest/code-exercises/blob/master/javascript_exercises/js-internals/vm-internals.js
- https://code.visualstudio.com/docs/editor/debugging
Thoughts: Debugging from within VSCode is absolutely essential to tracking down errors and evaluating code during execution.

30. WordPress Site
Day 30: August 11, 2017 - Friday
Project:
- Setup a WordPress site for a blog on the 100 Days of Code challenge
Progress:
- Registered for an account
- Chose a theme
- Customized the template (sidebar, header & footer)
- Wrote my first post!
Link to work:
Thoughts: So all of this took me 3-4 hours (off and on) and an entire day to do but it’s done.😁
While writing a WordPress blog is not something I thought I’d do I am glad I’ve started the process. Writing a blog is a surefire way of letting prospective employers know about your mastery, skill set and breadth of knowledge.
I was actually inspired to do a WordPress blog by @AdrianaHasburn while reading her Process to CSS Images post. (Thanks Ariana!)
29. Chrome DevTools and Source Maps
Day 29: August 10, 2017 - Thursday
Project:
- Setup for Chrome DevTools
Progress:
- Read sections on:
- Code Editor Setup - They recommend Sublime/I use VSCode
- Persistence with DevTools Workspaces - Setting up source file mapping allows code changes to persist to source files
- CSS & JS Preprocessors - Using Source Maps allow direct references to preprocessed source files for saving changes directly from DevTools
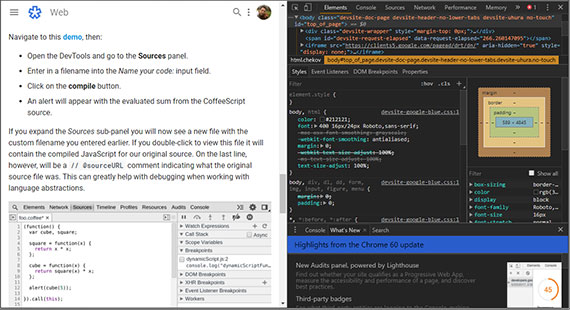
Link to work:
- Link to DevTools Getting Started Docs
Thoughts: I learned how to effectively use Chrome DevTools as part of my debug process. The combination of VSCode with Chrome DevTools gives me the type of end-to-end control that Visual Studio 2017 provides for back end development.
28. JS Closures & Variable Scope
Day 28: August 8, 2017 - Tuesday
Progress:
- My goal was to create an object literal that contained a recursive function wrapped in a closure.
- Worked on this for days before I got it right!
// my five year old nephew's favorite joke...
var comedian = {
    pauseReps: 3,
    pauseTime: 2000,
    setupJoke: function() {
        console.log("What's invisible and smells like carrots...");
    },
    timeThePunchLine: function () {
        var pauseRep = this.pauseReps;
        var pauseTime = this.pauseTime;
        var punchLine = this.punchLine;

        function timeoutHandler() {
            if (pauseRep == 0) {
                console.log(punchLine());
                return;
            } else {
                console.log(".");
                pauseRep--;
                setTimeout(timeoutHandler, pauseTime);
            }
        }

        timeoutHandler();
    },
    punchLine: function() {
        return "bunny farts.😲😂😐";
    }
};

var myNephew = comedian;
myNephew.setupJoke();
myNephew.timeThePunchLine();
Link to work: https://codepen.io/james-priest/pen/EvydgE?editors=1011
Thoughts: I read three articles by Kirupa (@Kirupa on Twitter) of http://www.kirupa.com that helped explain the concepts I needed to have down before successfully combining closures with object literals, recursion, variable hoisting, and scope chaining. They were from the Learn JavaScript 101 section of the site. These were:
I also got syntactic help from https://stackoverflow.com/questions/25889950/settimeout-and-recursive-function-with-parameters.
27. GitHub Page for my 100DaysOfCode log
Day 27: August 6, 2017 - Sunday
Progress:
- Updated CSS, jQuery, and Jekyll HTML template
Link to work:
Thoughts:
- Needed to come up with a way of expanding the nav to accommodate a long TOC
- Updated nav css overflow to accommodate scroll
26. Jekyll, jQuery, & FontAwesome
Day 26: August 5, 2017 - Saturday
Projects:
- Updated GitHub Page for my Resume/CV site
Progress:
- Added jQuery Nav
- Added FontAwesome for social media profile links & icons
- FontAwesome for nav pointer (breadcrumb)
- Updated CSS to indicate active link
Link to work:
Thought:
- Used jQuery for on-page navigation; dynamic building of the TOC & for basic usability: breadcrumbs highlights, etc.
25. Objects, Expressions & Closures, Oh My!
Day 25: August 3, 2017 - Wednesday
Today’s Challenge:
- I set out to define different JavaScript constructs that incorporate recursion, setTimeout, and a closure.
Progress:
- Set up two test environments for tracing and debugging
- CodePen for quick proof-of-concept testing
- VSCode to run Node & step through code using debugger.
Link to work:
Thoughts: This was not easy.😓 I initially wrote this as a Pen but needed additional debug info to trace scope so I also ran this with Node in the integrated Bash terminal I have going inside of VSCode.
I had read a great post from @Kirupa that discussed IIFEs & scope. Kirupa: Immediately Invoked Function Expressions a.k.a IIFEs
Example 1: setTimeout in IIFE
var reps = 3;

(function doStuff() {
    if (reps == 0)
        return;
    console.log(reps);

    reps--;
    setTimeout(doStuff, 1000);
})();
Example 2: setTimeout in object literal
var obj2 = {
    count: 3,
    repeat: function () {
        // bring vars down here so inner function can contain the variable count
        // in it's closure scope
        var enclosedCount = this.count;

        function doSomething() {
            if (enclosedCount == 0) {
                return;
            } else {
                console.log(enclosedCount);
                enclosedCount--;
                setTimeout(doSomething, 1000);
            }
        }

        doSomething();
    }
};

var inst = obj2;
inst.repeat();
Example 3: setTimeout in function expression
var myFunc = function () {

    var outer = 3;

    function doStuff() {
        var inner = 3;
        if (outer == 0) {
            return;
        } else {
            for (; inner> 0; inner--) {
                console.log("in: " + inner);
            }
            console.log("outer: " + outer);
            outer--;
            setTimeout(doStuff, 1000);
        }

    }

    doStuff();
    return "done"; // occurs after first loop completes. Use Async?
};

var doIt = myFunc();
console.log(doIt);
24. CodePen Lesson!
Day 24: August 2, 2017 - Wednesday
Today’s Project(s):
- Creating some proof of concept pens and testing out the environment
Progress:
- Set up my profile
- Created two test pens & a prototyping pen
- saved all progress
- had one pen open in two different tabs (my bad); closed one tab & saved the other
- overwrote my work by saving “wrong” tab. 😠😭
So I rewrote the proof-of-concept code from memory.
Link to work:
Thoughts: So, I learned that CodePen doesn’t have version control. This makes me real careful and deliberate with my changes.
In the end it turned out fine. By re-coding the exercise I inadvertently ended up employing a learning technique called Spaced Repetition.😁
23. JSBin vs. Plunker vs. CodePen
Day 23: Aug 1, 2017 - Tuesday
Today’s Project(s):
- Evaluated JSBin, Plunker and CodePen.
Progress:
- Set up accounts in each
- Created Gists from which to save and pull my code
- Tested out each code environment
Link to work:
Thoughts: Here are my two cents…
 JSBin - This is my goto js playground for testing syntax & short proof-of-concepts
- Pros
- quick setup
- Console tab is predominantly featured - great for quick debug
- version control - multiple snapshots
- Cons
- AutoSave and snapshots are clunky to use/administer; they require manual steps to keep organized
- Gists don’t import/export right
- loading & switching bins is slow & errs at times
- collaboration does not work as advertised
- less used features are not/is not inherently intuitive.
- editor is limited to one html, css & js file
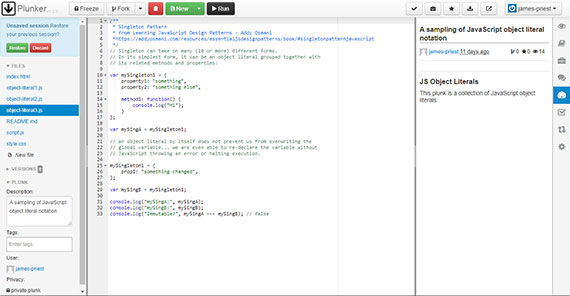 Plunker - great multi-file environment
- Pros
- Editor is spacious
- can have multiple js, css, html & md files in a plunk
- saved templates, multiple libraries, integrated gitter, live preview
- multiple js frameworks available
- version control, linting, chat, toolbox, and collaboration
- Cons
- no integrated Console
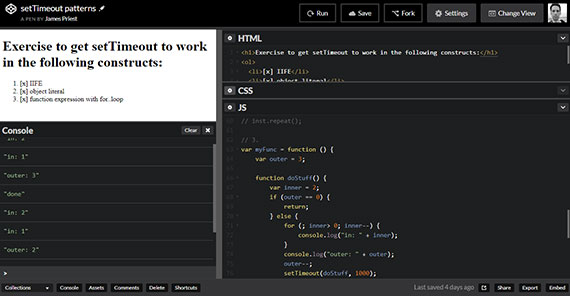 CodePen - great UX (fully featured experience)
- Pros
- Intuitive and configurable ui
- Pen or Project based workspace
- clean & focused documentation
- great social factor - huge community, profile setup & ability to post
- Cons
- no version control - easy to overwrite saved version with old version
Beyond what I listed, CodePen is designed right. It just works - it “feels” good to use, its responsive, it’s intuitive, and it’s robust which means it doesn’t seem to choke as easily as some others.
In the end, it’s the design that makes CodePen attractive.
“Design is how something works, not what it looks like.” - Steve Jobs
22. JavaScript VM Internals
Day 22: July 31, 2017 - Monday
Today’s Project(s): Watched Arindam Paul’s YouTube vid: JavaScript VM Internals, Event loops, Async and Scope Chains
Progress: Followed along with the video and coded the proof of concepts
Link to work:
Thoughts: JavaScript goes through a two phase process when a program is run. Phase one is the compilation phase and phase two is the execution phase. The compiler actually alternates between these two phases as it digs deeper into nested functions. These nested function environments are referred to as local scope or lexical scope (The scope of the variable can be defined by its position in the source code).
When JavaScript goes through the compilation phase it actually just extracts out declarations - the variable declarations and the function declarations (the value doesn’t matter at this point). It moves them to the top of the code block and then prepares the memory so that it can execute the code. It is through this extraction that variable hoisting occurs.
Let’s look at this example…
(column 1 & columns 3: compilation phase; column 2 & column 4: execution phase)
 1 var a = 2;             // Global Scope (Window)
 2 b = 1;                 // a | a=2    |   |
 3                        // f | f="λf" |---|------> Lambda "f"
 4 function f(z) {        //   | b=1    |   | b=3    ('b' created at runtime)
 5     b = 3;             //   |        |   | c=4
 6     c = 4;             // ------------------------
 7     var d = 6;
 8     e = 1;             // Local execution scope for f()
 9                        // z | z=1    |   |
10     function g() {     // d | d=6    |   | d=18
11         var e = 0;     // g | g="λg" |---|------> Lambda "g"
12         d = 3 * d;     //   | e=1    |   |
13         return d;      // ------------------------
14     }
15                        // Local execution scope for g()
16     return  g();       // e | e=0
17     var e;             // ------------------------
18 }
19
20 f(1); //18
The compiler goes through the global scope, extracts the declarations a and f (column 1). It does not know what b is referring to at this point so it skips it. It then checks f for syntax, saves the contents of function f as a string blob - Lambda "f", and then skips to line 18. This concludes the compilation phase which then immediately kicks off the execution phase. This is where values are assigned to a and f. b is created at runtime and assigned a value as well (column 2).
Code execution continues onto line 20, function f is executed and the compiler creates a memory allocation in heap for f which can be thought of as a local execution context. This is where it enters into f and starts the compilation phase once again. As soon as the compiler sees z as the function parameter, it declares it as a local variable. b and c are skipped over and d is declared. e is skipped and g is declared. Finally e on line 17 is declared before the execution phase begins. This declaration of e is an example of variable hoisting because it occurs after the assignment in code but is actually hoisted to be declared before execution. This concludes the compilation phase for f.
We now enter the execution phase for f. The first thing that happens is the value passed to f is assigned to the variable declaration z. JavaScript then encounter an assignment to b which it has no local reference to. It then checks it’s stack pointer back to the parent function to see if b exists there (which it does) and then happily assigns b the new value of 3.
During the execution phase JavaScript will follow the pointer chain all the way back to global scope looking for the referenced variable regardless of how many scope chains it has to go through. If it finds the variable before reaching global scope it will assign the value. If not, it will create the variable in global scope and then assign the value. This is what happens with variable c during execution.
Next, d is assigned the value of 6 followed by e being assigned the value of 1. g is then assigned the contents of function g as a string blob before line 16 is reached where the code says, “function g, execute self”. At this point a heap memory allocation is created as a local execution context for g. We then enter the compilation phase for g.
At this point the compilation phase for g creates a pointer back to the local execution scope for f. e is declared and that is all that happens in the compilation phase for g.
The execution phase for g looks for a local reference to d which it does not find so it goes up the scope chain and finds it it in the lexical scope of f. It then assigns d the value of 18 before hitting line 13 where it actually returns the value of d which is 18. Execution context then continues to line 16 where g() is replaced with the value 18 which is then returned back to f(1) on line 20.
After F of 1 is done there is no reachability or reference to anything other than the Global scope. In JavaScript, if you have an object, or a function definition, or a function execution, or any other type of thing, if you do not have a way to reach it, it will be garbage collected.
21. JS Namespace Patterns
Day 21: July 30, 2017 - Sunday
Progress:
- Practiced creating various namespace objects
- Created namespace objects with different singleton conventions
// Option 1
var myApp = myApp || {};

// Option 2
if (!myApp) { myApp = {}; }

// Option 3 - useful only in a parameter/argument scenario
window.myApp || (window.myApp = {});

// Option 4 - jQuery plug-in
var myApplication = $.fn.myApplication = function () { };

// Option 5 - Long form (unnecessary)
var myApplication = myApplication === undefined ? {} : myApplication;
Link to work:
Thoughts: Played with six different namespace design patterns. These incorporated a Singleton pattern to ensure one (and only one) instance is ever created. Some used coercion to test if an instance already existed, some instantiate an empty object and add properties to the object after the fact. Some define/declare the entire namespace object as an object literal. Some use IIFEs to immediate invoke and return an object.
20. Singleton Design Pattern with IIFEs
Day 20: July 28, 2017 - Friday
Today’s Project(s):
- Singleton pattern using Immediately Invoked Function Expression (IIFE)
Progress:
- Read The Singleton Pattern in Addy Osmani’s Essential JavaScript Design Patterns.
Link to work:
Thoughts: Read a great post by @kirupa of http://kirupa.com called Immediately Invoked Function Expressions (aka IIFE) this is part of his site’s Learning JavaScript 101 section.
Writing the function by following a pattern is pretty straight forward. The key is to
- understand what’s going on under the hood
- know when to use it
- know why you’re using it
Here are the key take-aways about IIFEs from @kirupa:
- The function executes in its own bubble. It comes into existence, does its work, and then disappears. No reference is created to the function so there’s no way to access it after execution.
- An IIFE leaves behind no evidence of its existence after it has run. This is largely because IIFEs are anonymous functions that are nameless.
- Because the code runs in it’s own function scope it’s protected from accidental modification by code outside of it.
- IIFEs are great for protecting the IIFE code from the rest of your js, but they don’t stop your IIFE code from wreaking havoc on the code outside of your IIFE.
- It executes immediately. No waiting time and no instantiating a var to then invoke the function with.
- Side Note: The reason the function executes immediately is because the compiler is
trickedtold to treat the function, which is normally just a declaration, as an expression. - There are ways other than using wrapping parentheses to reach a valid point in the grammar so that your function is treated as an expression. (Although, parens should be used for readability since they are the convention)
- void function(e){ console.log(e) }(‘hi’)
- !function(e){ console.log(e) }(‘hi’)
- typeof function(e){ console.log(e) }(‘hi’)
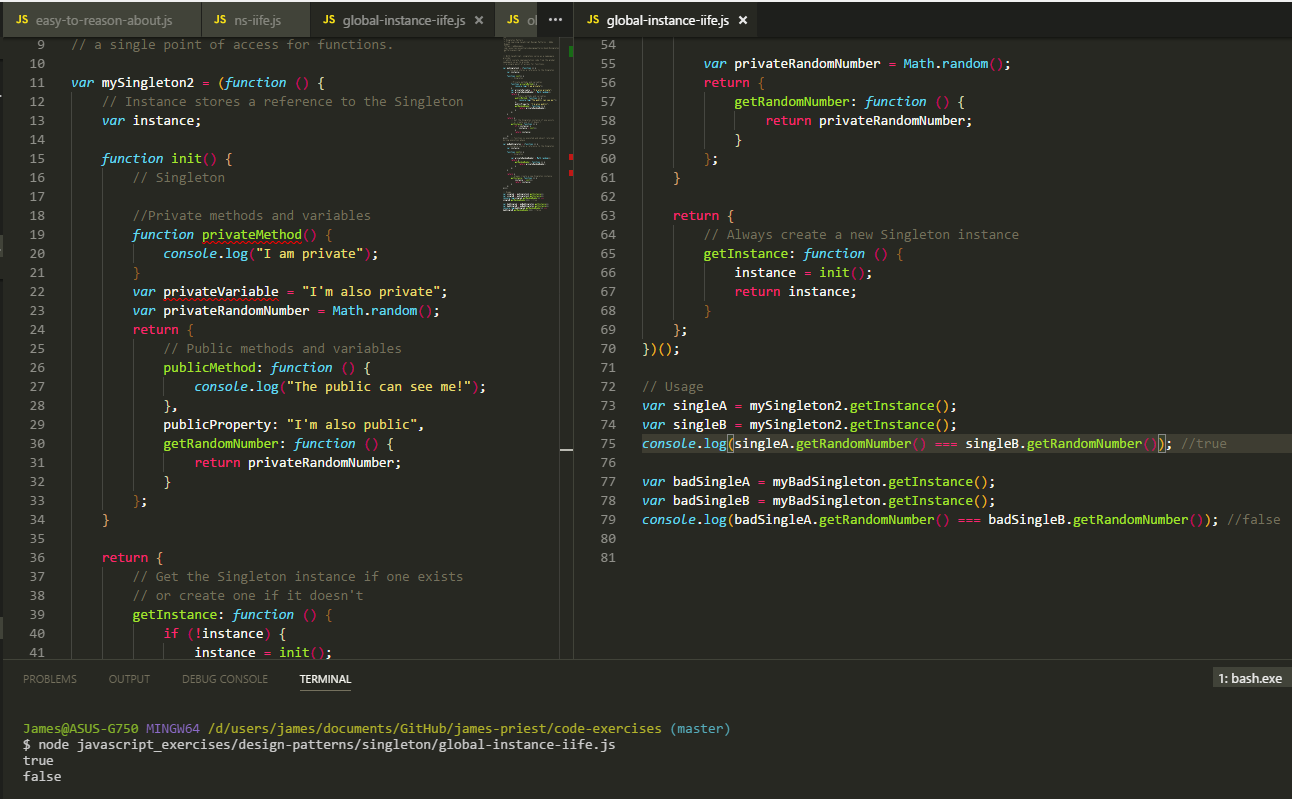
19. JS Object Literals
Day 19: July 27, 2017 - Thursday
Today’s Project(s):
- Object literals
Progress:
- Created three types of objects using object-literal notation.
Link to work:
Thoughts: Object literals are a beautiful way to organize your code. It uses key/value pairs and nests well for deeper hierarchies. It also reads well and is easy to understand if structured properly.
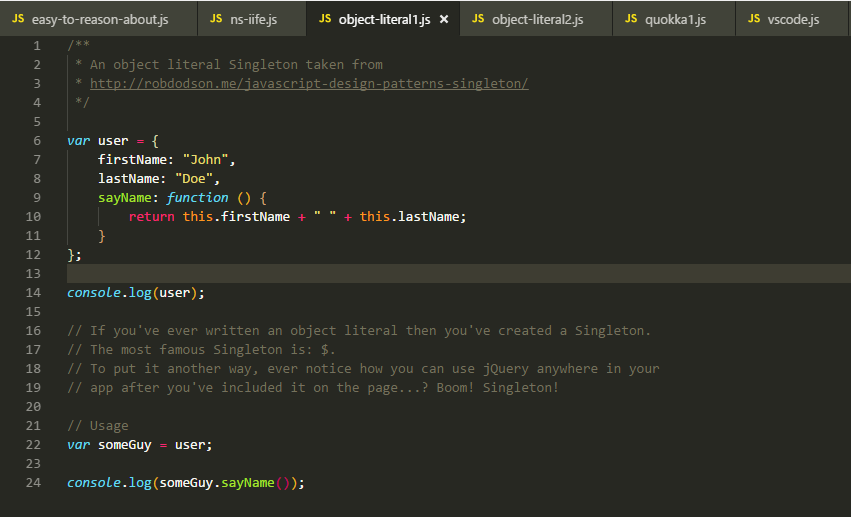
18. Npm, packages and scripts
Day 18: July 26, 2017 - Wednesday
Today’s Project(s): Set up a js project environment
Progress:
- set up a
package.jsonfile throughnpm init - added dev-only and runtime packages through
npm install --save-devandnpm install - used
npm uninstallandnpm update - created build, test, prepublish and flow scripts
- used
npm run
Link to work:
Thoughts: I love npm and its documentation. Organized well. Super simple. Intuitive.
17. Flow testing
Day 17: July 25, 2017 - Tuesday
Today’s Project(s):
- Flow JavaScript type checker
Progress:
- Completed installation & testing
Link to work:
Thoughts:
- Flow was put out by Facebook and it allows static type checking of JavaScript code as well as a deeper capability to make smart decisions by understanding the code at a deeper level.
16. ESLint testing
Day 16: July 24, 2017 - Monday
Today’s Project(s):
- ESLint - config, fine-tune, & test
Progress:
- installed globally and as a dev dependency
npm install -g eslint@latestnpm install eslint@latest --save-dev
- created
.eslintrc.jsonin script./srcdirectory and a global config in my home directoryeslint --init
- run
eslint a.js
- installed VSCode ESLint extension
- Test Playground: http://eslint.org/demo/
Link to work:
Thoughts: This was the third linter I tried and looks to be the most flexible. I like the extensibility capabilities and ability to choose between various different style guides.
15. JSHint testing
Day 15: July 23, 2017 - Sunday
Today’s Project(s):
- Linting with JSHint
Progress:
- installed globally
npm install -g jshint@latest
- created
.jshintrcin my home directory &./srcdirectory - run
jshint a.js
- installed VSCode JSHint extension
- http://jshint.com has a configurable code test playground on the homepage
Link to work:
Thoughts:
- Configuring JSHint required that I learn & understand the various JavaScript pitfalls developers run into so I can understand why each recommendation is made by JSHint. Things like no
for..initerators, use of thenewkeyword and"option strict"for functions. - http://jshint.com has a configurable code test playground on the homepage for quick code block tests
14. JSLint testing
Day 14: July 21, 2017 - Friday
Today’s Project(s):
- JSLint command line linting
Progress:
- Did an npm global install.
Link to work:
Thoughts: This is the granddaddy of them all and was originally written by Douglas Crockford in 2002 with the latest stable version released in 2011. It offers no config and is highly opinionated as to what “The Good Parts” are. See JavaScript: The Good Parts. Still, this is the staple linter to use if you are just starting out and want to see where it all began. Simple install. No configuration needed.
13. Jekyll Build Environment
Day 13: July 20, 2017 - Thursday
Today’s Last Week’s Project(s):
- Created Jekyll Build Environment on Ubuntu 16.04. This is for testing locally before committing changes to GitHub Pages.
Progress:
- Completed the following
- Spun up a Linux VM
- Installed, configured & updated Ubuntu
- Installed Nodejs, NPM, Git, Ruby, RubyGems, Bundle, Jekyll, Visual Studio Code & Chrome
- Cloned my Personal Page repo from GitHub
- Started Jekyll server -
bundle exec jekyll serve- this watches for changes to code or content and rebuilds the site when it detects any. It also runs a lightweight http server to view changes on the fly. Pretty cool! - Started local development & testing
Link to work:
- README.md from my Personal Page. This is the raw source that the template engine uses to build the site.
- Generated Site This is the Jekyll static site that’s generated on GitHub whenever I update, commit and push my README.md.
Thoughts:
- This was a good exercise in building a complete end-to-end dev solution.
- I started with
jekyll-theme-leap-day, one of GitHub’s officially supported templates and made modifications to the html, css, & javascript. - This also gave me a good opportunity to practice Bash shell scripting, npm package management and VS Code plug-in configuration
12. Finished jQuery on FCC
Day 12: July 12, 2017 - Wednesday
Today’s Project(s):
- Free Code Camp exercises - jQuery manipulation of DOM
Progress:
- Steady… I finished the jQuery section today
Link to work:
Thoughts:
- I’ve now finished up the following FCC sections:
- HTML5 and CSS
- Responsive Design with Bootstrap
- jQuery
- Next are the two Front End Development Projects to test the skills learned. These are:
- Build a Tribute Page
- Build a Personal Portfolio Webpage
11. Windows 10, Ubuntu 16.04, Jekyll, & GitHub Pages
Day 11: July 9, 2017 - Sunday
Today’s This Week’s Project(s):
- FCC Code Challenges
- Created GitHub personal page
- Cloned repo
- Followed this process: work locally, push changes, review & repeat…
- Decided to get the Jekyll static site generator runnung locally so I don’t have to push changes live in order to view/test them
- Docs said to enable Bash on Ubuntu on Windows 10… I’m running a highly customized Windows 8.1. 😣
- Upgraded VMware Workstation to version 12.5.7
- Upgraded virtual instance of Ubuntu 9.10 to 14.04
- this upgrade choked miserably and required lots of manual fixes
- had to fix bootloader
- reset passwords
- reinstall display drivers, etc…
- Installed FRESH copy of Ubuntu 16.04 in a VM - all went well 😅
- Installed a fresh copy of Windows 10 Pro Creators update in a VM - so far so good 😊
- Sync’d bookmarks across browsers (Chrome, FF, Edge, Safari) and platforms (Win, Linux, Mac) with Xmarks
- This plugin is awesome. It works with the synchronization that Google, Microsoft & Firefox do within their browsers but you have to turn off bookmark sync for theses and let Xmarks do the Bookmark sync. I run many VMs so this works great to keep everything in check.
- Windows 7 VM
- Streamlined OS - removed hibernation and paging. Returned them after defragmentation of virtual disk
- Uninstalled unnecessary applications, removed duplicate data and removed old snapshots for smaller disk footprint
- Reduced vmdk (virtual disk) size to reclaim space
- Ubuntu 16.04 VM
- Installed & updated all default packages
- installed vmware tools for host/guest OS integration
- apt-got git, ruby, rubygems, jekyll and nodejs 😉
- now I’m ready to clone my GitHub portfolio page and go to town
- Windows 10 VM
- Researched, installed, & configured OS features. Now I’m testing, modifying and evaluating.
- Holding off on upgrading host OS until I can make sure all 8.1 customizations will transfer/upgrade gracefully.
- Enabled Developer mode in VM hosted instance of Win 10
- Installed
Windows Subsystem for Linuxwhich is basically an Ubuntu-based Bash shell for Windows. Yay! 👏😍
Progress:
- Continued jQuery DOM manipulation exercises of FCC
- Started online portfolio / resume / profile on GitHub
Link to work:
- My FCC Code Portfolio
- My Online Resume and personal page: https://james-priest.github.io/
Thoughts:
- Getting my personal GitHub page going was way more involved than I thought it would be. To be fair, it’s very straight forward to choose a theme and set up a personal page on GitHub. Customizing requires a bit more. Here are the steps I took:
- Created a repo for my personal account profile page and named it
james-priest.github.io. - Went into Settings for that repo and turned on GitHub Pages and chose a theme.
- Modified the README.md
- Created a repo for my personal account profile page and named it
- So far so good! This would have been it if I didn’t need a higher level of customization. Fortunately, GitHub provides very clear docs on how to modify the CSS (scss), HTML, and create a local dev environment with Jekyll - a Ruby-based static site generator. This allows you to modify and preview without a commit to GitHub for each change. So here are the remaining steps:
- Upgrade my OS to Win10 to use the integrated bash shell
- Install ruby, gems, git & jekyll
- Clone repo & then it’s: modify (VS Code), build (Jekyll), test (local) & deploy (git)
- I’ll finish those this week.
10. GitHub Page for this log
Day 10: July 4, 2017 - Tuesday
Today’s Project(s):
- Created GitHub Page for this repo and code log
- Watched Intro to ASP.NET Core 1.1 on Microsoft Virtual Academy
Progress:
- Completed the setup of a GitHub Page for this log
- Got about halfway through Intro ASP.NET Core training
Link to work:
- 100 Days of Code Log GitHub Page (this page)
Thoughts:
Created the GitHub Page through GitHub. It uses Jekyll and one of the pre-built templates. It also add a yaml file. I may look into how to modify the template in order to correct for limited number of links on the sidebar as well as modification of the top nav bar
The Intro to ASP.NET Core class is great. It’s hosted by Scott Hanselman and Maria Naggaga. I love both of them. I can’t wait to finish the FCC Front End Development cert so I can switch to .NET Core Back End with C#.
9. JavaScript Array Methods
Day 9: July 2, 2017 - Sunday
Today’s Project(s):
- javascript-array-methods - Vanilla JavaScript project to show what each JS Array object method does
- FCC Code Challenges
Progress:
- Completed migration of javascript-array-methods v1.0.0 to GitHub
- Started jQuery selector section of FCC
Link to work:
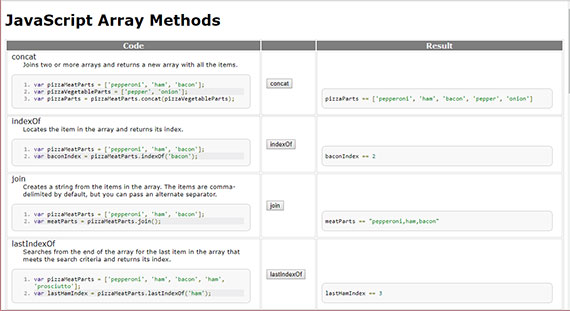
- JavaScript Array Methods on GitHub - click image to see demo
- My FCC Code Portfolio
Thoughts: Finally good to get the JavaScript Array Methods app up on GitHub. Next I need to modify it to use Bootstrap and Objects to hold data rather than arrays.
8. Code & Dev activities
Day 8: June 30, 2017 - Friday
Today’s Last Week’s Project(s):
- FCC Code Challenges
- Received and accepted an invitation to join DWYL on GitHub
- Added projects and people to my Stars & Following tabs on GitHub
- Signed up for Netlify - they host static sites through CLI deploy. npm install and deploy any repo
- Researched Back End learning path and decided on .NET Core since its going to be the high💲dollar💲 technology for 2018. Read the ASP.NET Core prediction about how it will be the next big thing. I also know & love the MS development environment.
- Retooled my dev environments:
- Updated Visual Studio 2017 to Enterprise and v15.2
- Got my VS Code plugins in line
- Installed notepad2 (great notepad replacement)
- Evaluated many of the Code Playgrounds out there to solve for two needs:
- having a place to test code as I go through tutorials
- having a place to organize and host samples of work
- Decided to set up a GitHub repo to contain my source code instead. I’ll still use JSBin for quick JS, ES6 and TypeScript tests.
- Created additional repos to migrate my test projects to:
- Researched Open Source Friday, FirstTimersOnly movement and [How to Contribute](https://opensource.guide/how-to-contribute/ “”) in Open Source
- Got caught in a rabbit hole of learning regarding JavaScript concepts, HTML5 api features & Google Web articles. Covered the following:
- Functional Composition
- Closures
- Hoisting
- Service Workers or Web Workers
- Promises
- App Cache, Local Storage, Sessions Storage, IndexedDB & Web SQL
- Chrome Dev Tools
- Researched Google’s Material Design
- Read through Google Codelabs - Your First PWA and Your First Offline Web App
- Read about CSS Grid vs. Flexbox
Progress:
- Completed Responsive Design with Bootstrap section of FCC! 😃
Link to work:
Thoughts: All this research and learning was great and necessary but it ate up another week’s worth of “code” time. I’m not worried about it though. I’ve come to the conclusion that it all moves me towards the same ends.
I also don’t trip on whether I’m doing a tutorial or coding something from scratch. It’s all development time and one usually proceeds the other if I’m going to employ the most effective learning style.
The one challenge I need to get in check is following through to the end of one project, learning path, or class with a single mindedness of purpose before getting distracted or caught up in another. I feel I might be missing something if I don’t investigate and dig deep into a concept I don’t fully understand. This is the thinking that gets me spread out with 10 browser instances of 20 open tabs each and then scrambling to keep it all straight. OneTab Chrome extension is great for this.
Bottom line is I’m making progress and learning how to organize and keep 10 plates spinning at any given time. The next soft skill to incorporate will be the concept of balance!
7. Bootstrap Responsive Design
Day 7: June 24, 2017 - Saturday
Today’s Project(s):
- FCC Code Challenges
Progress:
- Started Responsive Design with Bootstrap section of FCC
Link to work:
Thoughts: It’s easy for me to get distracted with any one of the six different projects I’m working on at the same time. I need to limit my WIP in order to make consistent headway.
6. Hoisting, Closures, and Module Patterns
Day 6: June 22, 2017 - Thursday
Today’s Project(s):
- FCC Code Challenges
- Learned about closures & module patterns in JavaScript
Progress:
- Finished the Gear Up for Success section of FCC (Joined FCC forum, Linked-In Alumni Network & Free Code Camp Group in Pasadena)
Link to work:
- My FCC Code Portfolio
- Understanding Hoisting in JavaScript
- What is a Closure
- JavaScript Module System Showdown: CommonJS vs AMD vs ES2015
Thoughts: I’m taking time to read about technologies, methodologies and language conventions. Right now it’s a jumble of information but I know eventually it will all start to click and make sense.
5. HTML & CSS in FreeCodeCamp
Day 5: June 20, 2017 - Tuesday
Today’s Project(s):
- FCC Code Challenges
Progress:
- Finished the HTML5 & CSS section
Link to work:
Thoughts: So I skipped 5 days of postings & tweets but still was productive in my studies. I spend 8-10 hours in front of the computer daily; sometimes its directly related to learning and code challenges but half the time it’s about reading about a new technology or configuring my dev environment or fine-tuning a process. It’s constant learning and applying that knowledge.
The key is to get and find efficiencies in your daily process and turn those into routine…
4. HTML5 Exercises
Day 4: June 15, 2017 - Thursday
Today’s Project(s):
- FCC Code Challenges
Progress:
- Completed some form element exercises
- Completed css class & id selectors
Link to work:
Thoughts: Today was a little light on the workload. It’s funny how I can spend ALL day on the computer do code-related activities without actually coding. :/ Go figure…
The important thing is that I did get something done and posted. I’m keeping it pushin…
3. My Personal Kanban
Day 3: June 14, 2017 - Wednesday
Today’s Project(s):
- Kanban board
- FCC Code Challenges
Progress:
- Got going on my Kanban board
Link to work:
Thoughts: This took a little while to get started on. I’m reading Personal Kanban by Jim Benson. Here’s a link to the companion site: Personal Kanban.
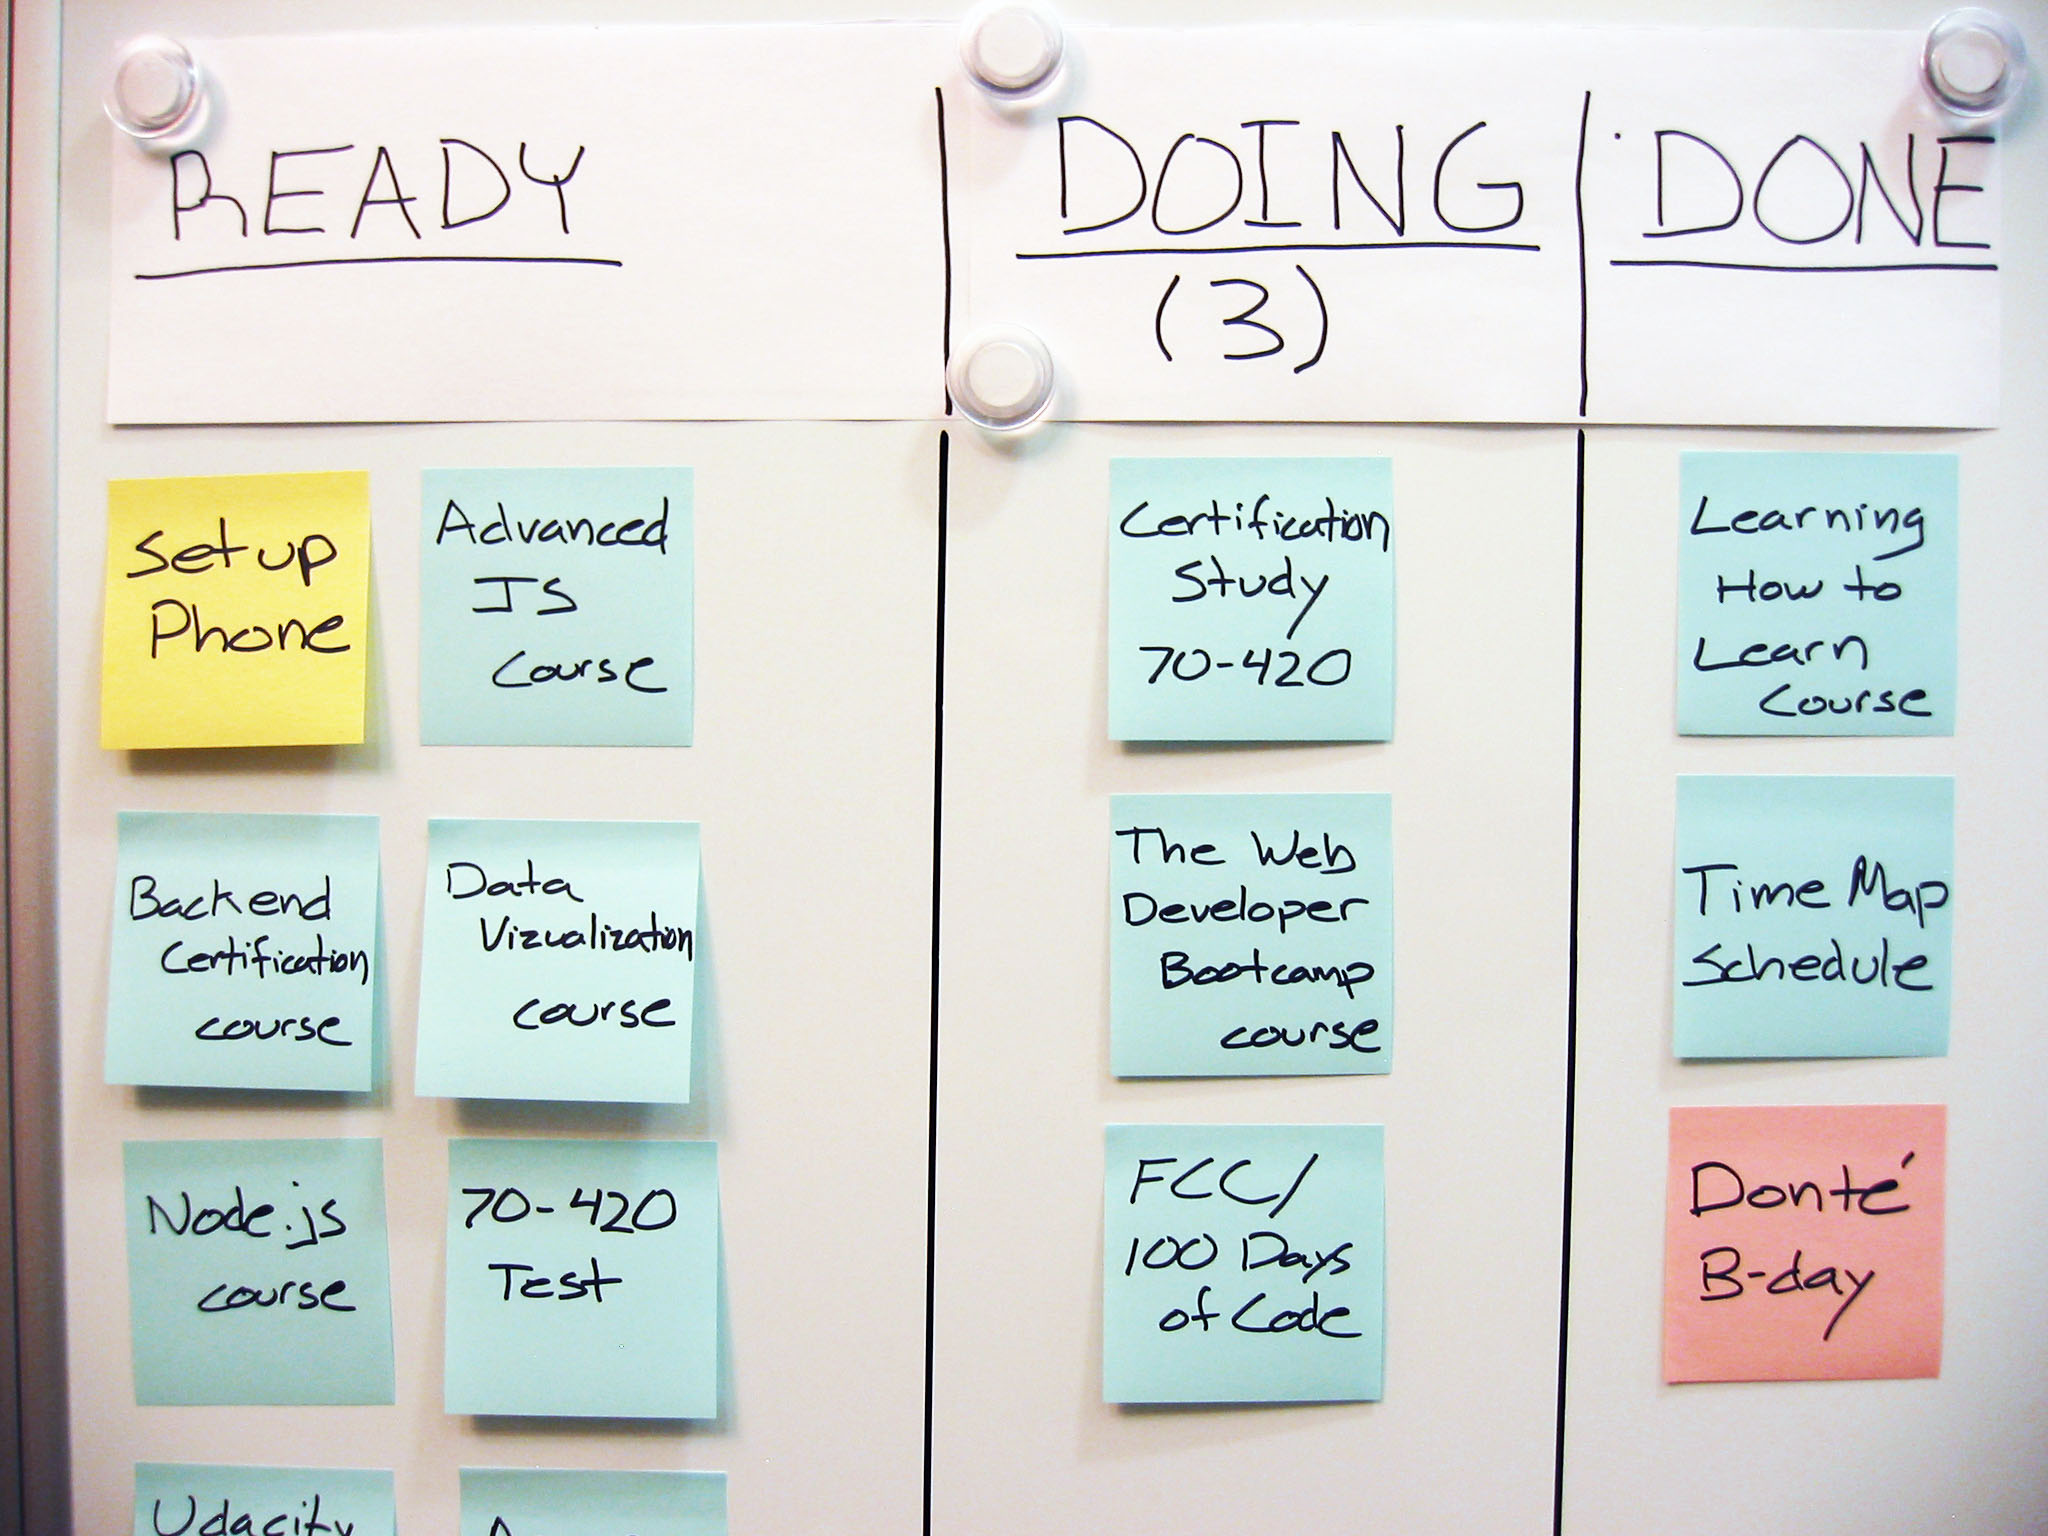
2. My Time Map
Day 2: June 13, 2017 - Tuesday
Today’s Project(s):
- Time Map - My Daily Code Schedule
- FCC Code Challenges
Progress:
- Wrapped up Time Map
Link to work:
Thoughts: Today’s work was more organizational and productivity-based in nature but necessary nonetheless. It took me a while to come up with an aggressive but reasonable schedule.
My goal is to do 4 Pomodoros for each two-hour Study block (in blue).
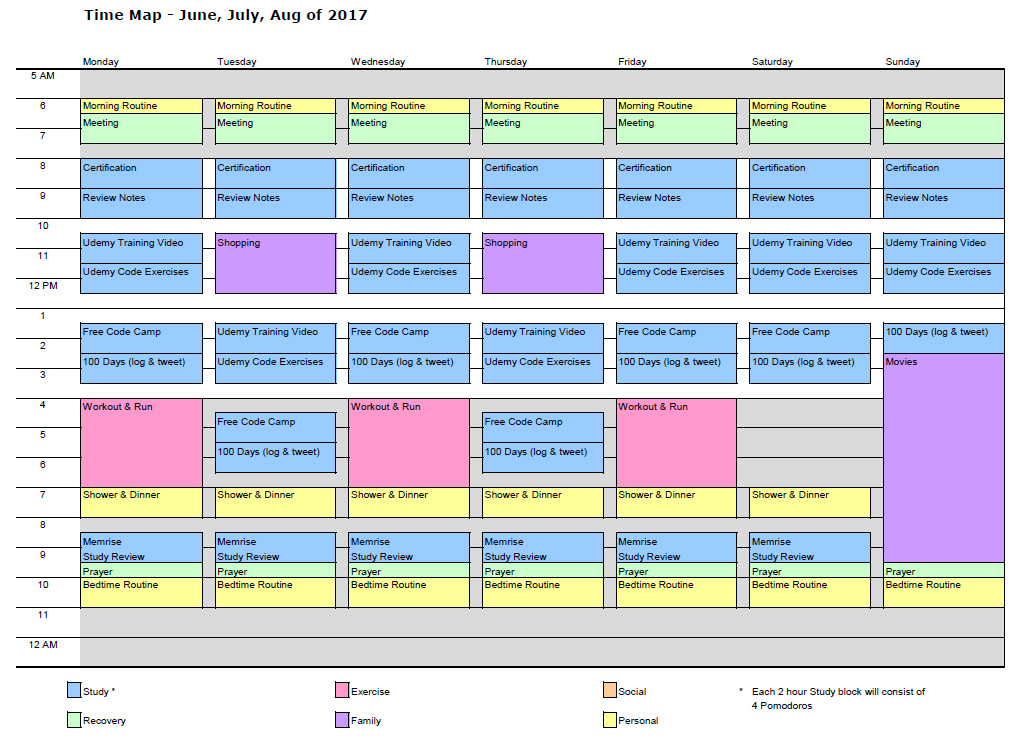
1. The Web Developer Bootcamp
Day 1: June 12, 2017 - Monday
Today’s Project(s):
- FCC Code Challenges
- Udemy’s The Web Developer Bootcamp course
Progress:
- More CSS on FCC
- set font styles
Link to work:
Thoughts: Signed up for Colt Steele’s The Web Developer Bootcamp course at Udemy today. I’m looking forward to using the bootcamp along side FCC as part of my dev program. Apparently folks are doing this with good results.
It’ll go something like this:
- Watch video
- Code the exercises myself
- Do FCC Code Challenges
- Update my 100 days of Code log and tweet my results
Pre-launch - Learning How to Learn in 4 weeks
Day 0: June 11, 2017 - Sunday
Today’s Project(s):
- FCC Code Challenges
- Learning How to Learn MOOC
Progress:
- More CSS
- set font styles
Link to work:
Thoughts: Finished Coursera’s Learning How to Learn and passed with 100% on my final exam!
Pre-launch - Learning How to Learn on Coursera
Day 0: June 10, 2017 - Saturday
Today’s Project(s):
- FCC Code Challenges
- Learning How to Learn MOOC
Progress:
- Worked on CSS
- Imported Google font
- set font styles
Link to work:
Thoughts: I’m wrapping up a great MOOC from Coursera called Learning How to Learn This in the top ten of all-time most popular MOOCs. I can’t recommend it enough for getting prep’d to do FCC or any other intensive development program, bootcamp or online course.
Pre-launch - GitHub, Twitter & Free Code Camp
Day 0: June 9, 2017 - Friday
Today’s Project(s):
- GitHub profile
- Twitter account
- FCC Profile
Progress: Prep work…Today was time spent on setup. This includes:
- Setup
- Forked the Official 100-days-of-code GitHub Repo
- Updated my GitHub profile (@james-priest)
- Got my Twitter account going (@james_priest1)
- Tweet’d my commitment to the 100-days-of-code challenge
Link to work:
- My GitHub 100-days-of-code-log
Thoughts: Glad to be starting this.