James Priest
100 Days of Code
| Round 1 | Round 2 | Round 3 | Round 4 | this log | Round 6 |
Challenge & Commitment
This is part of Alexander Kallaway’s 100DaysOfCode challenge. More details about the challenge can be found here: 100daysofcode.com.
Commitment: I will code daily for the next 100 days.
| Start Date | End Date |
|---|---|
| February 25, 2019 | June 26, 2019 |
Goals
- Code daily
- Successfully complete Udacity’s React Nanodegree program
Code Log
100. LinkedIn Skills & Endorsements
Day 100: June 26, 2019 - Wednesday
Project: Getting hired
Progress: Continued updating profile.
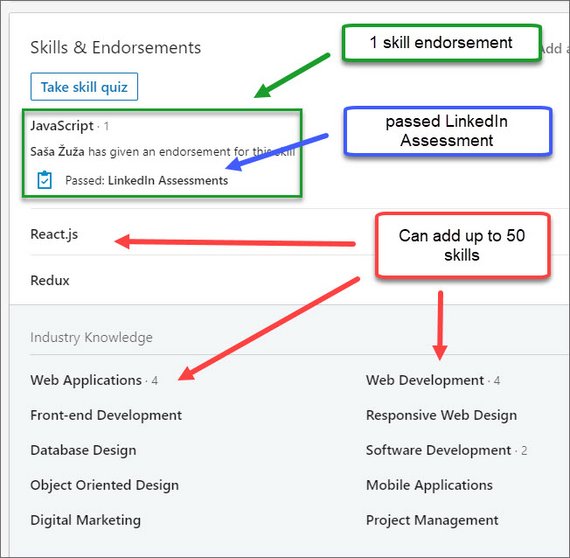
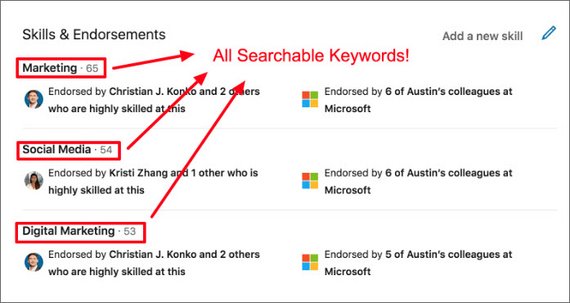
Next I leaned about how to increase profile view with Skills and Endorsements.
The skills you add play into the searchability of your profile. Those skills act as keywords and will help you show up at the top of search results.
Profiles with 5+ skills see 17x more profile views than people with less than five:
Links:
- How to Build an Amazing LinkedIn Profile - [15 proven tips] by Austin Belcak
- LinkedIn Profile - James Priest
99. LinkedIn Summary & Experience
Day 99: June 25, 2019 - Tuesday
Project: Getting hired
Progress: Continued updating profile.
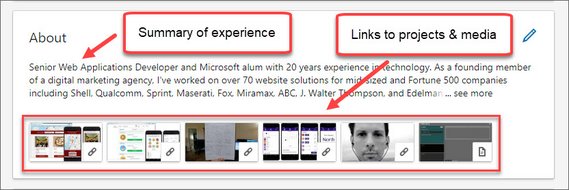
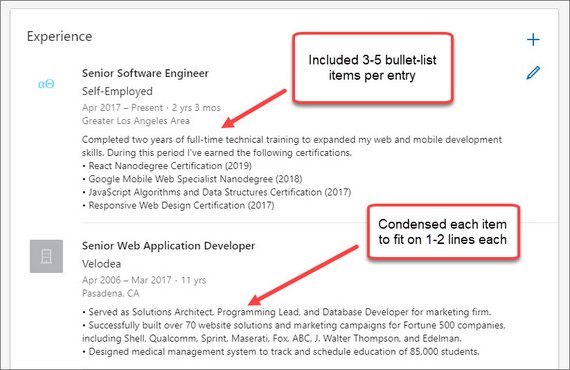
Next I used How to Build an Amazing LinkedIn Profile - [15 proven tips] as a guide to update the following sections.
- About
- Experience
- Education
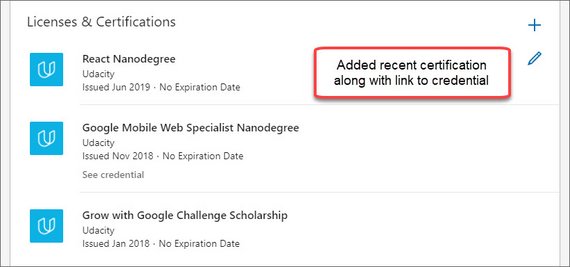
- Licenses & Certifications
Links:
- How to Build an Amazing LinkedIn Profile - [15 proven tips] by Austin Belcak
- LinkedIn Profile - James Priest
98. LinkedIn Profile Header
Day 98: June 24, 2019 - Monday
Project: Getting hired
Progress: Continued updating profile.
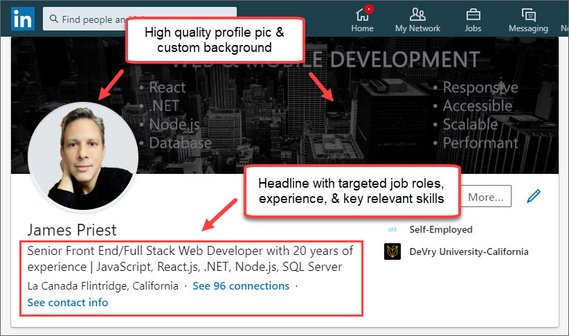
Next I worked on updating the following items from the How to Build an Amazing LinkedIn Profile - [15 proven tips] article.
- Profile image
- Background photo
- Headline
Here’s a statistic from the article:
The data also shows that profiles with custom profile pictures and cover photos see 21x more profile views, 9x more connection requests, and 36x more messages than people using defaults!
An optimized Headline with keywords pertaining to desired job role and skill set increases profile views and improves weighted relevancy when recruiters are searching on skill set.
Links:
- How to Build an Amazing LinkedIn Profile - [15 proven tips] by Austin Belcak
- LinkedIn Profile - James Priest
97. LinkedIn Profile Update
Day 97: June 23, 2019 - Sunday
Project: Getting hired
Progress: Started updating profile
Next I updated my LinkedIn Profile by going through the 15 steps detailed in the following article:
- How to Build an Amazing LinkedIn Profile - [15 proven tips] by Austin Belcak
The goal is to increase the number of profile views, contact requests, and job offers.
The way to do this is to build an awesome LinkedIn Profile that takes advantage of all the available sections and features but to also do it in a targeted and precise way.
It took me about a week to implement all the items the article recommends. This required getting clear about what I wanted to highlight and the kinds of jobs I want to target.
Links:
96. Website Portfolio Update
Day 96: June 22, 2019 - Saturday
Project: Getting hired
Progress: Completed portfolio section.
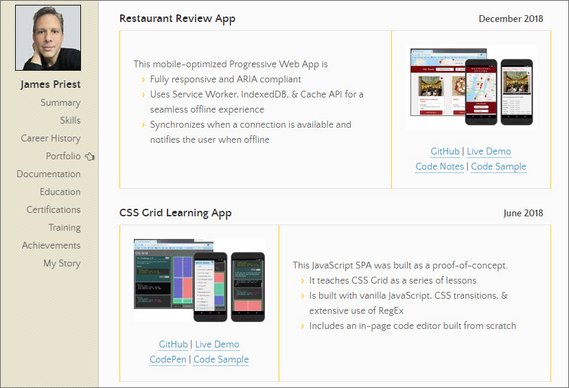
The next set of tasks towards getting hired was to update the portfolio section of my website.
First I made sure that each GitHub repository had a README in place so I could link to it.
I then created three bullet points for each project describing what the app does and what technologies were used to build it.
Lastly I included links to the following:
- GitHub
- Live Demo
- Code Notes
- Code Sample
Links:
95. Resume Makeover
Day 95: June 18, 2019 - Tuesday
Project: Getting hired
Progress: Completed resume makeover.
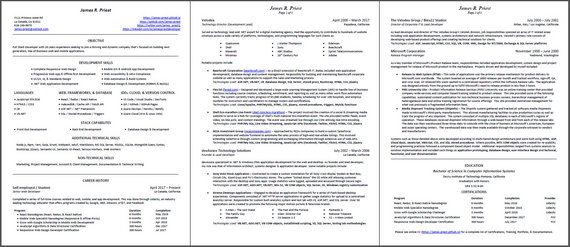
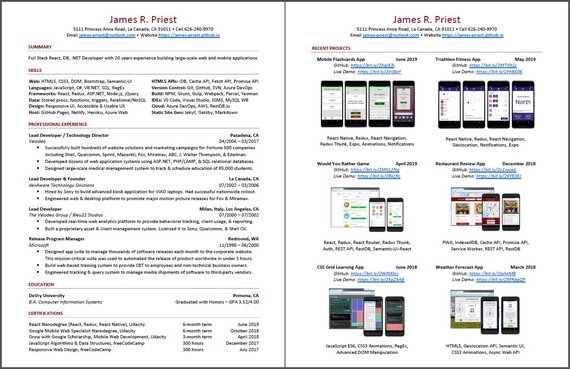
I had a three pages resume that was dense, hard to read, and overly complex. It needed to be condensed down to one page so hiring managers could quickly scan for relevant information.
This didn’t involve coding but it did involve distilling my skill set and experience into an easy to read format.
I took the three pages of information and put it on one page. I then showcased my most recent projects on the back as my second page.
I was told that hiring managers and head hunters spend no more than 30 seconds per resume. So you want to make it as easy as possible for them to get the information they need.
Links:
- Resume Old Format
- Resume New Format
94. Mobile Flashcards App Project Completed
Day 94: June 10, 2019 - Monday
Project: Udacity React Nanodegree Program
Progress: Continued React Native project for my React Nanodegree Program.
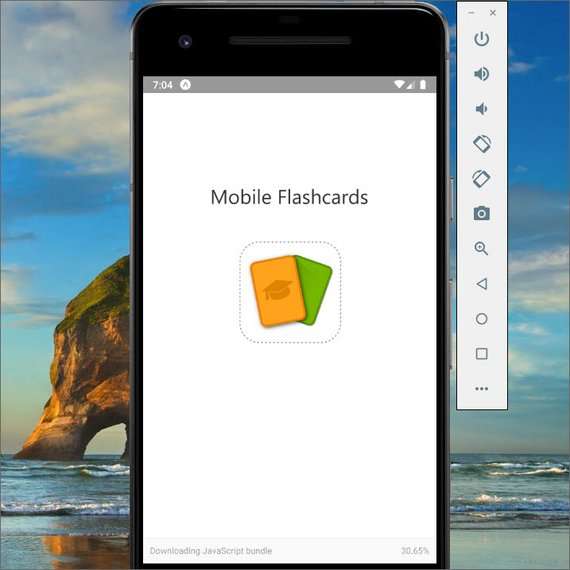
I submitted my app and completed the project! It got a great review and passed all the requirements on the first try.
Unfortunately, I turned in my final project 1 week late. Hopefully Udacity will allow me to graduate still.😬🙏
You can read more here: ReactND Project 3 - Mobile Flashcards - 8. Clean-up
Links:
- Code notes: ReactND Project 3 - Mobile Flashcards
- Course notes - Udacity React Native
- Link to Udacity React Nanodegree Program
93. Mobile Flashcards App Notifications
Day 93: June 9, 2019 - Sunday
Project: Udacity React Nanodegree Program
Progress: Continued React Native project for my React Nanodegree Program.
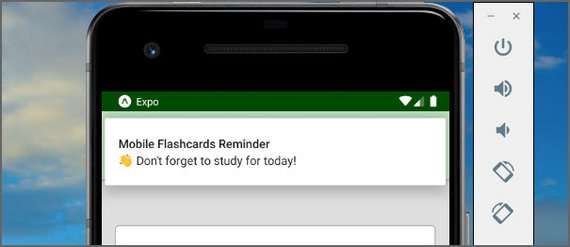
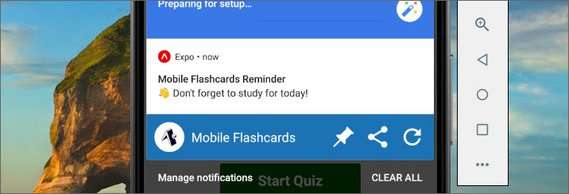
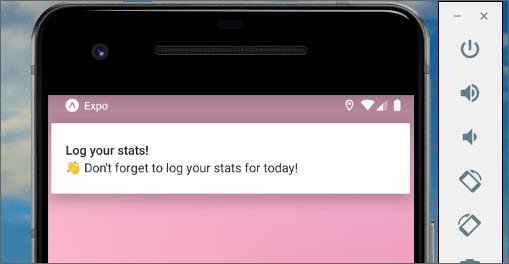
This step consisted of adding a daily notification reminder. It can be dismissed and resets itself once per day.
You can read more here: ReactND Project 3 - Mobile Flashcards - 7. Notifications
Links:
- Code notes: ReactND Project 3 - Mobile Flashcards
- Course notes - Udacity React Native
- Link to Udacity React Nanodegree Program
92. Mobile Flashcards App Add AsyncStorage
Day 92: June 8, 2019 - Saturday
Project: Udacity React Nanodegree Program
Progress: Continued React Native project for my React Nanodegree Program.
Added AsyncStorage to the app so that data changes will persist between sessions. This was added to:
- Create Deck
- Add Card to Deck
- Remove Deck
- Reset Deck
You can read more here: ReactND Project 3 - Mobile Flashcards - 6. AsyncStorage
Links:
- Code notes: ReactND Project 3 - Mobile Flashcards
- Course notes - Udacity React Native
- Link to Udacity React Nanodegree Program
91. Mobile Flashcards App Wire-up iOS Quiz
Day 91: June 7, 2019 - Friday
Project: Udacity React Nanodegree Program
Progress: Continued React Native project for my React Nanodegree Program.
This involved implementing a sliding control that closely resembled Android’s ViewPagerAndroid component.
I used ScrollView and manually implemented some of the following behavior
- horizontal scroll
- scroll snap
- automatic scroll on button click
You can read more here: ReactND Project 3 - Mobile Flashcards - 5.5 Quiz - iOS
Links:
- Code notes: ReactND Project 3 - Mobile Flashcards
- Course notes - Udacity React Native
- Link to Udacity React Nanodegree Program
90. Mobile Flashcards App Wire-up Android Quiz
Day 90: June 6, 2019 - Thursday
Project: Udacity React Nanodegree Program
Progress: Continued React Native project for my React Nanodegree Program.
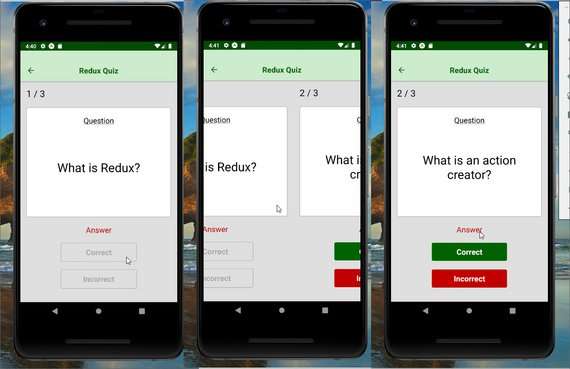
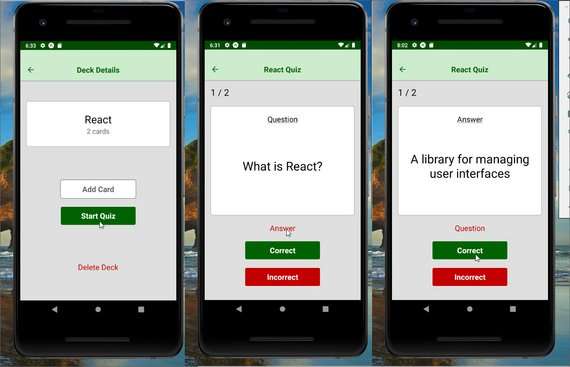
This section was more involved than other views and screens since it required managing the following
- local state
- paging/navigation
- score keeping
- validation
You can read more here: ReactND Project 3 - Mobile Flashcards - 5.4 Quiz - Android
Links:
- Code notes: ReactND Project 3 - Mobile Flashcards
- Course notes - Udacity React Native
- Link to Udacity React Nanodegree Program
89. Mobile Flashcards App Wire-up Add Card
Day 89: June 5, 2019 - Wednesday
Project: Udacity React Nanodegree Program
Progress: Continued React Native project for my React Nanodegree Program.
This part consisted of wiring up the AddCard component to the redux store.
I used
- mapStateToProps
- mapDispatchToProps
- React Navigation
You can read more here: ReactND Project 3 - Mobile Flashcards - 5.3 Add Card To Deck
Links:
- Code notes: ReactND Project 3 - Mobile Flashcards
- Course notes - Udacity React Native
- Link to Udacity React Nanodegree Program
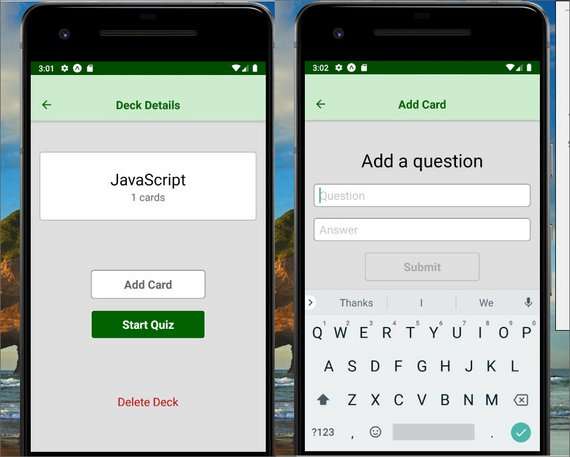
88. Mobile Flashcards App Wire-up Deck Details
Day 88: June 4, 2019 - Tuesday
Project: Udacity React Nanodegree Program
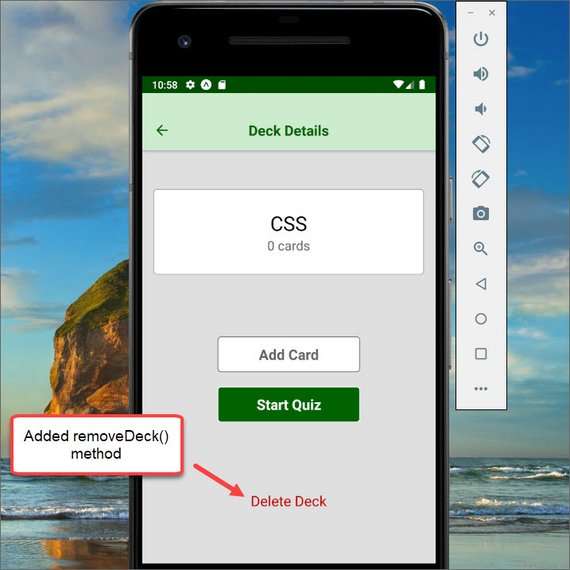
Deck Detail with Delete Deck wired-up
Progress: Continued React Native project for my React Nanodegree Program.
I had to refactor some code to properly handle the deletion of a store object from the detail page that displayed that data.
Needed to do the following:
- Update Deck component to handle ‘undefined’
deckprop - Update DeckDetail to use
shouldComponentUpdateand suppress update on undefined `deck object - Remove
IsRequiredfrom PropTypes definition
You can read more here: ReactND Project 3 - Mobile Flashcards - 5.2 Deck Details
Links:
- Code notes: ReactND Project 3 - Mobile Flashcards
- Course notes - Udacity React Native
- Link to Udacity React Nanodegree Program
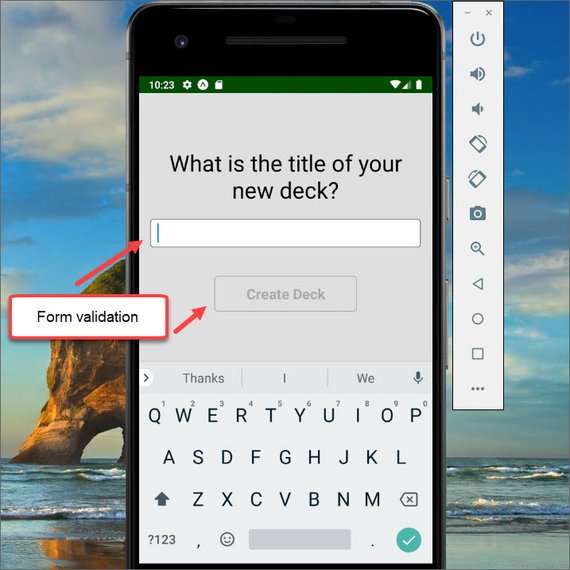
87. Mobile Flashcards App Wire-up Add Deck
Day 87: June 3, 2019 - Monday
Project: Udacity React Nanodegree Program
Progress: Continued React Native project for my React Nanodegree Program.
This part of the the development involves connecting the Redux store to my components.
This involved
- field validation to enable/disable submit
- using react-redux connect() method
- dispatching the addDeck action creator
- clearing state
- using react-navigation to navigate back in the stack
You can read more here: ReactND Project 3 - Mobile Flashcards - 5.1 Add Deck
Links:
- Code notes: ReactND Project 3 - Mobile Flashcards
- Course notes - Udacity React Native
- Link to Udacity React Nanodegree Program
86. Mobile Flashcards App Add Redux
Day 86: June 2, 2019 - Sunday
Project: Udacity React Nanodegree Program
Progress: Continued React Native project for my React Nanodegree Program.
I added Redux to my app including:
- Action creators
- Reducers
- Store Provider
- Data initialization using Redux Thunk
Now the home screen is being populated with actual data.
You can read more here: ReactND Project 3 - Mobile Flashcards - 4. Redux
Links:
- Code notes: ReactND Project 3 - Mobile Flashcards
- Course notes - Udacity React Native
- Link to Udacity React Nanodegree Program
85. Mobile Flashcards App Navigation Part 2
Day 85: June 1, 2019 - Saturday
Project: Udacity React Nanodegree Program
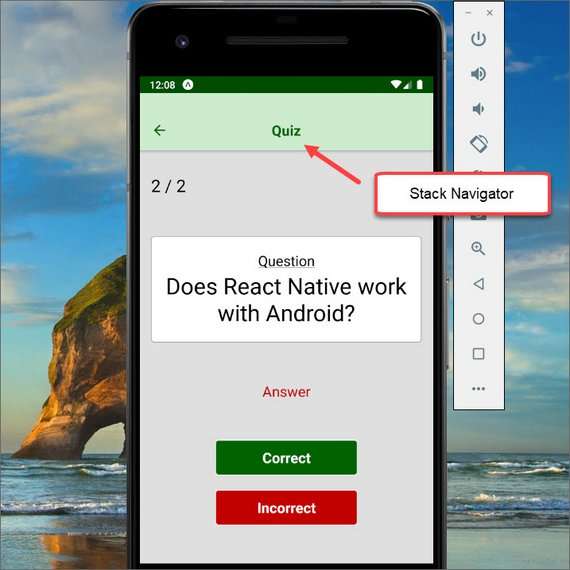
Mobile Flashcards Stack Navigation
Progress: Continued React Native project for my React Nanodegree Program.
I completed the navigation for this app. I did the following:
- Added stack navigators to display the remaining screens
- Updated styling for better layout & UX
You can read more here: ReactND Project 3 - Mobile Flashcards - 3.4 AddCard Navigator
Links:
- Code notes: ReactND Project 3 - Mobile Flashcards
- Course notes - Udacity React Native
- Link to Udacity React Nanodegree Program
84. Mobile Flashcards App Navigation Part 1
Day 84: May 31, 2019 - Friday
Project: Udacity React Nanodegree Program
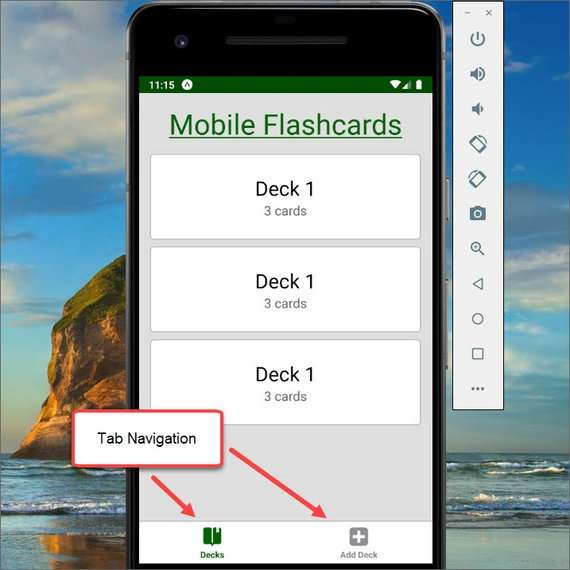
Mobile Flashcards Tab Navigation
Progress: Continued React Native project for my React Nanodegree Program.
Today I started implementing the navigation for this app. I did the following:
- Added two tabs as part of the tab navigator
- Added two stack navigators to display different screens within a tab
You can read more here: ReactND Project 3 - Mobile Flashcards - 3. Navigation
Links:
- Code notes: ReactND Project 3 - Mobile Flashcards
- Course notes - Udacity React Native
- Link to Udacity React Nanodegree Program
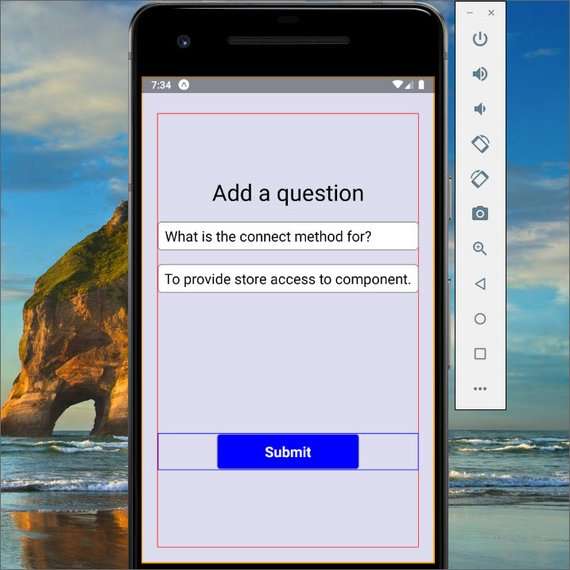
83. Mobile Flashcards App Views Part 2
Day 83: May 30, 2019 - Thursday
Project: Udacity React Nanodegree Program
Progress: Continued React Native project for my React Nanodegree Program.
I finished creating the different views for this app. This adds the following screens:
- AddQuestion
- Quiz
- Question
- Answer
- Results
You can read more here: ReactND Project 3 - Mobile Flashcards - 2.4 AddCard
Links:
- Code notes: ReactND Project 3 - Mobile Flashcards
- Course notes - Udacity React Native
- Link to Udacity React Nanodegree Program
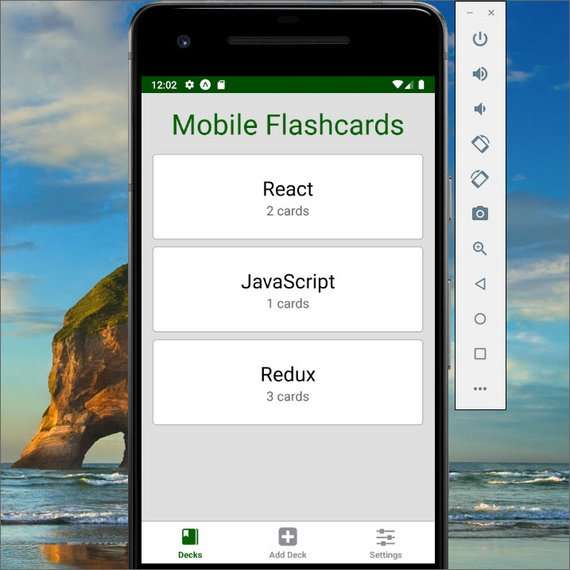
82. Mobile Flashcards App Views Part 1
Day 82: May 29, 2019 - Wednesday
Project: Udacity React Nanodegree Program
Progress: Continued React Native project for my React Nanodegree Program.
I started creating the different views for this app. These have borders around each section for visual display & alignment.
So far I have the following screens:
- DeckList
- AddDeck
- DeckDetail
I have the following components:
- Deck
- TextButton
- TouchButton
You can read more here: ReactND Project 3 - Mobile Flashcards - 2. Views
Links:
- Code notes: ReactND Project 3 - Mobile Flashcards
- Course notes - Udacity React Native
- Link to Udacity React Nanodegree Program
81. Mobile Flashcards App Data & API Methods
Day 81: May 28, 2019 - Tuesday
Project: Udacity React Nanodegree Program
Progress: Continued React Native project for my React Nanodegree Program.
I added various API methods to manipulate data through the use of AsyncStorage.
The methods created are:
getDecks: return all of the decks along with their titles, questions, and answers.getDeck: take in a single id argument and return the deck associated with that id.saveDeckTitle: take in a single title argument and add it to the decks.addCardToDeck: take in two arguments, title and card, and will add the card to the list of questions for the deck with the associated title.
You can read more here: ReactND Project 3 - Mobile Flashcards - 1.5 Helper Methods
Links:
- Code notes: ReactND Project 3 - Mobile Flashcards
- Course notes - Udacity React Native
- Link to Udacity React Nanodegree Program
80. Mobile Flashcards App Requirements
Day 80: May 27, 2019 - Monday
Project: Udacity React Nanodegree Program
Progress: Started React Native project for my React Nanodegree Program.
I finally started the last project required to get my React Nanodegree. This is a mobile app that allows you to create decks of flashcards to test yourself with.
I had a hard time starting this one but am hoping I can get it done in the next 5 days. That will be ambitious since it needs run on both Android and iOS.
It will consist of the following:
- React Native
- 5-6 app screens
- Expo Managed build system
- React Navigation
- Redux state management
You can read more here: ReactND Project 3 - Mobile Flashcards - 1. Project Requirements
Links:
- Code notes: ReactND Project 3 - Mobile Flashcards
- Course notes - Udacity React Native
- Link to Udacity React Nanodegree Program
79. React Native App Store Preparation
Day 79: May 19, 2019 - Sunday
Project: Udacity React Nanodegree Program
Progress: Continued React Native course for my React Nanodegree Program.
Today I learned about how build both iOS and Android bundle files.
You can read more here: Udacity React Native - 5.6 App Store Preparation
Links:
- Course notes - Udacity React Native
- Link to Udacity React Nanodegree Program
78. React Native Animations & Notifications
Day 78: May 18, 2019 - Saturday
Project: Udacity React Nanodegree Program
Progress: Continued React Native course for my React Nanodegree Program.
Today I learned about two React Native libraries.
- Animated
- Notifications
These allow React Native to use the device’s notification system and allow animations and transitions between screens and elements.
You can read more here: Udacity React Native - 5.3 Animations
Links:
- Course notes - Udacity React Native
- Link to Udacity React Nanodegree Program
77. React Native Location
Day 77: May 17, 2019 - Friday
Project: Udacity React Nanodegree Program
Progress: Continued React Native course for my React Nanodegree Program.
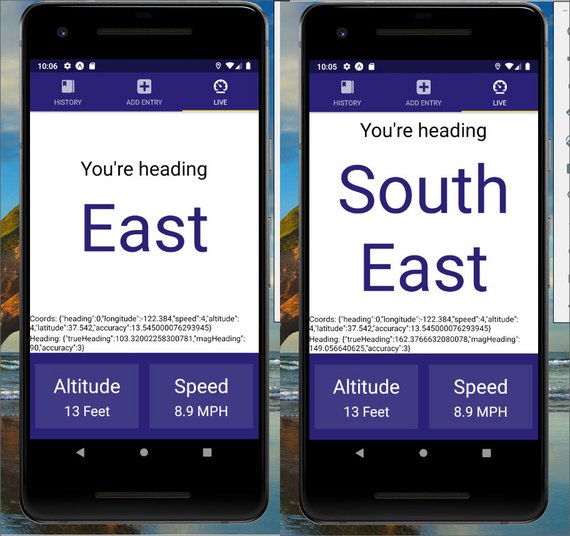
Today I learned about Location services available on React Native through Expo.
This allowed me to access:
- location coordinates
- heading
- speed
- altitude
You can read more here: Udacity React Native - 5.2 Geolocation
Links:
- Course notes - Udacity React Native
- Link to Udacity React Nanodegree Program
76. React Native Live Tab
Day 76: May 16, 2019 - Thursday
Project: Udacity React Nanodegree Program
Progress: Continued React Native course for my React Nanodegree Program.
The next section of the course deals with features that are native to each device. These are things like:
- Geolocation
- Animations
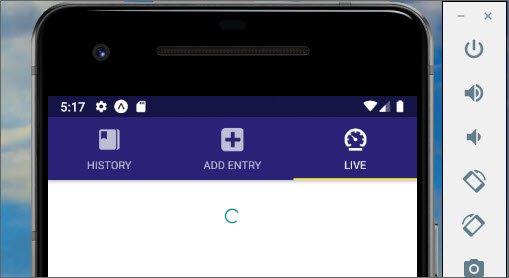
- Notifications
- Photos
This first step involved creating a tab to test these features.
You can read more here: Udacity React Native - 5. Native Features
Links:
- Course notes - Udacity React Native
- Link to Udacity React Nanodegree Program
75. Native Stack Navigator
Day 75: May 15, 2019 - Wednesday
Project: Udacity React Nanodegree Program
Progress: Continued React Native course for my React Nanodegree Program.
This portion of the app required me to do the following:
- Add a Stack Navigator
- Combine it with my Tab Navigator
- Implement navigation from various screens
You can read more here: Udacity React Native - 4.8 Stack Navigator
Links:
- Course notes - Udacity React Native
- Link to Udacity React Nanodegree Program
74. React Native Status Bar
Day 74: May 14, 2019 - Tuesday
Project: Udacity React Nanodegree Program
Progress: Continued React Native course for my React Nanodegree Program.
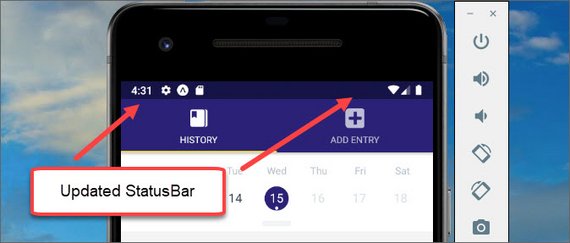
Today I learned about how to style and control the display of the status bar for both Android and iOS devices
You can read more here: Udacity React Native - 4.6 Status Bar
Links:
- Course notes - Udacity React Native
- Link to Udacity React Nanodegree Program
73. Android Tab Navigator
Day 73: May 13, 2019 - Monday
Project: Udacity React Nanodegree Program
Progress: Continued React Native course for my React Nanodegree Program.
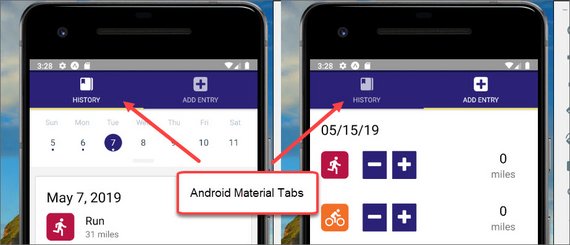
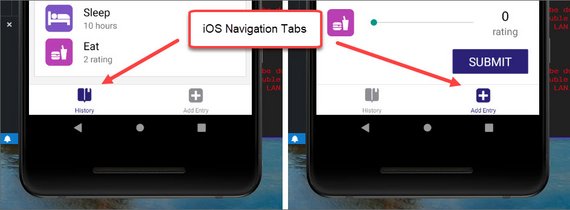
Today I changed the tab implementation so that is uses Material Tab Navigator for Android and iOS tabs navigator for iOS.
The code then checks to see what platform the app is running on to know what UI component to show.
You can read more here: Udacity React Native - 4.5 Implement Tabs
Links:
- Course notes - Udacity React Native
- Link to Udacity React Nanodegree Program
72. Native Tab Navigator
Day 72: May 12, 2019 - Sunday
Project: Udacity React Nanodegree Program
Progress: Continued React Native course for my React Nanodegree Program.
Today I implemented tab navigation on my Triathlon app. I learned how to do the following:
- Set
navigationOptionsobject for each screen - Create
taBarOptionsand tab screens forcreateBottomTabNavigatormethod - Use
createAppContainerto output a component
You can read more here: Udacity React Native - 4.4 Tab Navigator
Links:
- Course notes - Udacity React Native
- Link to Udacity React Nanodegree Program
71. Stack Navigator Test
Day 71: May 11, 2019 - Saturday
Project: Udacity React Nanodegree Program
Progress: Continued React Native course for my React Nanodegree Program.
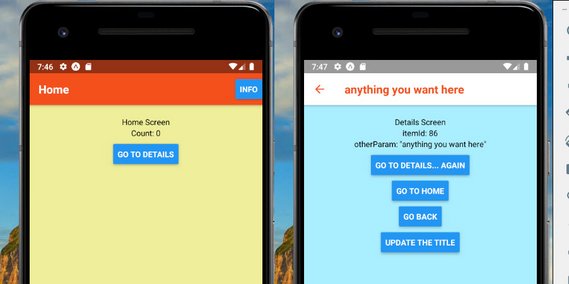
I spent the day going through the Getting Started section of the React Navigation docs.
This showed how to build the basics of a Stack Navigator. Also learned how to:
- Style the navbar
- Pass parameters
- Use
createStackNavigator&createAppContainermethods
You can read more here: Udacity React Native - 4. Navigation
Links:
- Course notes - Udacity React Native
- Link to Udacity React Nanodegree Program
70. React Navigation
Day 70: May 10, 2019 - Friday
Project: Udacity React Nanodegree Program
Progress: Continued React Native course for my React Nanodegree Program.
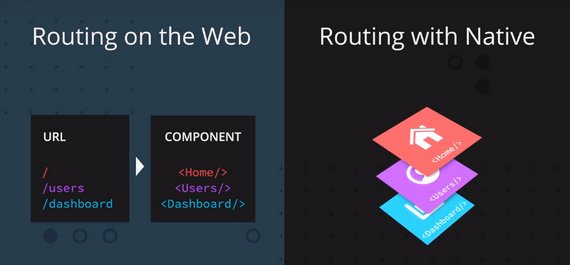
Today I started learning about the React Navigation library for Native. It uses route stacks where a route is pushed or popped off the stack.
You can read more here: Udacity React Native - 4. Navigation
Links:
- Course notes - Udacity React Native
- Link to Udacity React Nanodegree Program
69. Triathlon RN App
Day 69: May 9, 2019 - Thursday
Project: Udacity React Nanodegree Program
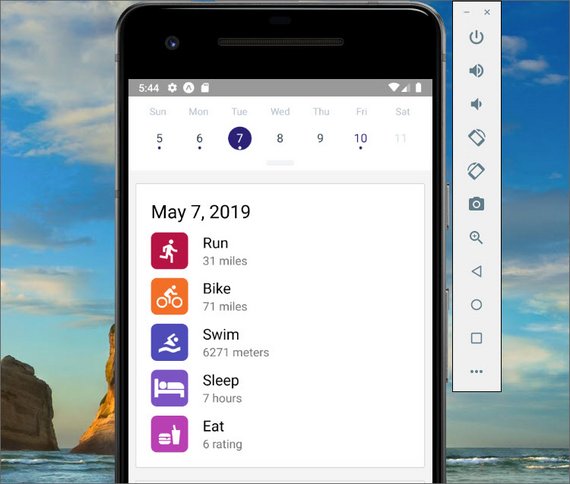
React Native History Component
Progress: Continued React Native course for my React Nanodegree Program.
In this lesson I built out the MetricCard Component and styled the UI for each day display.
I also learned about Styled Components and other CSS in JS Libraries.
You can read more here: Udacity React Native - 3.7 History Styling
Links:
- Course notes - Udacity React Native
- Link to Udacity React Nanodegree Program
68. React Native Calendar
Day 68: May 8, 2019 - Wednesday
Project: Udacity React Nanodegree Program
Progress: Continued React Native course for my React Nanodegree Program.
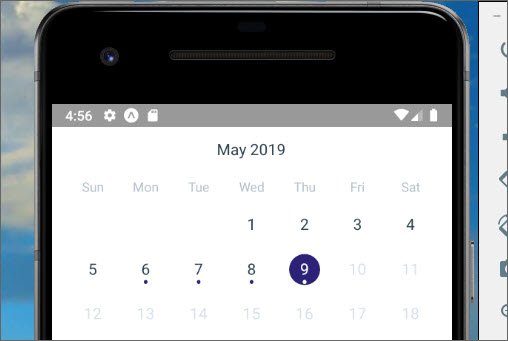
In this lesson I implemented a calendar control that allows me to select a day and associate data to that selected day.
In addition I was able to output the JSON data for that day to the screen.
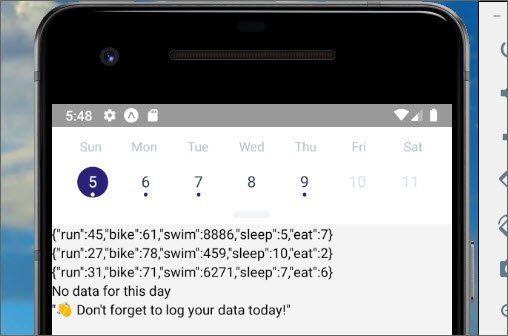
React Native Calendar JSON data
You can read more here: Udacity React Native - 3.5 Calendar History
Links:
- Course notes - Udacity React Native
- Link to Udacity React Nanodegree Program
67. React Native Flexbox
Day 67: May 7, 2019 - Tuesday
Project: Udacity React Nanodegree Program
Progress: Continued React Native course for my React Nanodegree Program.
In this lesson I implemented styles on my app components. It covered the following:
- Layout
- Buttons
- Sliders
- Text
- Icons
You can read more here: Udacity React Native - 3.3 Layout in React Native
Links:
- Course notes - Udacity React Native
- Link to Udacity React Nanodegree Program
66. React Native Layout
Day 66: May 6, 2019 - Monday
Project: Udacity React Nanodegree Program
Progress: Continued React Native course for my React Nanodegree Program.
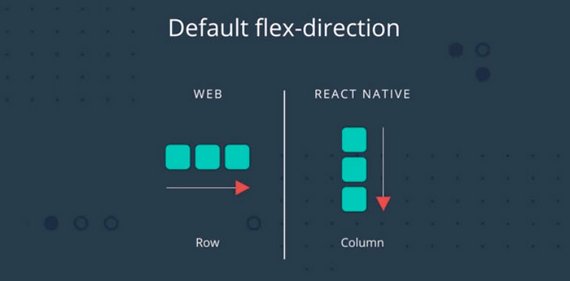
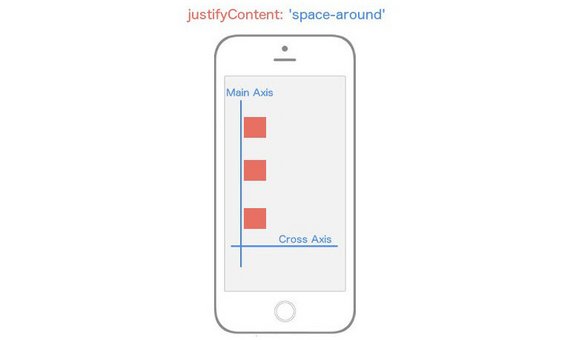
In this lesson I learned about CSS in JS for styling and flexbox for layout. It covered the following:
StyleSheet.create()- Flex Direction
- Justify Content
- Align Items
- Stretch
- Centering Content
- Aligning individual items
You can read more here: Udacity React Native - 3. Styling & Layout
Links:
- Course notes - Udacity React Native
- Link to Udacity React Nanodegree Program
65. React Native & Redux
Day 65: May 5, 2019 - Sunday
Project: Udacity React Nanodegree Program
Progress: Continued React Native course for my React Nanodegree Program.
In this lesson I learned about AsyncStorage and combining Redux with React Native.
This works pretty much as is does with React for the web. There were some package dependency issues that had to be resolved but overall it worked fine.
AsyncStorage works like browser localStorage API.
Here’s a list of items added
- Actions
- Reducers
- Connect, mapStateToProps, & mapDispatch shorthand
You can read more here: Udacity React Native - 2.12 AsyncStorage
Links:
- Course notes - Udacity React Native
- Link to Udacity React Nanodegree Program
64. React Native Lists & Forms
Day 64: May 4, 2019 - Saturday
Project: Udacity React Nanodegree Program
Progress: Continued React Native course for my React Nanodegree Program.
This lesson introduced the following:
- Lists
- ScrollView
- FlatList
- SectionList
- Forms
- TextInput
- KeyboardAvoidingView
- Switch
- Images
- Local
- Remote
You can read more here: Udacity React Native - 2.11 Lists, Forms, Images
Links:
- Course notes - Udacity React Native
- Link to Udacity React Nanodegree Program
63. React Native Sliders
Day 63: May 3, 2019 - Friday
Project: Udacity React Nanodegree Program
Progress: Continued React Native course for my React Nanodegree Program.
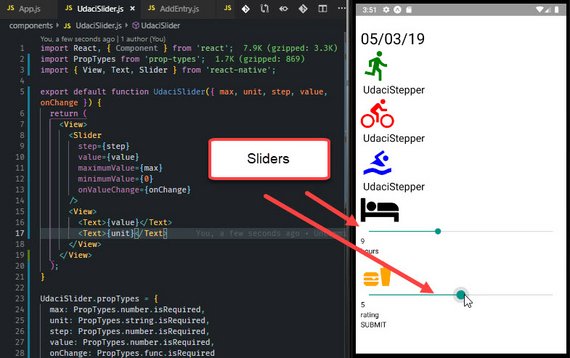
I continued building out the AddEntry component for this Triathlon Tracker app. I added the following:
- Sliders
- Range Steppers
- Buttons
You can read more here: Udacity React Native - 2.10 Update Components
Links:
- Course notes - Udacity React Native
- Link to Udacity React Nanodegree Program
62. React Native Icons
Day 62: May 2, 2019 - Thursday
Project: Udacity React Nanodegree Program
Progress: Continued React Native course for my React Nanodegree Program.
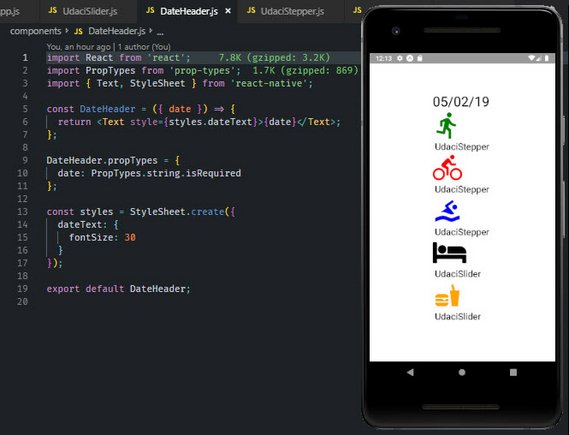
I started building out the component scaffolding for the Triathlon App. So far I have the following components:
- AddEntry page
- Stepper control stub
- Slider control stub
- DateHeader
- Icons
You can read more here: Udacity React Native - 2.6 AddEntry Component
Links:
- Course notes - Udacity React Native
- Link to Udacity React Nanodegree Program
61. RN Triathlon Tracker
Day 61: May 1, 2019 - Wednesday
Project: Udacity React Nanodegree Program
Progress: Continued React Native course for my React Nanodegree Program.
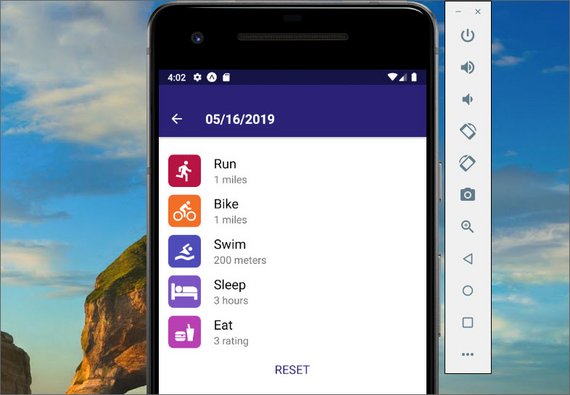
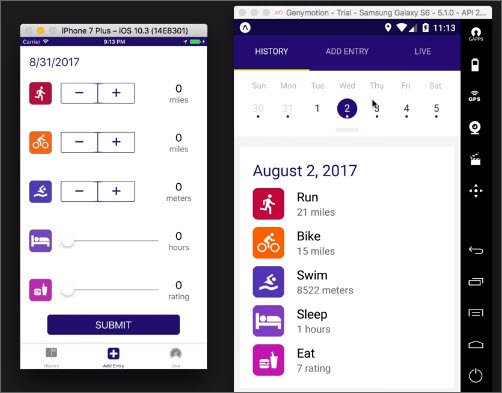
This is the project I’ll build as during this course. It’s a Triathlon Tracker that will allow me to track activity in the following categories:
- Run
- Bike
- Swim
- Sleep
- Eat
You can read more here: Udacity React Native - 2 React vs React Native
Links:
- Course notes - Udacity React Native
- Link to Udacity React Nanodegree Program
60. React Native Debugging
Day 60: April 30, 2019 - Tuesday
Project: Udacity React Nanodegree Program
Progress: Continued React Native course for my React Nanodegree Program.
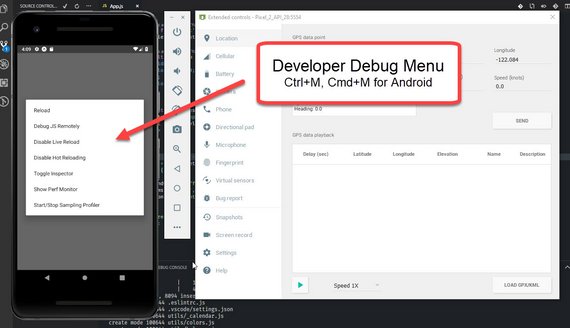
I spent the day learning about debug capabilities in React Native apps. Here’s a short list of the items I worked on:
- Set up an Android Device Emulator
- Learned about Expo Developer Tools
- Explored Remote JS Debugging
- Inspecting UI Elements
- App Reload
You can read more here: Udacity React Native - 1.4 Using the Debugger
Links:
- Course notes - Udacity React Native
- Link to Udacity React Nanodegree Program
59. React Native Dev Setup
Day 59: April 29, 2019 - Monday
Project: Udacity React Nanodegree Program
Progress: Continued React Native course for my React Nanodegree Program.
The last tow days was spend setting up a dev environment. I wanted to use an emulator on my machine rather than my phone. This required extra steps.
- Install Expo-CLI for React Native development
- Install Java SDK & Android Studio
- Install additional dependency packages
- Create Virtual Device
- Enable Live Reload & Hot Reloading
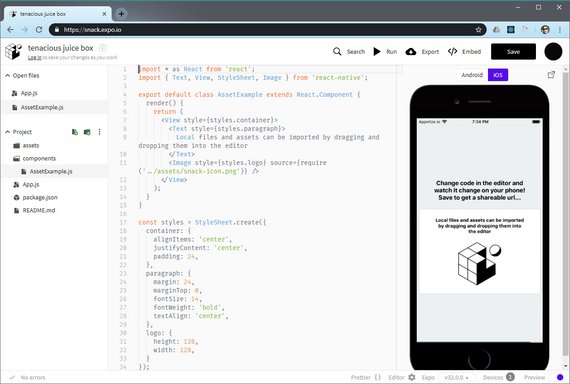
Alternatively, you can use a web-based tool called Expo Snack which allows development in the browser. You are limited with the amount of time you have available to use the in-screen emulator.
You can read more here: Udacity React Native - 1.3 Dev Environment Setup
Links:
- Course notes - Udacity React Native
- Link to Udacity React Nanodegree Program
58. React Native Explained
Day 58: April 28, 2019 - Sunday
Project: Udacity React Nanodegree Program
Progress: Continued React Native course for my React Nanodegree Program.
This section discussed the ways in which React and React Native share similarities.
Some of the benefits include:
- Leverage JavaScript & React to build apps for both iOS & Android
- Ability to have a single team write for both iOS & Android platforms
- Ability for RN apps to compile down to native app code
You can read more here: Udacity React Native - 1.2 What is React Native
Links:
- Course notes - Udacity React Native
- Link to Udacity React Nanodegree Program
57. React Native
Day 57: April 27, 2019 - Saturday
Project: Udacity React Nanodegree Program
Progress: Started React Native course for my React Nanodegree Program.
Today covered what the React Native course would consist of including:
- Dev environment setup
- Ideological & API differences from React
- Styling & layout patterns
- Routing patterns
- Native functionality
You can read more here: Udacity React Native - 1.1 Course Intro
Links:
- Course notes - Udacity React Native
- Link to Udacity React Nanodegree Program
56. React/Redux Polling App Project Completed
Day 56: April 26, 2019 - Friday
Project: Udacity React Nanodegree Program
Progress: Completed React/Redux project for my React Nanodegree Program.
I completed and cleaned-up the code to be able to submit this project. Last minute items including:
- Checked functionality against requirements & rubric
- Removed all debug & console.log() code
- Updated README & documentation & posted to GitHub
You can read more here: ReactND Project 2 - Would You Rather - 5. Project Submission
Links:
- Live Demo: Would You Rather on Netlify
- CodeSandbox: Would You Rather App@13-application-design
- Code notes - ReactND Project 2 - Would You Rather
- Course notes - Udacity React & Redux
- Link to Udacity React Nanodegree Program
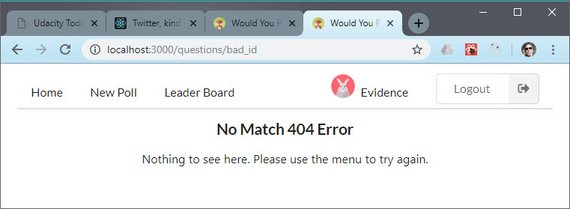
55. React/Redux Polling App No Match 404 Route
Day 55: April 25, 2019 - Thursday
Project: Udacity React Nanodegree Program
Progress: Continued React/Redux project for my React Nanodegree Program.
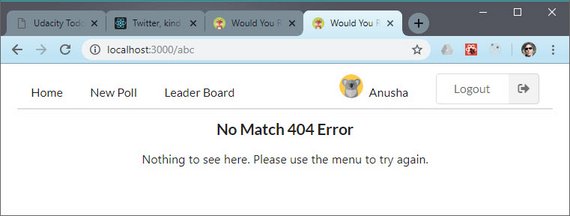
Today I wrapped up the final required piece for my project submission. This involved the following.
- Creating a NoMatch component
- Updating Routing in App
- Using React Router Redirect on bad id matches
You can read more here: ReactND Project 2 - Would You Rather - 4.13 No Match 404 Routing
Links:
- Live Demo: Would You Rather on Netlify
- CodeSandbox: Would You Rather App@13-application-design
- Code notes - ReactND Project 2 - Would You Rather
- Course notes - Udacity React & Redux
- Link to Udacity React Nanodegree Program
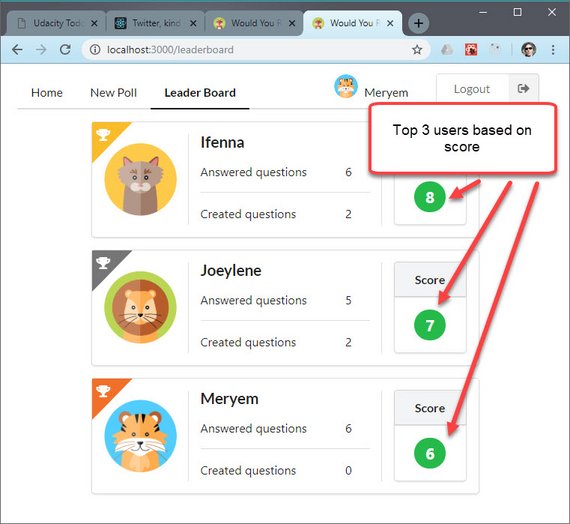
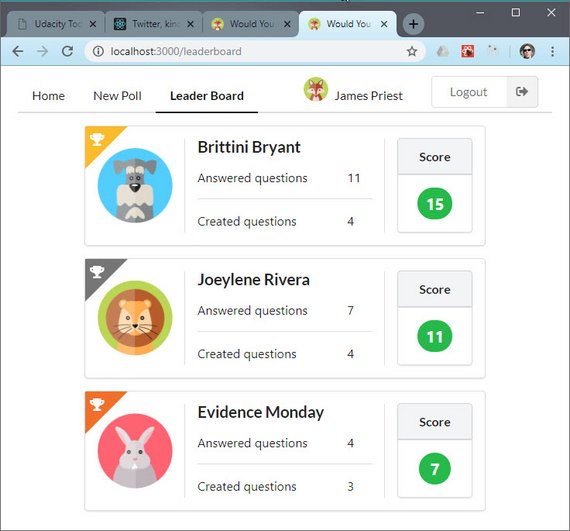
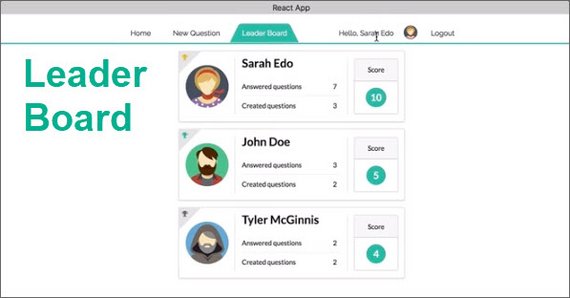
54. React/Redux Polling App Leaderboard View
Day 54: April 24, 2019 - Wednesday
Project: Udacity React Nanodegree Program
Progress: Continued React/Redux project for my React Nanodegree Program.
I completed the Leaderboard view which had a long chain of data transformations including:
- Object.values()
- map()
- sort()
- reverse()
- slice()
You can read more here: ReactND Project 2 - Would You Rather - 4.12 Display Leaderboard
Links:
- Live Demo: Would You Rather on Netlify
- CodeSandbox: Would You Rather App@13-application-design
- Code notes - ReactND Project 2 - Would You Rather
- Course notes - Udacity React & Redux
- Link to Udacity React Nanodegree Program
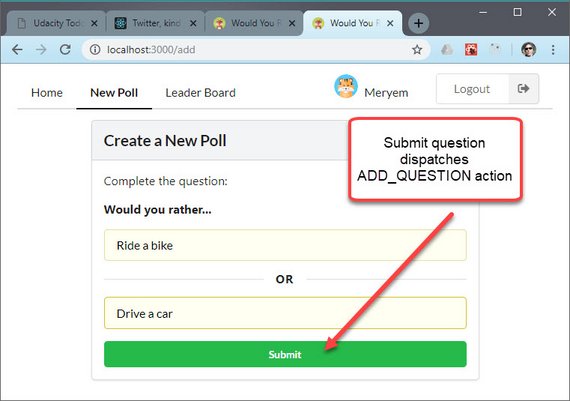
53. React/Redux Polling App Create New Poll
Day 53: April 23, 2019 - Tuesday
Project: Udacity React Nanodegree Program
Progress: Continued React/Redux project for my React Nanodegree Program.
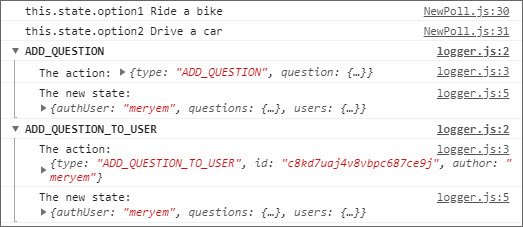
This part of the app required new actions, action creators, reducers, & a thunk middleware function. The app now does the following:
- Updates users state
- Updates questions state
- Does async request to the DB
Here are the logger results showing the dispatched action.
You can read more here: ReactND Project 2 - Would You Rather - 4.11 Create New Poll
Links:
- Live Demo: Would You Rather on Netlify
- CodeSandbox: Would You Rather App@13-application-design
- Code notes - ReactND Project 2 - Would You Rather
- Course notes - Udacity React & Redux
- Link to Udacity React Nanodegree Program
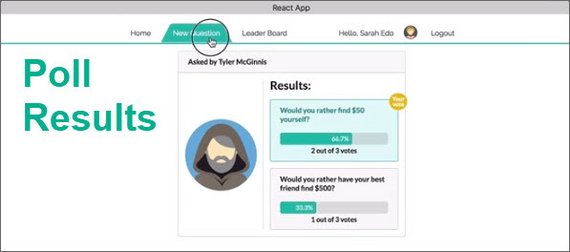
52. React/Redux Polling App Display Poll Results
Day 52: April 22, 2019 - Monday
Project: Udacity React Nanodegree Program
Progress: Continued React/Redux project for my React Nanodegree Program.
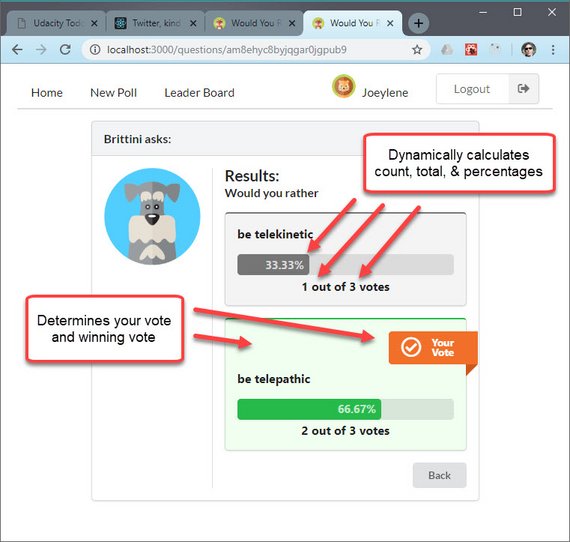
I connected the PollResult component to the Redux store in order to pull necessary data to do poll calculations.
These include:
- total number of votes
- number of votes for each option
- percentage of total vote for each option
- indication of which option user voted for
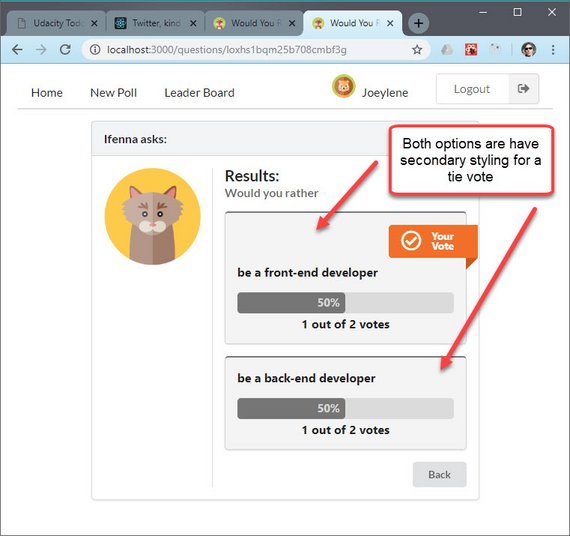
Code handles cases of a ties and leaves both options with secondary styling.
You can read more here: ReactND Project 2 - Would You Rather - 4.10 Display Poll Results
Links:
- Live Demo: Would You Rather on Netlify
- CodeSandbox: Would You Rather App@13-application-design
- Code notes - ReactND Project 2 - Would You Rather
- Course notes - Udacity React & Redux
- Link to Udacity React Nanodegree Program
51. React/Redux Polling App Answer Poll Question
Day 51: April 21, 2019 - Sunday
Project: Udacity React Nanodegree Program
Progress: Continued React/Redux project for my React Nanodegree Program.
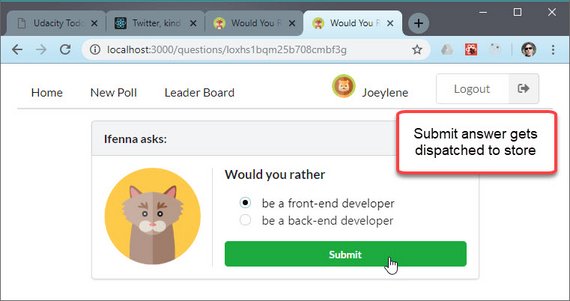
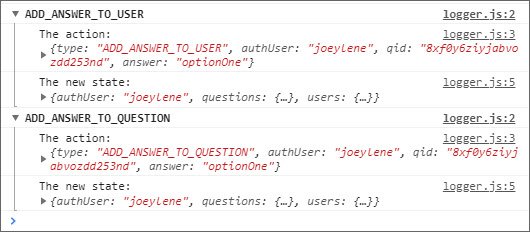
Finished the Answer Poll Question part of the app. This does the following:
- Updates users state
- Updates questions state
- Does an async request to the DB
The Redux Logger middleware shows actions submitted and the updated state as a result.
You can read more here: ReactND Project 2 - Would You Rather - 4.9 Answer Poll Question
Links:
- Live Demo: Would You Rather on Netlify
- CodeSandbox: Would You Rather App@13-application-design
- Code notes - ReactND Project 2 - Would You Rather
- Course notes - Udacity React & Redux
- Link to Udacity React Nanodegree Program
50. React/Redux Polling App UserCard Component
Day 50: April 20, 2019 - Saturday
Project: Udacity React Nanodegree Program
Progress: Continued React/Redux project for my React Nanodegree Program.
The UserCard component is responsible for displaying each of the following components based on the context
- PollTeaser
- PollQuestion
- PollResult
For this reason I needed to refactor the component to better handle each use case
I created a simple switch statement that returns the proper component based on type.
const pollTypes = {
  POLL_TEASER: 'POLL_TEASER',
  POLL_QUESTION: 'POLL_QUESTION',
  POLL_RESULT: 'POLL_RESULT'
};

const PollContent = props => {
  const { pollType, question, unanswered } = props;

  switch (pollType) {
    case pollTypes.POLL_TEASER:
      return <PollTeaser question={question} unanswered={unanswered} />;
    case pollTypes.POLL_QUESTION:
      return <PollQuestion question={question} />;
    case pollTypes.POLL_RESULT:
      return <PollResult question={question} />;
    default:
      return;
  }
};
Then the component is referenced by the following:
<PollContent pollType={pollType} question={question} unanswered={unanswered} />
You can read more here: ReactND Project 2 - Would You Rather - 4.8 UserCard Component
Links:
- Live Demo: Would You Rather on Netlify
- CodeSandbox: Would You Rather App@13-application-design
- Code notes - ReactND Project 2 - Would You Rather
- Course notes - Udacity React & Redux
- Link to Udacity React Nanodegree Program
49. React/Redux Polling App Home View
Day 49: April 19, 2019 - Friday
Project: Udacity React Nanodegree Program
Progress: Continued React/Redux project for my React Nanodegree Program.
This section required work on three separate components.
- Home
- UserCard
- PollTeaser
Both Home and UserCard were connected up to the Redux store in order to map our state to props for display.
The most involved transformation of involved taking state as an object, turning into an array, filtering that array, and then sorting it chronologically.
This was done to our question data prior to being used in our connect method.
function mapStateToProps({ authUser, users, questions }) {
  const answeredIds = Object.keys(users[authUser].answers);
  const answered = Object.values(questions)
    .filter(question => answeredIds.includes(question.id))
    .sort((a, b) => b.timestamp - a.timestamp);
  const unanswered = Object.values(questions)
    .filter(question => !answeredIds.includes(question.id))
    .sort((a, b) => b.timestamp - a.timestamp);

  return {
    userQuestionData: {
      answered,
      unanswered
    }
  };
}
You can read more here: ReactND Project 2 - Would You Rather - 4.7 Home View
Links:
- Live Demo: Would You Rather on Netlify
- CodeSandbox: Would You Rather App@13-application-design
- Code notes - ReactND Project 2 - Would You Rather
- Course notes - Udacity React & Redux
- Link to Udacity React Nanodegree Program
48. React/Redux Polling App Login & Nav
Day 48: April 18, 2019 - Thursday
Project: Udacity React Nanodegree Program
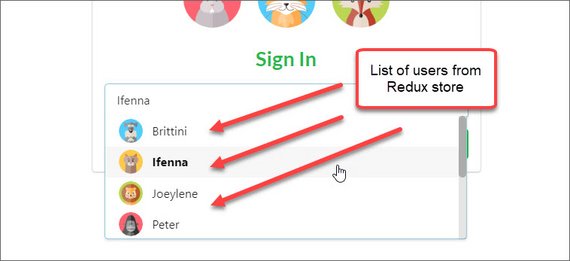
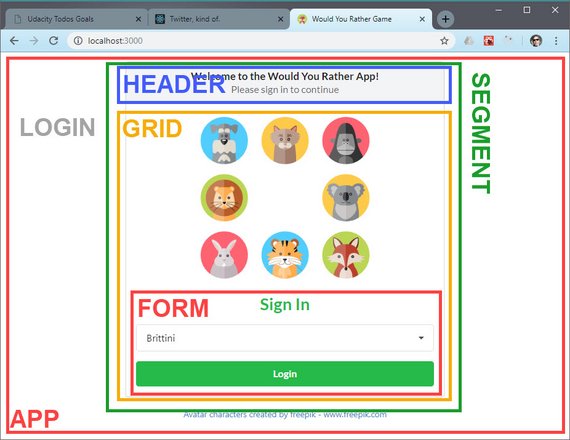
Login Form Component showing user accounts
Progress: Continued React/Redux project for my React Nanodegree Program.
This part of the the application dev process consists of creating components around my Redux data.
I started with the Login & Nav components which use the following Redux state entities.
- users
- authUser (Logged in user)
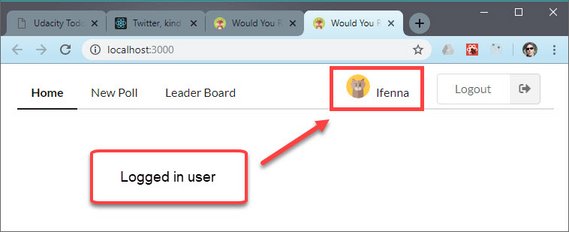
Nav Component showing logged in user
You can read more here: ReactND Project 2 - Would You Rather - 4.6 Login & Navigation
Links:
- Live Demo: Would You Rather on Netlify
- CodeSandbox: Would You Rather App@13-application-design
- Code notes - ReactND Project 2 - Would You Rather
- Course notes - Udacity React & Redux
- Link to Udacity React Nanodegree Program
47. React/Redux Polling App Initial Data Set
Day 47: April 17, 2019 - Wednesday
Project: Udacity React Nanodegree Program
Progress: Continued React/Redux project for my React Nanodegree Program.
Today I finally hooked up all the Redux plumbing code I had written up until this point by creating an entry point for an action dispatch in my App component. This now brings together each of these parts.
- actions
- action creators
- reducers
- redux middleware
- async API calls
The entry point dispatches my handleInitialData() redux thunk action to fill the store with it’s initial data set.
You can read more here: ReactND Project 2 - Would You Rather - 4.5 Initialize App Data
Links:
- Live Demo: Would You Rather on Netlify
- CodeSandbox: Would You Rather App@13-application-design
- Code notes - ReactND Project 2 - Would You Rather
- Course notes - Udacity React & Redux
- Link to Udacity React Nanodegree Program
46. React/Redux Polling App Middleware & Logging
Day 46: April 16, 2019 - Tuesday
Project: Udacity React Nanodegree Program
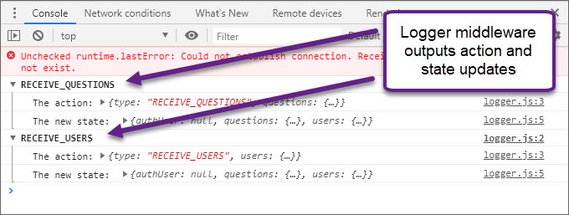
Dev Tools Console with Logger output
Progress: Continued React/Redux project for my React Nanodegree Program.
Today I added a Redux Thunk middleware component that outputs the resulting state of any action dispatches. This makes it a lot easier to do simple state debugging.
This involved the following code at /src/middleware/logger.js.
// logger.js
const logger = store => next => action => {
  console.group(action.type);
  console.log('The action:', action);
  const returnValue = next(action);
  console.log('The new state: ', store.getState());
  console.groupEnd();
  return returnValue;
};

export default logger;
Then adding the following code at /src/middleware/index.js.
// index.js
import thunk from 'redux-thunk';
import logger from './logger';
import { applyMiddleware } from 'redux';

export default applyMiddleware(thunk, logger);
Then it was added to the createStore() method in /src/index.js.
// index.js
...
import rootReducer from './reducers/index';
import middleware from './middleware';

const store = createStore(rootReducer, middleware);

ReactDOM.render(
  <Provider store={store}>
    <App />
  </Provider>,
  document.getElementById('root')
);
You can read more here: ReactND Project 2 - Would You Rather - 4.4 Middleware
Links:
- Live Demo: Would You Rather on Netlify
- CodeSandbox: Would You Rather App@13-application-design
- Code notes - ReactND Project 2 - Would You Rather
- Course notes - Udacity React & Redux
- Link to Udacity React Nanodegree Program
45. React/Redux Polling App Actions & Reducers
Day 45: April 15, 2019 - Monday
Project: Udacity React Nanodegree Program
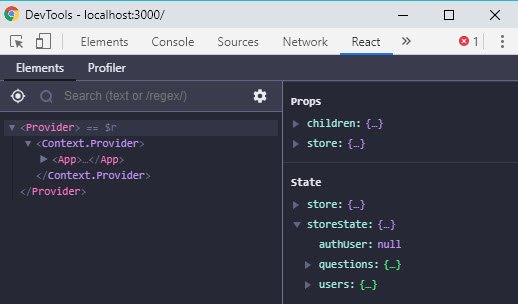
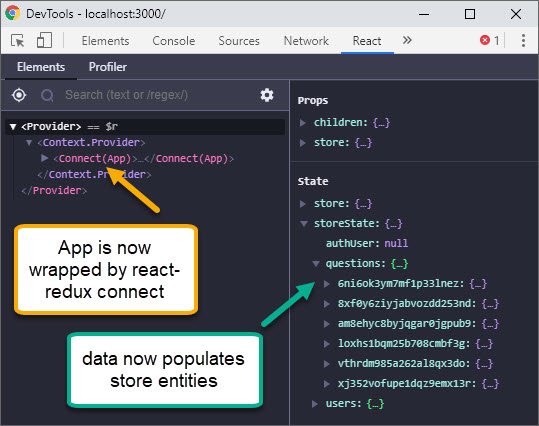
React Dev Tools showing store state
Progress: Continued React/Redux project for my React Nanodegree Program.
Now that I completed the design and planning phase I was able to finally start the coding phase. The great part is that this is happening quickly and with confidence.
I managed to work on the following:
- Async API calls
- Actions & action creators
- Reducers
You can read more here: ReactND Project 2 - Would You Rather - 4. Coding Phase
Links:
- Live Demo: Would You Rather on Netlify
- CodeSandbox: Would You Rather App@13-application-design
- Code notes - ReactND Project 2 - Would You Rather
- Course notes - Udacity React & Redux
- Link to Udacity React Nanodegree Program
44. React/Redux Polling App Store Data
Day 44: April 14, 2019 - Sunday
Project: Udacity React Nanodegree Program
Progress: Continued React/Redux project for my React Nanodegree Program.
This last step of the the application design process involves analyzing where each piece of data is required.
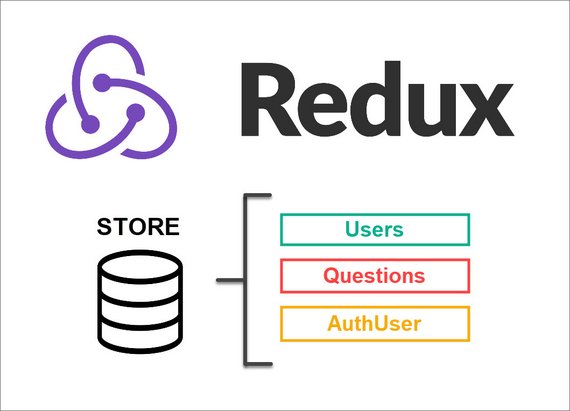
Data used globally or in many different places is ideal for our Redux store. One useful exercise is to list out all components that rely on each data entity.
Component / Store Matrix: Here’s a matrix that shows each proposed component on the left matched with each data entity across the top. It indicates whether that component with use that entity.
| Components / Data | Users | Questions | AuthUser | Text | Option |
|---|---|---|---|---|---|
| App | x | x | |||
| Login | x | x | |||
| Home | x | ||||
| UserCard | x | ||||
| PollTeaser | x | ||||
| PollQuestion | x | x | x | ||
| PollAnswer | x | ||||
| NewPoll | x | x | |||
| Leaderboard | x | ||||
| LeaderboardCard | x |
We can quickly see which components require Users, Questions, & AuthUser. This also tells us which components need to be made into container components and connected with React-Redux.
You can read more here: ReactND Project 2 - Would You Rather - 3.4 Store Data
Links:
- Live Demo: Would You Rather on Netlify
- CodeSandbox: Would You Rather App@13-application-design
- Code notes - ReactND Project 2 - Would You Rather
- Course notes - Udacity React & Redux
- Link to Udacity React Nanodegree Program
43. React/Redux Polling App App Events
Day 43: April 13, 2019 - Saturday
Project: Udacity React Nanodegree Program
Progress: Continued React/Redux project for my React Nanodegree Program.
This next step consists of determining what events happen in each component. We do this by taking a look at what can happen in each component. Specifically, what actions the app or user is performing on the data in each component.
We do the following in the analysis of of each component:
- underline the action
- bold the data
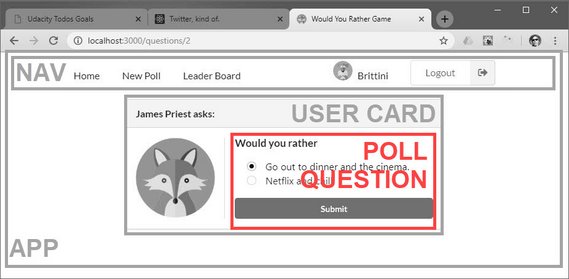
Here’s the breakdown for the PollQuestion component from above.
- get authUser to record an answered question.
- get question from the list of questions.
- set option for the answered question.
You can read more here: ReactND Project 2 - Would You Rather - 3.3 App Events
Links:
- Live Demo: Would You Rather on Netlify
- CodeSandbox: Would You Rather App@13-application-design
- Code notes - ReactND Project 2 - Would You Rather
- Course notes - Udacity React & Redux
- Link to Udacity React Nanodegree Program
42. React/Redux Polling App Component Hierarchy
Day 42: April 12, 2019 - Friday
Project: Udacity React Nanodegree Program
Progress: Continued React/Redux project for my React Nanodegree Program.
Now that the views have been created along with a bullet list of requirements for each, the next step is to create the component hierarchy.
This is done by drawing boxes around every component or sub-component and naming each.
Determining what should be a component should follow the same rules for deciding if a new function or object should be created. It should follow the single responsibility principle. A component should ideally only do one thing.
You can read more here: ReactND Project 2 - Would You Rather - 3.2 Component Hierarchy
Links:
- Live Demo: Would You Rather on Netlify
- CodeSandbox: Would You Rather App@13-application-design
- Code notes - ReactND Project 2 - Would You Rather
- Course notes - Udacity React & Redux
- Link to Udacity React Nanodegree Program
41. React/Redux Polling App Views & Requirements
Day 41: April 11, 2019 - Thursday
Project: Udacity React Nanodegree Program
Progress: Continued React/Redux project for my React Nanodegree Program.
The next step in building this app is to take each mockup and list out the requirements based on user stories or a narrative.
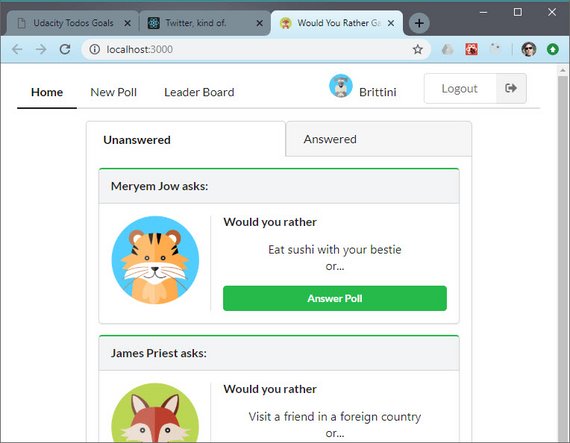
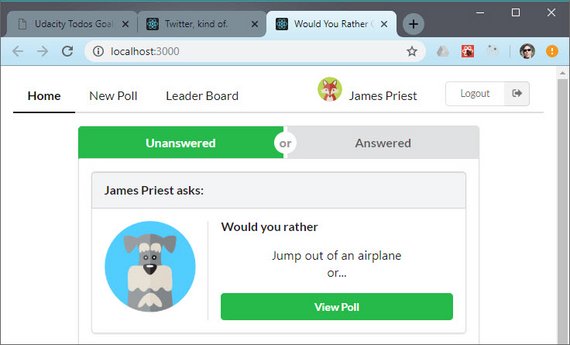
Here’s a list of requirements for the Home view pictured above.
- Upon login the user is take to root (
/) and shown the Home view - User can toggle between his/her answered and unanswered polls
- Unanswered polls should be shown by default
- Polls in both categories are arranged from most recent to least recently created
- The logged in account name should be visible on the page
- Clicking any poll (answered or unanswered) navigates to the poll’s details
- Poll details should be located at
questions/:question_id
You can read more here: ReactND Project 2 - Would You Rather - 3.1 View Requirements
Links:
- Live Demo: Would You Rather on Netlify
- CodeSandbox: Would You Rather App@13-application-design
- Code notes - ReactND Project 2 - Would You Rather
- Course notes - Udacity React & Redux
- Link to Udacity React Nanodegree Program
40. React/Redux Polling App Login Form
Day 40: April 10, 2019 - Wednesday
Project: Udacity React Nanodegree Program
Progress: Continued React/Redux project for my React Nanodegree Program.
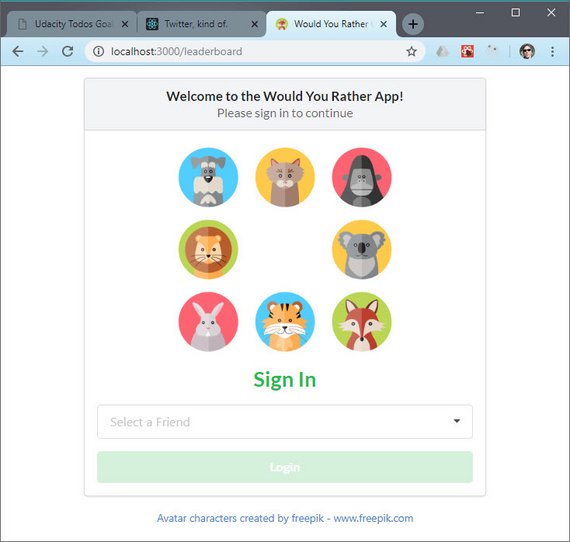
Today I completed the Login page mockup for this project. It does the following.
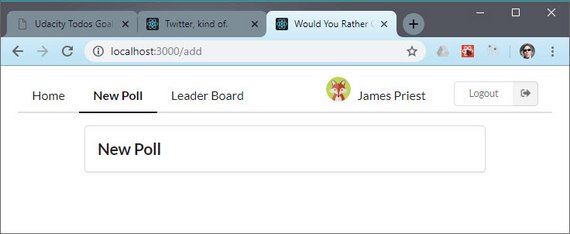
- Allows a user to select one of the pre-existing accounts
- Enables the Login button once a selection has been made
- Displays the logged in user within the Navigation bar.
You can read more here: ReactND Project 2 - Would You Rather - 2.11 Mockup - Login
Links:
- Live Demo: Would You Rather on Netlify
- CodeSandbox: Would You Rather App@12-mockup-login
- Code notes - ReactND Project 2 - Would You Rather
- Course notes - Udacity React & Redux
- Link to Udacity React Nanodegree Program
39. React/Redux Polling App Leaderboard
Day 39: April 9, 2019 - Tuesday
Project: Udacity React Nanodegree Program
Progress: Continued React/Redux project for my React Nanodegree Program.
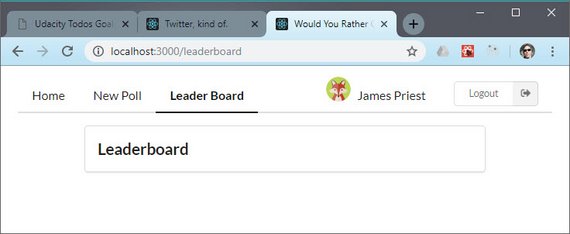
The leaderboard required some data manipulation in order to do the following
- Get answered questions score
- Get created questions score
- Calculate totals
- Sort by rank
You can read more here: ReactND Project 2 - Would You Rather - 2.10 Mockup - Leaderboard
Links:
- Live Demo: Would You Rather on Netlify
- CodeSandbox: Would You Rather App@11-mockup-leaderboard
- Code notes - ReactND Project 2 - Would You Rather
- Course notes - Udacity React & Redux
- Link to Udacity React Nanodegree Program
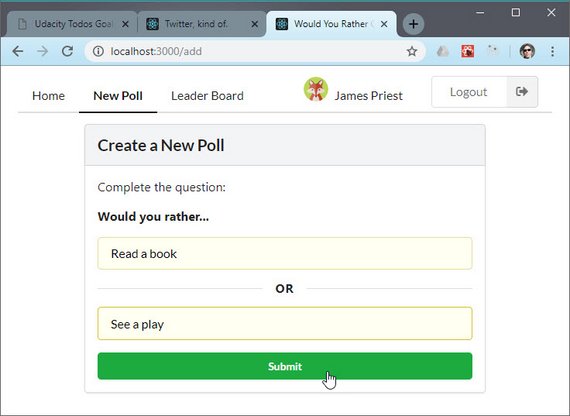
38. React/Redux Polling App New Poll Form
Day 38: April 8, 2019 - Monday
Project: Udacity React Nanodegree Program
Progress: Continued React/Redux project for my React Nanodegree Program.
Today I created a controlled component for the Add Poll page. It does the following.
- Requires each field to have valid data before Submit button is enabled
- Uses state to control field values
- Implements a Loader on submission
You can read more here: ReactND Project 2 - Would You Rather - 2.9 Mockup - New Poll
Links:
- Live Demo: Would You Rather on Netlify
- CodeSandbox: Would You Rather App@10-mockup-new-poll
- Code notes - ReactND Project 2 - Would You Rather
- Course notes - Udacity React & Redux
- Link to Udacity React Nanodegree Program
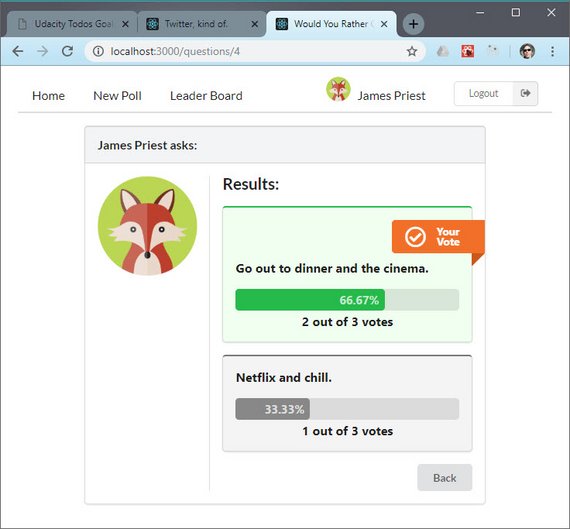
37. React/Redux Polling App Poll Result
Day 37: April 7, 2019 - Sunday
Project: Udacity React Nanodegree Program
Progress: Continued React/Redux project for my React Nanodegree Program.
Today was spent mocking up the Poll Result page. It does the following
- Displays the winning answer
- Shows the number of votes for each question along with total votes
- Displays a percentage of votes
- Shows which option the user voted for
You can read more here: ReactND Project 2 - Would You Rather - 2.8 Mockup - Poll Result
Links:
- Live Demo: Would You Rather App@9-mockup-poll-result on CodeSandbox
- Code notes - ReactND Project 2 - Would You Rather
- Course notes - Udacity React & Redux
- Link to Udacity React Nanodegree Program
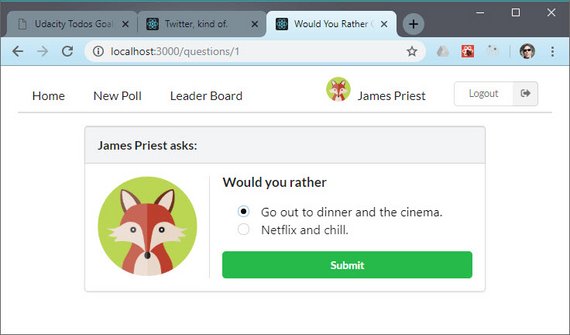
36. React/Redux Polling App Poll Question
Day 36: April 6, 2019 - Saturday
Project: Udacity React Nanodegree Program
Progress: Continued React/Redux project for my React Nanodegree Program.
I spent the day putting together a working version of the poll question page.
It does the following.
- Displays both question options
- Allows one to be selected
- Submits the selection in order to display the result
You can read more here: ReactND Project 2 - Would You Rather - 2.7 Mockup - Poll Question
Links:
- Live Demo: Would You Rather App@8-mockup-poll-question on CodeSandbox
- Code notes - ReactND Project 2 - Would You Rather
- Course notes - Udacity React & Redux
- Link to Udacity React Nanodegree Program
35. React/Redux Polling App Framework/Stub Pages
Day 35: April 5, 2019 - Friday
Project: Udacity React Nanodegree Program
Progress: Continued React/Redux project for my React Nanodegree Program.
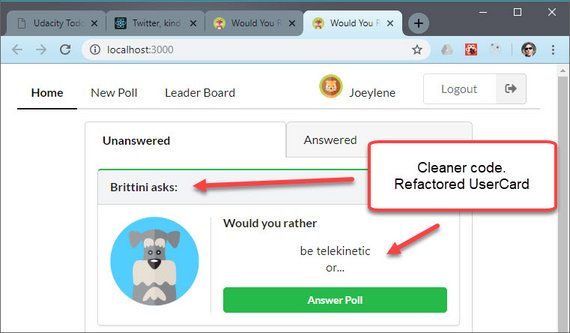
I spent the last couple days creating a mockup framework for this app. It now allows navigation and contains a stub view for each page.
This a little time-consuming since I had to do the following
- Add and implement routing
- Organize reusable component structure
- Create stub pages for each view
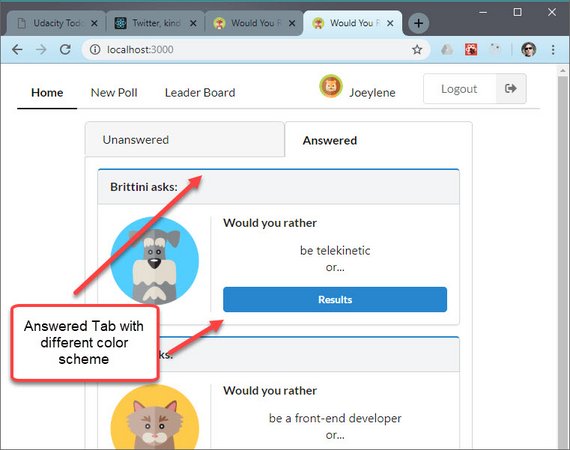
I also updated the UI scheme a bit to differentiate between answered and unanswered polls.
You can read more here: ReactND Project 2 - Would You Rather - 2.6 Mockup - Framework
Links:
- Live Demo: Would You Rather App@7-mockup-framework on CodeSandbox
- Code notes - ReactND Project 2 - Would You Rather
- Course notes - Udacity React & Redux
- Link to Udacity React Nanodegree Program
34. React/Redux Polling App Nav & Tab Component
Day 34: April 3, 2019 - Wednesday
Project: Udacity React Nanodegree Program
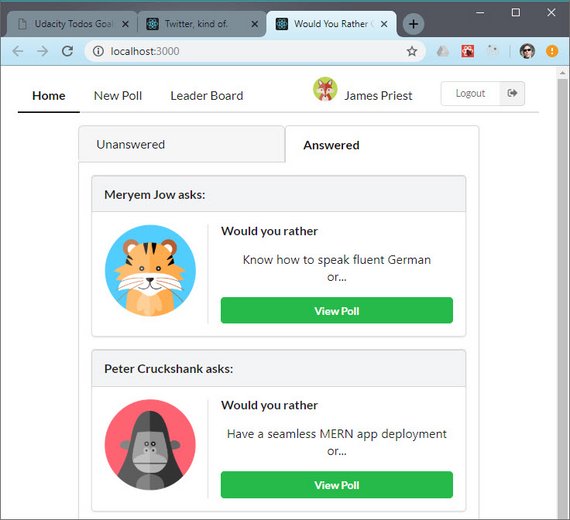
Home Page with Tab Component Mockup
Progress: Continued React/Redux project for my React Nanodegree Program.
Today I cleaned up the Home Page mockup by splitting the UI into the following components.
- App.js
- Home.js
- Nav.js
- TabControl.js
- Question.js
I then composed these together and used a JavaScript object to mimic the data that Redux will eventually return.
You can read more here: ReactND Project 2 - Would You Rather - 2.4 Mockup - Home
Links:
- Live Demo: Would You Rather App@6-mockup-home on CodeSandbox
- Code notes - ReactND Project 2 - Would You Rather
- Course notes - Udacity React & Redux
- Link to Udacity React Nanodegree Program
33. React/Redux Polling App Home Page Mockup
Day 33: April 2, 2019 - Tuesday
Project: Udacity React Nanodegree Program
Progress: Continued React/Redux project for my React Nanodegree Program.
Today I used the Semantic UI React library to begin mocking up my UI.
I did the following.
- Created a Nav component
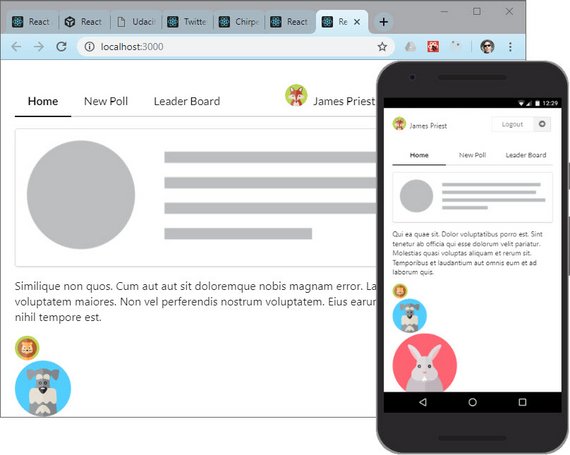
- Made sure it was responsive and worked across various breakpoints & sizes
- Mocked up the Home Page using my Nav component and composing sections
You can read more here: ReactND Project 2 - Would You Rather - 2.3 UI Mockups
Links:
- Live Demo: Would You Rather App@4-ui-mockups on CodeSandbox
- Code notes - ReactND Project 2 - Would You Rather
- Course notes - Udacity React & Redux
- Link to Udacity React Nanodegree Program
32. React/Redux Polling App Semantic UI React
Day 32: April 1, 2019 - Monday
Project: Udacity React Nanodegree Program
Progress: Continued React/Redux project for my React Nanodegree Program.
I started with the planning stage of evaluating different React UI Libraries for my UI Framework. I settled on Sematic UI React.
It has awesome docs with examples and code for every component. Each example is done with an embedded CodeSandbox instance so you can instantly tweak the code.
Here’s the short list of features.
- jQuery Free
- Declarative API
- Augmentation
- Shorthand Props
- Sub Components
- Auto Controlled State
I created a couple UI test samples to play with the library and have found it to be very flexible
You can see the code I used in my code notes.
You can read more here: ReactND Project 2 - Would You Rather - 2.1 Sematic UI React
Links:
- Code notes - ReactND Project 2 - Would You Rather
- Course notes - Udacity React & Redux
- Link to Udacity React Nanodegree Program
31. React/Redux Polling App Sample UI
Day 31: March 31, 2019 - Sunday
Project: Udacity React Nanodegree Program
Progress: Continued React/Redux project for my React Nanodegree Program.
I added to the requirements portion of my Code Notes by including the following:
- App Functionality
- App Architecture
- Project Instructions
- Sample Project UI
- Step-by-Step Guide
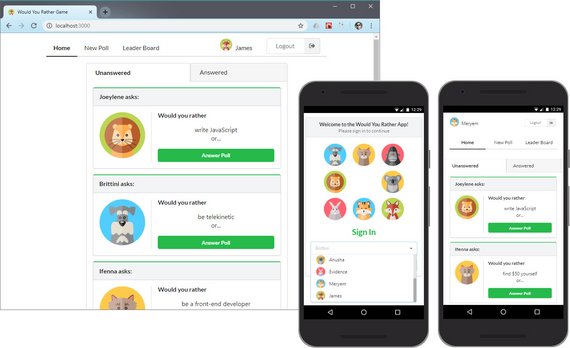
Included are screenshots of a sample version of the “Would You Rather” app.
This helps to show some of the functionality and information that this app needs to have.
I also added a section with step-by-step instructions which detail how to design the structure of a React/Redux app.
You can read more here: ReactND Project 2 - Would You Rather - 1.5 Sample Project UI
Links:
- Code notes - ReactND Project 2 - Would You Rather
- Course notes - Udacity React & Redux
- Link to Udacity React Nanodegree Program
30. React/Redux Polling App Specifications
Day 30: March 30, 2019 - Saturday
Project: Udacity React Nanodegree Program
Progress: Started React/Redux project for my React Nanodegree Program.
Today was the first day of planning for the “Would You Rather” React/Redux polling application.
This app is to be built from scratch and is required to graduate. It must demonstrate mastery of the following.
- React
- Redux
- React Router
- Redux Thunk & Middleware
Today I spent time covering the project requirements by detailing these in my notes.
You can read more: ReactND Project 2 - Would You Rather - 1. Project Requirements
Links:
- Code notes - ReactND Project 2 - Would You Rather
- Course notes - Udacity React & Redux
- Link to Udacity React Nanodegree Program
29. Twitter Redux App Done
Day 29: March 29, 2019 - Friday
Project: Udacity React Nanodegree Program
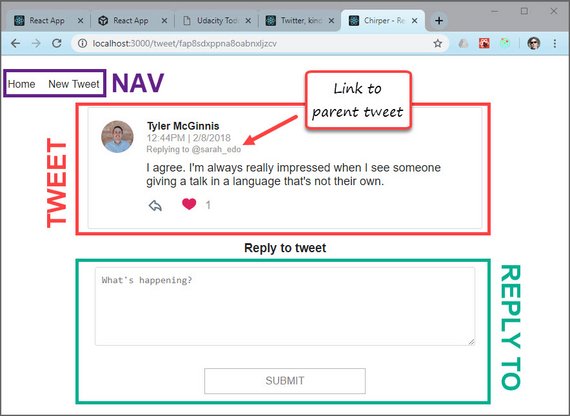
Live Demo: Chirper - Redux Twitter@11-react-router on CodeSandbox
Progress: Continued Udacity Redux lesson for my React Nanodegree Program.
Today I finished my “real-world” Twitter-like app. It employed the following.
- React
- Redux
- React Router
- Redux Thunk
Today’s lesson involved implementing React Router across the views and hooking up the child components work with router.
Now that this exercise is done, I should have the required skills to complete my required 2nd React Nanodegree project. The suggested due date was last week so I hope I’m able to knock it out in the next 5-7 days.
You can read more in my notes: Udacity React & Redux - 7.17 Using React Router
Links:
- Live Demo - Chirper - Redux Twitter@11-react-router on CodeSandbox
- GitHub Repo - Chirper - Redux Twitter-like App
- Course notes - Udacity React & Redux
- Link to Udacity React Nanodegree Program
28. Container Component
Day 28: March 28, 2019 - Thursday
Project: Udacity React Nanodegree Program
Live Demo: Chirper - Redux Twitter@10-tweet-page on CodeSandbox
Progress: Continued Udacity Redux lesson for my React Nanodegree Program.
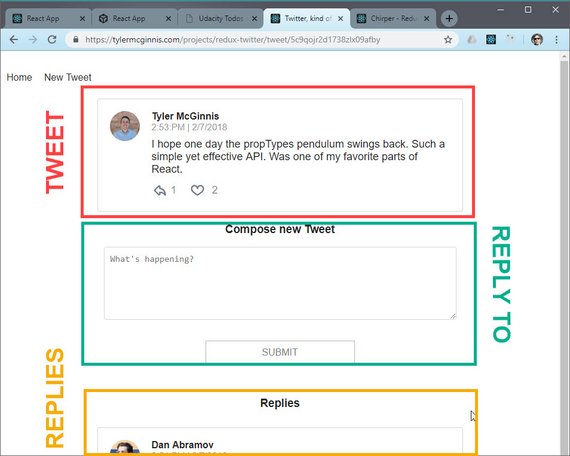
Now that I have a few components such as Dashboard, Tweet, & AddTweet, I can begin to compose them in my TweetPage container component.
The Tweet Page displays
- The tweet that has been selected
- An input to reply to the selected tweet
- List of existing replies
Since the actions, action creators, and reducers already exist for my child components it was a matter of fine-tuning the children to work in different contexts.
You can read more in my notes: Udacity React & Redux - 7.16 TweetPage Component
Links:
- Live Demo - Chirper - Redux Twitter@10-tweet-page on CodeSandbox
- GitHub Repo - Chirper - Redux Twitter-like App
- Course notes - Udacity React & Redux
- Link to Udacity React Nanodegree Program
27. Compose New Tweet
Day 27: March 27, 2019 - Wednesday
Project: Udacity React Nanodegree Program
Live Demo: Chirper - Redux Twitter@9-new-tweet on CodeSandbox
Progress: Continued Udacity Redux lesson for my React Nanodegree Program.
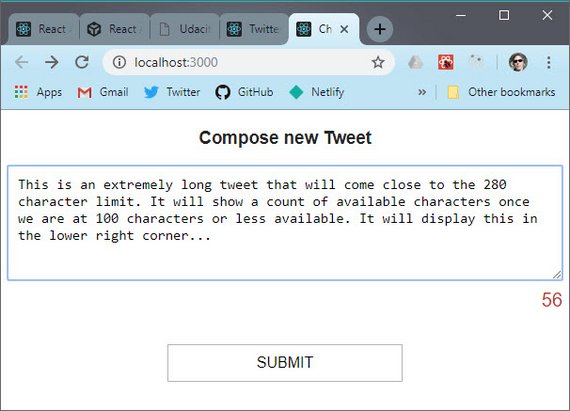
This next part of this Twitter-like Redux app consisted of building the following:
- NewTweet Component
- ADD_TWEET action and addTweet action creator
- Thunk
handleAddTweetfunction for the async API call - ADD_TWEET reducer to return updated Redux state
- Connect the action creators to the NewTweet component for Redux dispatch
You can read more in my notes: Udacity React & Redux - 7.15 NewTweet Component
Links:
- Live Demo - Chirper - Redux Twitter@9-new-tweet on CodeSandbox
- GitHub Repo - Chirper - Redux Twitter-like App
- Course notes - Udacity React & Redux
- Link to Udacity React Nanodegree Program
26. Redux Dispatch Action
Day 26: March 26, 2019 - Tuesday
Project: Udacity React Nanodegree Program
Live Demo: Chirper - Redux Twitter@8-like-tweet on CodeSandbox
Progress: Continued Udacity Redux lesson for my React Nanodegree Program.
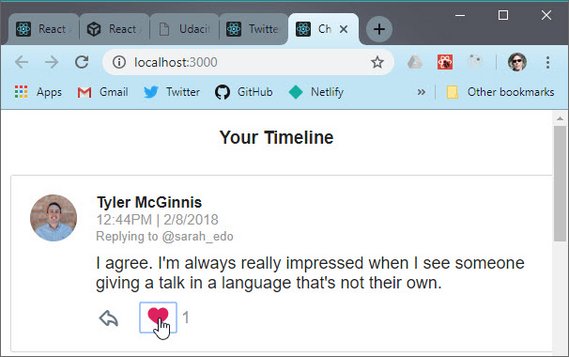
This part of the app consists the following:
- Adding a TOGGLE_TWEET action creator
- Building a thunk
handleToggleTweetfunction for the async API call - Creating a TOGGLE_TWEET reducer to return the updated state
- Connecting the action creators to our component for dispatch
You can read more in my notes: Udacity React & Redux - 7.14 Liking a Tweet
Links:
- Live Demo - Chirper - Redux Twitter@8-like-tweet on CodeSandbox
- GitHub Repo - Chirper - Redux Twitter-like App
- Course notes - Udacity React & Redux
- Link to Udacity React Nanodegree Program
25. React Redux Loading Bar
Day 25: March 25, 2019 - Monday
Project: Udacity React Nanodegree Program

Loading…

Live Demo: Chirper - Redux Twitter@7-loading on CodeSandbox
Progress: Continued Udacity Redux lesson for my React Nanodegree Program.
This part of the lesson involved using a prebuilt component called react-redux-loading-bar to provide a loading bar that works with Redux.
The component has three parts to it.
- actions creators: showLoading & hideLoading
- loading bar reducer
- loading bar component
The three pieces need to be implemented in order for everything to work properly.
You can read more in my notes: Udacity React & Redux - 7.13 Loading Bar
Links:
- Live Demo - Chirper - Redux Twitter@7-loading on CodeSandbox
- GitHub Repo - Chirper - Redux Twitter-like App
- Finished App - Chirper - Redux Twitter-like App
- Course notes - Udacity React & Redux
- Link to Udacity React Nanodegree Program
24. Tweet Component
Day 24: March 24, 2019 - Sunday
Project: Udacity React Nanodegree Program
Live Demo: Chirper - Redux Twitter@6-tweet-ui on CodeSandbox
Progress: Continued Udacity Redux lesson for my React Nanodegree Program.
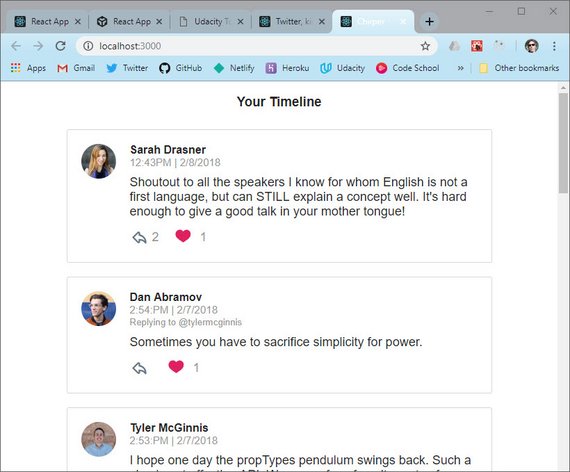
This next step involved bringing in various slices of the store into the Tweet component. This included
- authedUser
- tweets
- users
This data is then formatted before it’s made available as props to our component.
// Tweets.js
function mapStateToProps({ authedUser, users, tweets }, { id }) {
  const tweet = tweets[id];
  const parentTweet = tweet ? tweets[tweet.replyingTo] : null;

  return {
    authedUser,
    tweet: tweet
      ? formatTweet(tweet, users[tweet.author], authedUser, parentTweet)
      : null
  };
}
Once the component deconstructs the data elements, it renders out the information.
You can read more in my notes: Udacity React & Redux - 7.12 Tweet Component
Links:
- Live Demo - Chirper - Redux Twitter@6-tweet-ui on CodeSandbox
- GitHub Repo - Chirper - Redux Twitter-like App
- Finished App - Chirper - Redux Twitter-like App
- Course notes - Udacity React & Redux
- Link to Udacity React Nanodegree Program
23. Dashboard Component
Day 23: March 23, 2019 - Saturday
Project: Udacity React Nanodegree Program
Live Demo: Chirper - Redux Twitter@5-dashboard on CodeSandbox
Progress: Continued Udacity Redux lesson for my React Nanodegree Program.
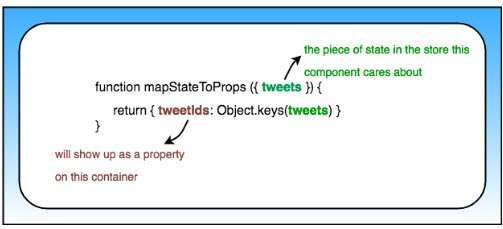
The next set of steps involves rendering state data from my Redux store as React UI. Starting with the Dashboard component, I needed to pull in a list of TweetIds. I did this by
- Using react-redux
mapStateToProps - Destructuring the
tweetsslice of my state - Extracting
tweetIdsand sorting in reverse chronological order
function mapStateToProps({ tweets }) {
  return {
    tweetsIds: Object.keys(tweets).sort(
      (a, b) => tweets[b].timestamp - tweets[a].timestamp
    )
  };
}
I then mapped over this in my Dashboard component.
class Dashboard extends React.Component {
  render() {
    const { tweetsIds } = this.props;
    return (
      <div>
        <h3 className="center">Your Timeline</h3>
        <ul className="dashboard-list">
          {tweetsIds.map(id => (
            <li key={id}>
              <div>TWEET ID: {id}</div>
            </li>
          ))}
        </ul>
      </div>
    );
  }
}

export default connect(mapStateToProps)(Dashboard);
You can read more in my notes: Udacity React & Redux - 7.11 Dashboard Component
Links:
- Live Demo - Chirper - Redux Twitter@5-dashboard on CodeSandbox
- GitHub Repo - Chirper - Redux Twitter-like App
- Finished App - Chirper - Redux Twitter-like App
- Course notes - Udacity React & Redux
- Link to Udacity React Nanodegree Program
22. Populate Redux Store
Day 22: March 22, 2019 - Friday
Project: Udacity React Nanodegree Program
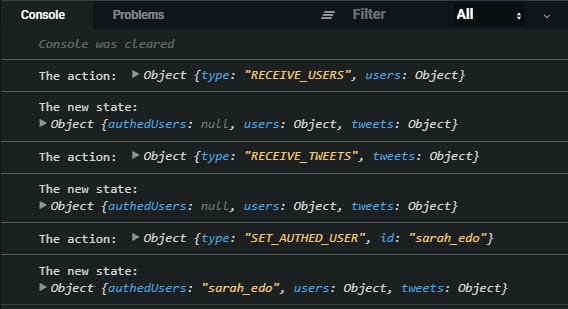
Live Demo: Chirper - Redux Twitter@4-handle-initial-data on CodeSandbox
Progress: Continued Udacity Redux lesson for my React Nanodegree Program.
Now that I have my Redux action creators, reducers, and middleware in place it was time to do the following:
- Use the react-redux
connect()method to hook Redux up to my App component. This turns App into a container component by providing access to the store and it’s methods. - Deconstruct the store’s
dispatchmethod inside ofcomponentDidMount(). - Dispatch my thunk action creator (
handleInitialData) to populate the store.
// App.js
import React, { Component } from 'react';
import { handleInitialData } from '../actions/shared';
import { connect } from 'react-redux';

class App extends Component {
  componentDidMount() {
    const { dispatch } = this.props;

    dispatch(handleInitialData());
  }
  render() {
    return <div>Starter Code</div>;
  }
}

export default connect()(App);
You can read more in my notes: Udacity React & Redux - 7.10 Initialize App Data
Links:
- Live Demo - Chirper - Redux Twitter-like App
- Repo - Chirper - Redux Twitter-like App on GitHub
- Course notes - Udacity React & Redux
- Link to Udacity React Nanodegree Program
21. Actions, Reducers, & Middleware
Day 21: March 21, 2019 - Thursday
Project: Udacity React Nanodegree Program
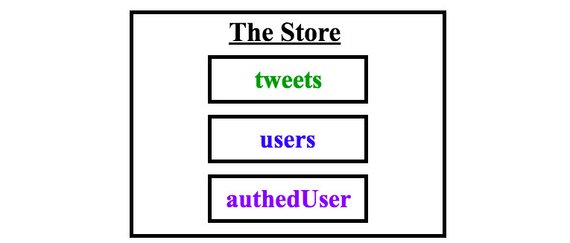
The Store contains tweets, users, & authedUsers properties.
Progress: Continued Udacity Redux lesson for my React Nanodegree Program.
I’ve now gotten into the coding portion my real-world Twitter-like Redux application.
I started with the actions and action creators. I then worked my way through the reducers. Next, I continued with the middleware.
I now have the following pieces hooked up and in place.
- Action Creators
- Thunk Action Creators (for async operations)
- Reducers
- Root Reducer (to combine store slices)
- Middleware (thunk & logger)
Nothing actually appears in the app yet because I haven’t actually dispatched any actions. That’ll be next.
You can read more in my notes: Udacity React & Redux - 7.7 Actions
Links:
- Live Demo - Chirper - Redux Twitter-like App
- Repo - Chirper - Redux Twitter-like App on GitHub
- Course notes - Udacity React & Redux
- Link to Udacity React Nanodegree Program
20. Planning Steps 3 & 4 Events & Store Data
Day 20: March 20, 2019 - Wednesday
Project: Udacity React Nanodegree Program
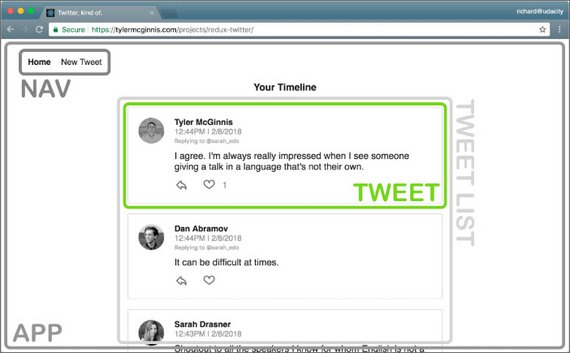
Live Demo: Chirper - Redux Twitter-like App
Progress: Continued Udacity Redux lesson for my React Nanodegree Program.
This section of the course gets into building a real-world Twitter-like Redux application by first starting with the application design process.
The next two steps of the design process are:
- Step 3 - Identify App Events
- Step 4 - Determine Store Data
We identify app events by taking a look at what can happen in each component. Specifically, what actions the app or user is performing on the data in each component.
Looking at this view we can determine the following events (actions) are needed.
- get the authedUser so the user can create a new tweet.
- set the text of the new tweet.
When determining what data should live in the store we can follow Dan Abramov’s advice.
“Data should be moved to the store when that data or state matters globally or when it is mutated in complex ways.”

The Store contains tweets, users, & authedUsers properties.
You can read more in my notes: Udacity React & Redux - 7.5 Step 3 - App Events
Links:
- Live Demo - Chirper - Redux Twitter-like App
- Repo - Chirper - Redux Twitter-like App on GitHub
- Course notes - Udacity React & Redux
- Link to Udacity React Nanodegree Program
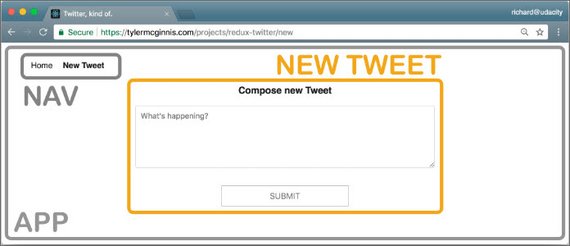
19. Planning Steps 1 & 2 Views & Components
Day 19: March 19, 2019 - Tuesday
Project: Udacity React Nanodegree Program
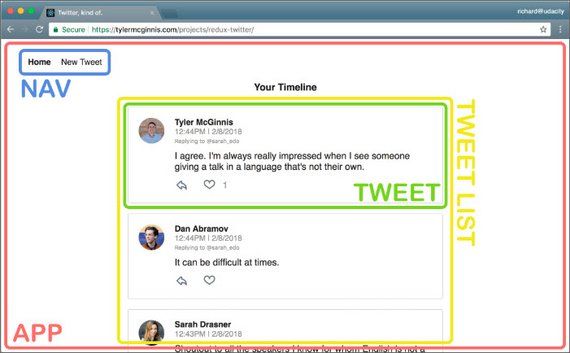
Live Demo: Chirper - Redux Twitter-like App
Progress: Continued Udacity Redux lesson for my React Nanodegree Program.
This section of the course gets into building a real-world Twitter-like Redux application by first starting with the application design process.
The first two steps of the design process are:
- Step 1 - Identify Views
- Step 2 - Create Component Hierarchy
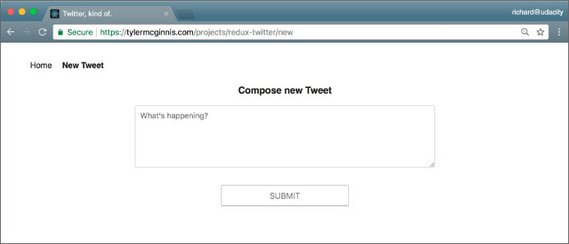
Identifying the views consists of drawing each page or screen of the app on a sheet of paper. This will help identify what information and data in required. In this case we already have a mockup we can use as a screenshot.
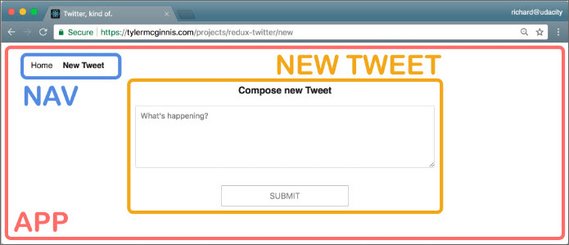
Creating the component hierarchy consists of drawing boxes around every component on the page and organizing the hierarchy based on the nesting of these components.
You can read more in my notes: Udacity React & Redux - 7.3 Step 1 - Views
Links:
- Live Demo - Chirper - Redux Twitter-like App
- Repo - Chirper - Redux Twitter-like App on GitHub
- Course notes - Udacity React & Redux
- Link to Udacity React Nanodegree Program
18. Real World Redux
Day 18: March 18, 2019 - Monday
Project: Udacity React Nanodegree Program
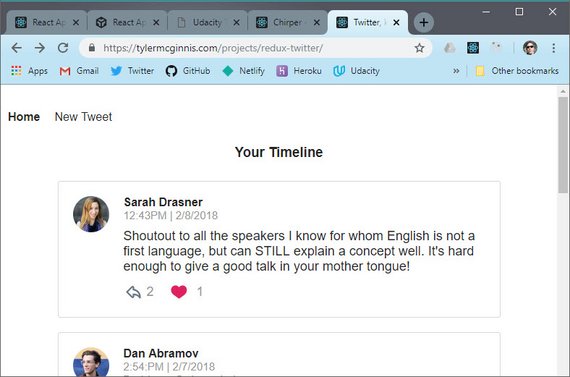
Live Demo: Chirper - Redux Twitter-like App
Progress: Continued Udacity Redux lesson for my React Nanodegree Program.
This section of the course gets into building a real-world Twitter-like Redux application by first starting with the application design process.
These are the steps we follow before writing a single line of code.
- Identify What Each View Should Look Like
- Break Each View Into a Hierarchy of Components
- Determine What Events Happen in the App
- Determine What Data Lives in the Store
This app will provide basic functionality like timeline, tweets, reply’s, likes, etc. We’ll use what we’ve learned so far to accomplish this including:
- Redux
- React
- React-Redux bindings
- Middleware (API call & thunks)
You can read more in my notes: Udacity React & Redux - 7. Real World Redux
Links:
- Live Demo - Chirper - Redux Twitter-like App
- Repo - Chirper - Redux Twitter-like App on GitHub
- Course notes - Udacity React & Redux
- Link to Udacity React Nanodegree Program
17. Redux Architecure
Day 17: March 17, 2019 - Sunday
Project: Udacity React Nanodegree Program
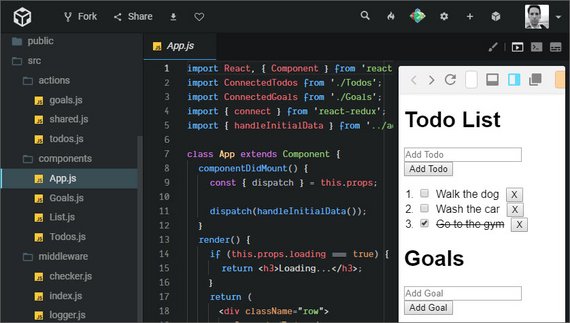
Live Demo: React Redux Todo Goals App on CodeSandbox
Progress: Continued Udacity Redux lesson for my React Nanodegree Program.
I spent the day reading through a handful of key articles that detailed how to best organize and manage code related to large-scale Redux applications.
This was very eye opening. It included the following topics.
- Normalizing data before use
- Storing data with an index and accessing it with selectors
- Keeping canonical data (data from the DB or API) separate from UI state data
- Splitting the store into sub-stores & using slice reducers
- Other best practices for connecting React components to Redux state
You can read more in my notes: Udacity React & Redux - 6.7 Redux Architecture
Links:
- Redux Docs - Organizing State
- Redux Docs - Normalizing State Shape
- Medium - Redux for state management in large web apps - Sub-stores, slice reducers, data structures with Immutable-js library, and selector functions
- Medium - Five Tips for Working with Redux in Large Applications - Data indexes, separate canonical and UI state, and selectors functions.
- egghead.io - Getting Started with Redux - Comprehensive video tutorial series on Redux by Dan Abramov.
- egghead.io - Building React Applications with Idiomatic Redux - Part 2 of Dan Abramov’s EXCELLENT video tutorial series.
- Course notes - Udacity React & Redux
- Link to Udacity React Nanodegree Program
16. Redux Folder Structure
Day 16: March 16, 2019 - Saturday
Project: Udacity React Nanodegree Program
Live Demo: React Redux Todo Goals App on CodeSandbox
Progress: Continued Udacity Redux lesson for my React Nanodegree Program.
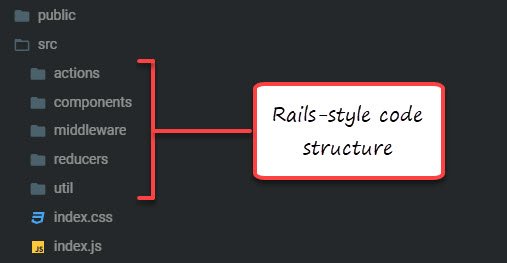
This lesson was showed how to organize and structure a React Redux app using the Rails-style pattern folder structure.
This splits files according to function with these folders.
- actions
- constants
- reducers
- containers
- components
The exercise involved splitting all existing code for my Todo & Goals app according to this structure.
You can read more in my notes: Udacity React & Redux - 6.5 Folder Structure
Links:
- Live Demo - React Redux Todo Goals App on CodeSandbox
- Repo - React Redux Todos & Goals App on GitHub
- Course notes - Udacity React & Redux
- Link to Udacity React Nanodegree Program
15. React Redux Bindings
Day 15: March 15, 2019 - Friday
Project: Udacity React Nanodegree Program
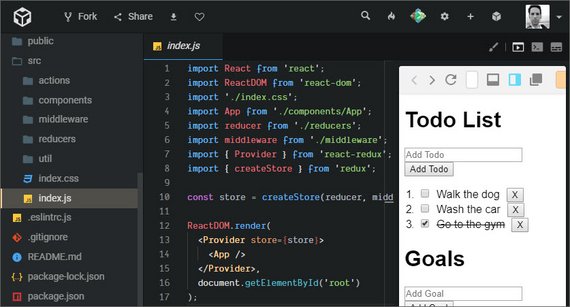
Live Demo: React Redux Todo Goals App on CodeSandbox
Progress: Continued Udacity Redux lesson for my React Nanodegree Program.
This lesson was about implementing the react-redux library to provide an efficient way to pass a Redux store to our React components.
This included
- Importing the
react-reduxlibrary - Wrapping
Appwith Provider and passing in the store - Using
connect()to map state & dispatch to props and then passing in the component we want to connect the redux store to.
You can read more in my notes: Udacity React & Redux - 6.5 react-redux Bindings
Links:
- Live Demo - React Redux Todo Goals App on CodeSandbox
- Repo - React Redux Todos & Goals App on GitHub
- Course notes - Udacity React & Redux
- Link to Udacity React Nanodegree Program
14. Connected Components
Day 14: March 14, 2019 - Thursday
Project: Udacity React Nanodegree Program
Live Demo: Context API Todo Goals App on CodeSandbox
Progress: Continued Udacity Redux lesson for my React Nanodegree Program.
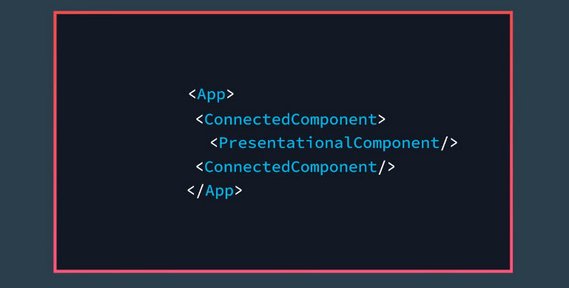
This lesson had us write code to replicate the functionality from react-redux.
This included
- Creating a Connected component to wrap a Provider
- Writing a connect method
- Ensuring connect is capable of being passed a function and currying a component for composition
You can read more in my notes: Udacity React & Redux - 6.3 Add Context to Todos
Links:
- Live Demo - Context API Todo Goals App on CodeSandbox
- Repo - Redux Todos & Goals App on GitHub
- Course notes - Udacity React & Redux
- Link to Udacity React Nanodegree Program
13. React Context API
Day 13: March 13, 2019 - Wednesday
Project: Udacity React Nanodegree Program
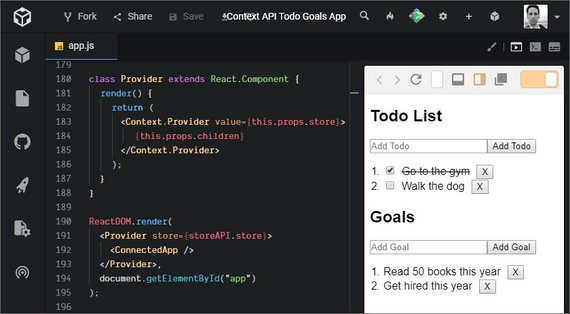
Live Demo: Context API Todo Goals App on CodeSandbox
Progress: Continued Udacity Redux lesson for my React Nanodegree Program.
This lesson covered the use of React’s Context API which gives deeply nested components access to props without having to pass them all the way down the hierarchy.
It uses:
- Declarative syntax
<Context.Provider>to accept data which is to be passed to a consumer component<Context.Consumer>which accepts a child function that provides access to the data and returns JSX.
// Provider
class App extends React.Component {
  render() {
  const name = 'Tyler';

  return (
    <Context.Provider value={name}>
      <Parent />
    </Context.Provider>
    );
  }
}

// Consumer
function Grandchild ({ name }) {
  return (
    <Context.Consumer>
      {(name) => (
        <div>
          <h1>Grandchild</h1>
          <h3>Name: {name}</h3>
        </div>
      )}
    </Context.Consumer>
  );
}
You can read more in my notes: Udacity React & Redux - 6.2 React’s Context API
Links:
- Live Demo - Context API Todo Goals App on CodeSandbox
- Repo - Redux Todos & Goals App on GitHub
- Course notes - Udacity React & Redux
- Link to Udacity React Nanodegree Program
12. Redux Thunk
Day 12: March 11, 2019 - Monday
Project: Udacity React Nanodegree Program
Live Demo: Async Redux Todo Goals App on CodeSandbox
Progress: Continued Udacity Redux lesson for my React Nanodegree Program.
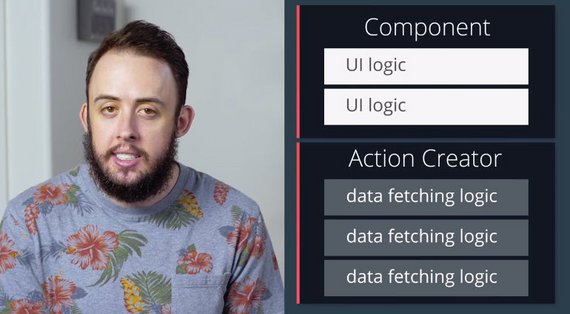
This lesson covered the use of redux-thunk middleware which allows us to run business logic and/or asynchronous code from our action creators.
This provides the following benefits:
- Cleaner separation between UI logic & data fetching logic.
- Ability to run async code, dispatch other actions, or update the action object prior to submitting the action to the reducer.
Redux middleware sits between the dispatch of an action and the running of the reducer. redux-thunk inspects what is returned from the action creator and passes it to reducer if it is an object. If it’s a function then it invokes the function before finally passing the final object to the reducer.
You can read more in my notes: Udacity React & Redux - 5.4 Thunk
Links:
- Live Demo - Async Redux Todo Goals App on CodeSandbox
- Repo - Redux Todos & Goals App on GitHub
- Course notes - Udacity React & Redux
- Link to Udacity React Nanodegree Program
11. Redux Optimistic Updates
Day 11: March 10, 2019 - Sunday
Project: Udacity React Nanodegree Program
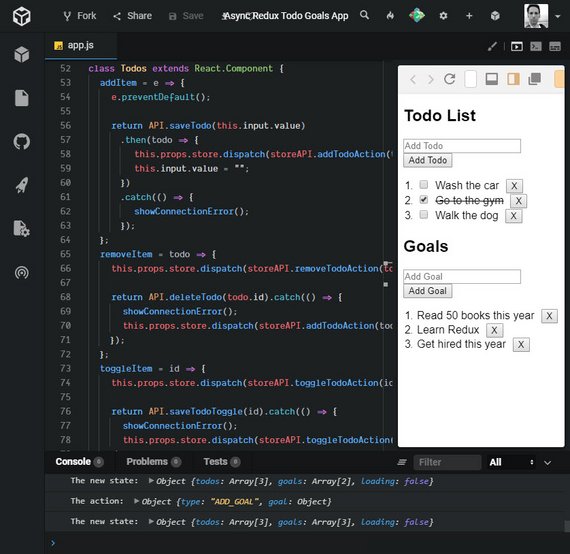
Live Demo: Async Redux Todo Goals App on CodeSandbox
Progress: Continued Udacity Redux lesson for my React Nanodegree Program.
This lesson covered using both optimistic and pessimistic updates to the database.
- An optimistic update modifies the Redux store prior to getting a successful confirmation back from the database.
- Pessimistic updates will only update the Redux store upon the return of a successful async request.
The reason to use optimistic updates is to provide a better UX. This updates the UI immediately when a user initiates an action rather than waiting until a response is returned.
You can read more in my notes: Udacity React & Redux - 5.3 Optimistic Updates
Links:
- Live Demo - Async Redux Todo Goals App on CodeSandbox
- Repo - Redux Todos & Goals App on GitHub
- Course notes - Udacity React & Redux
- Link to Udacity React Nanodegree Program
10. Asynchronous Redux
Day 10: March 9, 2019 - Saturday
Project: Udacity React Nanodegree Program
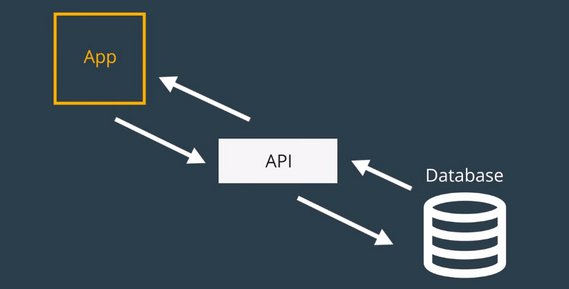
Live Demo: Async Redux Todo Goals App on CodeSandbox
Progress: Continued Udacity Redux lesson for my React Nanodegree Program.
This lesson introduced async operation handling in Redux. This covered:
- Fetching the request in
componentDidMount() - Creating a new receiveDataAction method
- Dispatching then method when data is received
You can read more in my notes: Udacity React & Redux - 5.1 Asynchronous Redux
Links:
- Live Demo - Async Redux Todo Goals App on CodeSandbox
- Repo - Redux Todos & Goals App on GitHub
- Course notes - Udacity React & Redux
- Link to Udacity React Nanodegree Program
9. React with Redux
Day 9: March 8, 2019 - Friday
Project: Udacity React Nanodegree Program
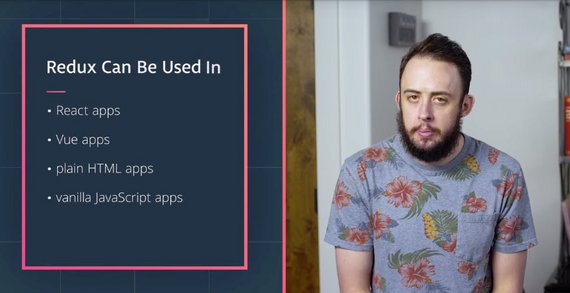
Live Demo: React Redux Todo Goals App on CodeSandbox
Progress: Continued Udacity Redux lesson for my React Nanodegree Program.
This lesson introduced using React with Redux. The goals were:
- Convert DOM-based UI to React UI
- Pass the Redux store as a prop to React components
- Dispatch actions from field methods based on user interaction
You can read more in my notes: Udacity React & Redux - 4.1 React with Redux
Links:
- Live Demo - React Redux Todo Goals App on CodeSandbox
- Repo - Redux Todos & Goals App on GitHub
- Course notes - Udacity React & Redux
- Link to Udacity React Nanodegree Program
8. Redux Middleware
Day 8: March 6, 2019 - Wednesday
Project: Udacity React Nanodegree Program
Live Demo: Redux Todo Goals App on CodeSandbox
Progress: Continued Udacity Redux lesson for my React Nanodegree Program.
This lesson focused Redux Middleware. Middleware intercepts a dispatched action before it reaches the reducer.
You can do things like:
- Extend Redux with custom functionality
- Validate, filter, or manipulate the data prior to it being reduced into state
- Middleware can be daisy-chained to run multiple extensions on the actions.
You can read more in my notes: Udacity React & Redux - 3.1 Redux Middleware
Links:
- Live Demo - Redux Todo Goals App on CodeSandbox
- Repo - Redux Todos & Goals App on GitHub
- Course notes - Udacity React & Redux
- Link to Udacity React Nanodegree Program
7. React Redux Tutorial Pt 4
Day 7: March 5, 2019 - Tuesday
Project: Udacity React Nanodegree Program

Live Demo: React Redux Thunk on CodeSandbox
Progress: Continued Udacity Redux lesson for my React Nanodegree Program.
Today I went through the last part of a tutorial called
This focused on introducing redux-thunk middleware which allows asynchronous operations to work with Redux. Some of the specifics around redux-thunk are:
- Normally action creators are limited to returning an object.
- Redux Thunk is middleware that allows action creators to return a function.
- Promise-based asynchronous operations can be conducted in the action creator.
- Actions can be dispatched from the action creator as well.
Here’s a sample of async code used in the action creator.
Links:
- Live Demo - React Redux Thunk on CodeSandbox
- GitHub Repo - react-redux-middleware
- Tutorial - React Redux Tutorial for Beginners: The Definitive Guide (2019)
- Course notes - Udacity React & Redux
- Link to Udacity React Nanodegree Program
6. React Redux Tutorial Pt 3
Day 6: March 4, 2019 - Monday
Project: Udacity React Nanodegree Program
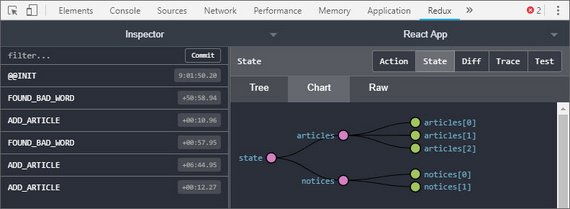
Live Demo: React Redux Middleware on CodeSandbox
Progress: Continued Udacity Redux lesson for my React Nanodegree Program.
Today I went through the third part of a tutorial called
This focused on introducing Redux middleware in order to provide logic to our dispatched actions. It provides the following benefits.
- the logic can live outside React (or any other library/framework)
- middlewares become reusable pieces of logic, easily to reason about
- middlewares can be tested in isolation
- we keep the components clean
In this example I intercept an ADD_ARTICLE action after dispatch and check for the presence of unwanted words.
If a forbidden word (such as ‘money’) was found then the FOUND_BAD_WORD action was dispatched instead. It was then handled by our reducer.
Testing out the logic filters out entries with unwanted words.
Our state is displayed using Redux DevTools.
Links:
- Live Demo - React Redux Middleware on CodeSandbox
- GitHub Repo - react-redux-middleware
- Tutorial - React Redux Tutorial for Beginners: The Definitive Guide (2019)
- Course notes - Udacity React & Redux
- Link to Udacity React Nanodegree Program
5. React Redux Tutorial Pt 2
Day 5: March 3, 2019 - Sunday
Project: Udacity React Nanodegree Program
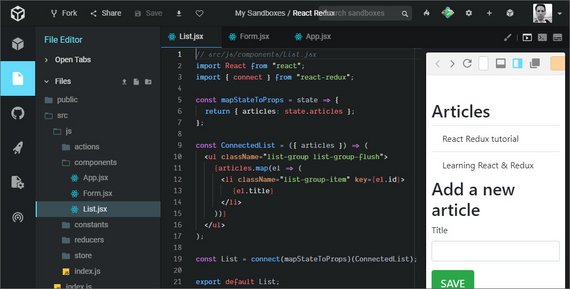
Live Demo: React Redux on CodeSandbox
Progress: Continued Udacity Redux lesson for my React Nanodegree Program.
Today I went through the second part of a tutorial called
This focused on combining Redux & React with the react-redux package and doing the following:
- Wrapping the app with a
<Provider>HOC (Higher Order Component) - Calling
connect()on any components we want to connect to Redux - Using
mapStateToPropsandmapDispatchToPropsto allow us to access state and dispatch from a React component’s props.
This was put into practice by creating an App, List, and Form component.
- App - parent component containing List and Form. App is wrapped with
<Provider>to allow React to access Redux store. - List - used
mapStateToPropsto display titles from Redux store (state). - Form - used
mapDispatchToPropsto dispatch ADD_ARTICLE action and update the store.
Links:
- Live Demo - Redux Redux on CodeSandbox
- Tutorial - React Redux Tutorial for Beginners: The Definitive Guide (2019)
- Course notes - Udacity React & Redux
- Link to Udacity React Nanodegree Program
4. React Redux Tutorial Pt 1
Day 4: March 2, 2019 - Saturday
Project: Udacity React Nanodegree Program
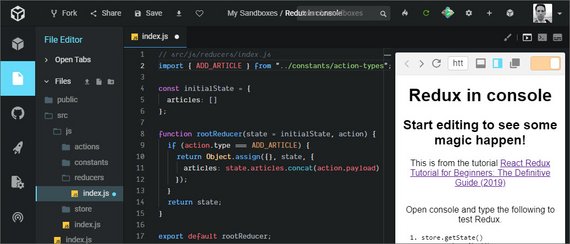
Live Demo: Redux in console on CodeSandbox
Progress: Continued Udacity Redux lesson for my React Nanodegree Program.
Today I went through the first part of a tutorial called
This first half focused on the basic elements of Redux and using it in console.
- The store
- Getting state
- Subscribing to state changes
- Dispatching actions
The next part will deal with connecting Redux and React together.
Links:
- Live Demo - Redux in console on CodeSandbox
- Tutorial - React Redux Tutorial for Beginners: The Definitive Guide (2019)
- Course notes - Udacity React & Redux
- Link to Udacity React Nanodegree Program
3. Create Log Template Repo
Day 3: March 1, 2019 - Friday
Project: 100 Days of Code Log Template
Progress: Created a new GitHub repo for my 100 Days of Code Log Template project.
I quickly realized that I needed to create a separate master template repo from the one I had my current log in.
Separating the template from the log allows me to update my log without in affecting the template and update the template with affecting the log. This way anyone following changes on the template won’t be notified on every log commit I make.
Additionally, any changes to the template or template instructions can the be pulled down without overwriting my log entires.
Links:
- GitHub repo - https://github.com/james-priest/100-days-log-template
- Demo Site - Sample Template Site
2. Redux, JS, & HTML UI
Day 2: February 28, 2019 - Thursday
Project: Udacity React Nanodegree Program
Live Demo: Redux Todo Goals App on CodeSandbox
Progress: Continued Udacity Redux lesson for my React Nanodegree Program.
This lesson focused implementing Redux with vanilla JavaScript and a simple HTML UI.
The kept the focus limited to:
- The store
- Getting state
- Subscribing to state changes
- Dispatching actions
You can read more in my notes: Udacity React & Redux - 2.4 Introducing Redux
Links:
- Live Demo - Redux Todo Goals App on CodeSandbox
- Repo - Redux Todos & Goals App on GitHub
- Course notes - Udacity React & Redux
- Link to Udacity React Nanodegree Program
1. Round 5 Code Log & Repo
Day 1: February 26, 2019 - Tuesday
Project: Udacity React Nanodegree Program
Progress: Created a new GitHub repo for my Round 5 code log.
This repo is redesigned so that it can be forked and cloned for others to use. I’m still in the process of writing out the README to cover the following areas
- installation instructions
- usage instructions
- customization
- image optimization
- set-up & testing
Links: My GitHub repo https://github.com/james-priest/100-days-log
